
Roster templates
4 min read
Roster templates
Use roster templates to speed up recurring scheduling and keep common shift patterns consistent.
Templates are useful for:
- Fixing staff to regular patterns.
- Setting shift times without assigning staff until later.
- Mixing pre-assigned and unassigned shifts in the same template.
If you need help creating day-by-day shifts first, see Creating Rosters.
Before you start
- Sign in to Wageloch.
- Open the Roster home screen.
- Confirm your team structure is up to date if you use department filtering. See Departments.
Create a template
- From the Roster home screen, open the roster menu in the top-right.
- Select Templates.
- Select Create New and choose one option:
- Blank Roster: for an empty template.
- Template from Previous: to copy an existing roster.
- Template from Template: to copy an existing template.
- Enter a template name.
- Select Done.
Faster setup
Use Copy From (bottom-right) to copy shifts across days, from another roster, or from another template.

Build template content
Choose one of the following approaches.
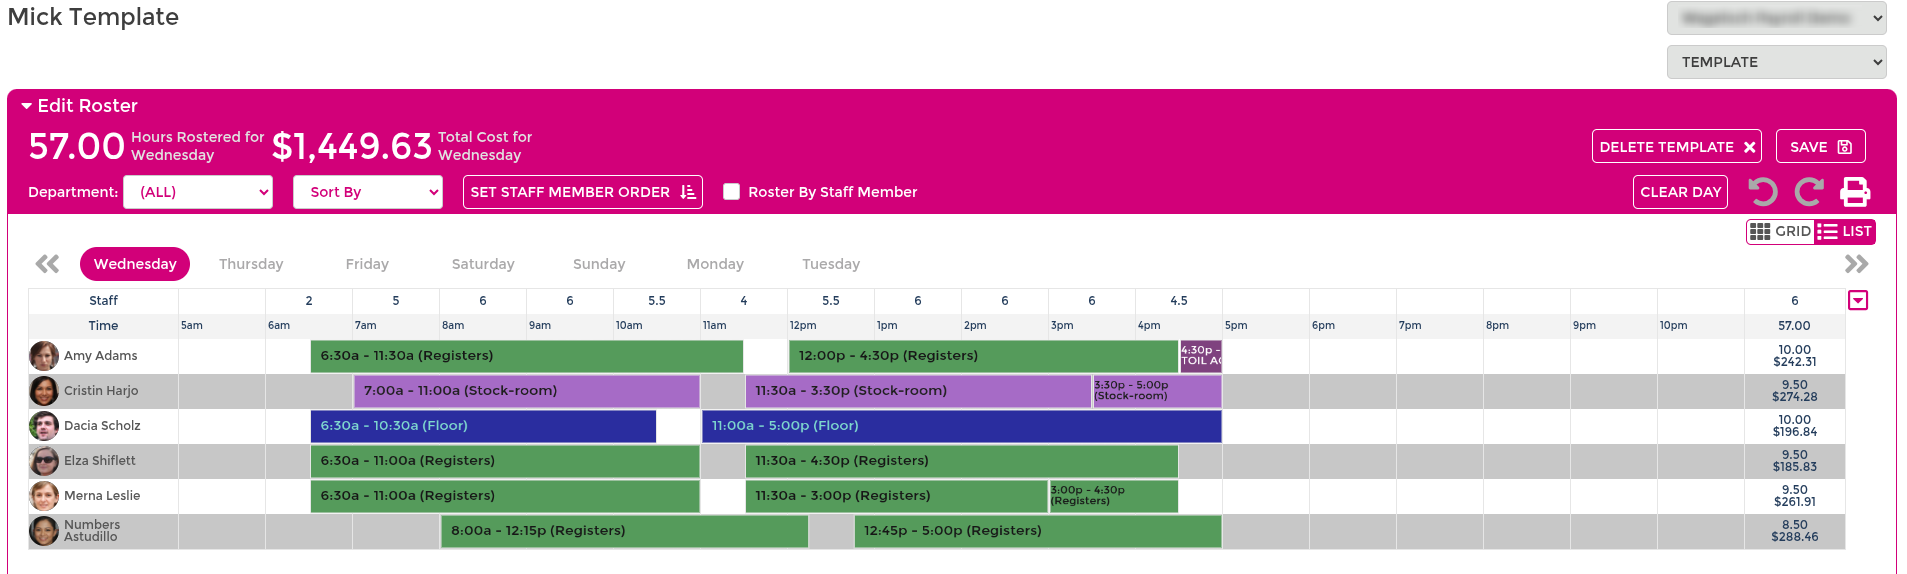
Option 1: Set staff and shifts
Use this when the same people usually work the same pattern.
- Select the day to edit.
- Select Add to create shift rows.
- Select (Select Staff) on each row.
- Tick staff who always work that shift.
- Add start and finish times, plus breaks where required.
- Select Save.
Option 2: Set shift times without staff
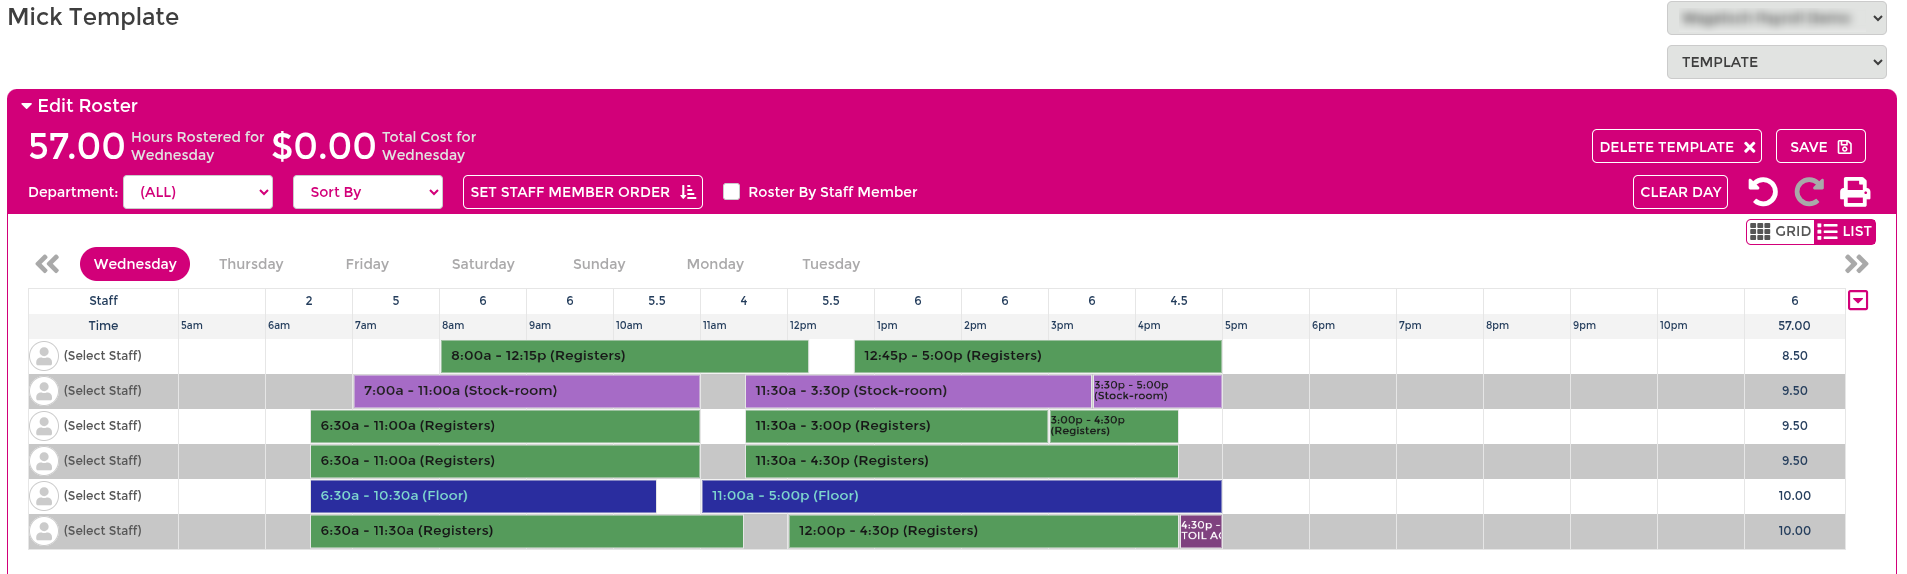
Use this when coverage times are fixed but staff allocation changes.
- Select the day to edit.
- Select Add multiple times to create required rows.
- Add shift start and finish times.
- Leave rows unassigned.
- Select Save.
When creating live rosters from this template, assign staff according to leave and availability.
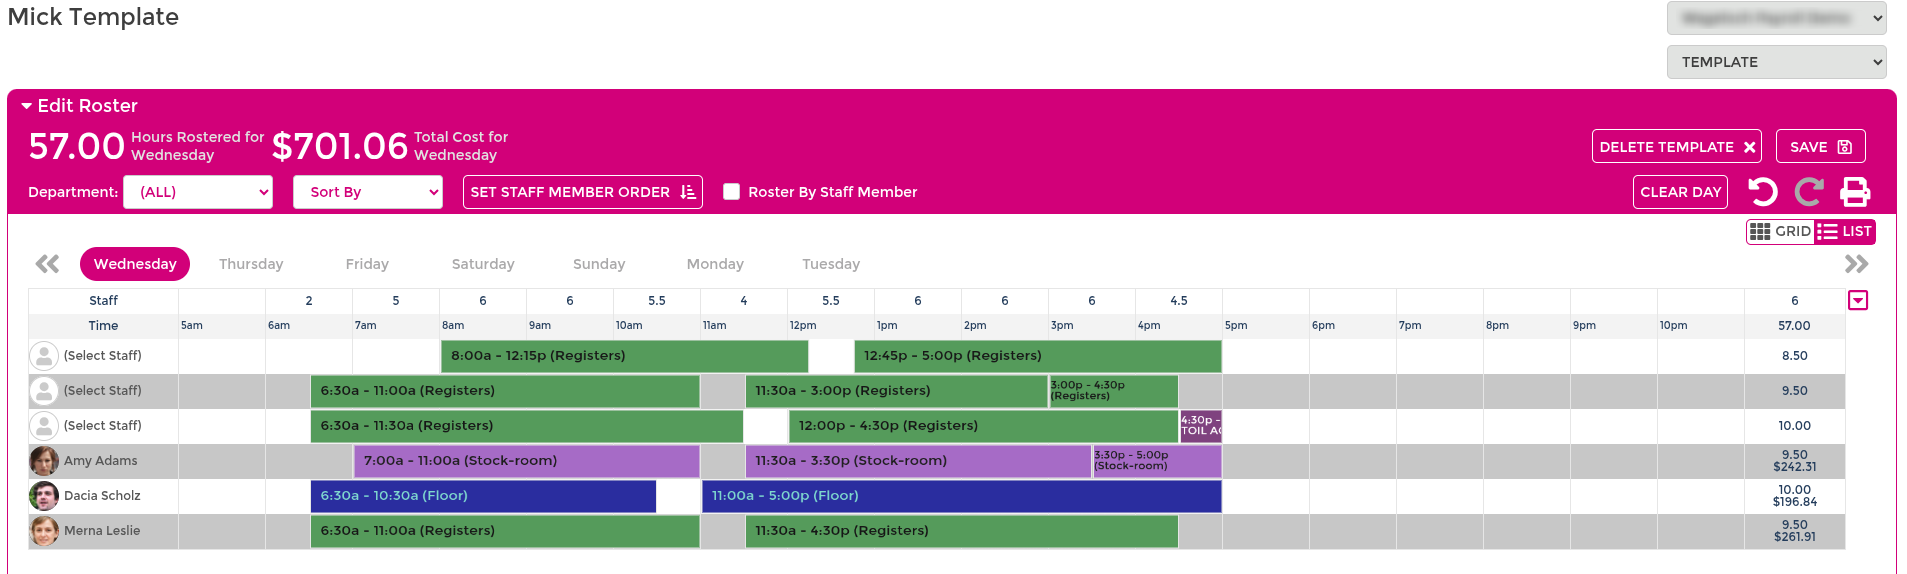
Option 3: Use a mixed template
Combine Option 1 and Option 2 in the same template when some shifts are fixed and others are flexible.
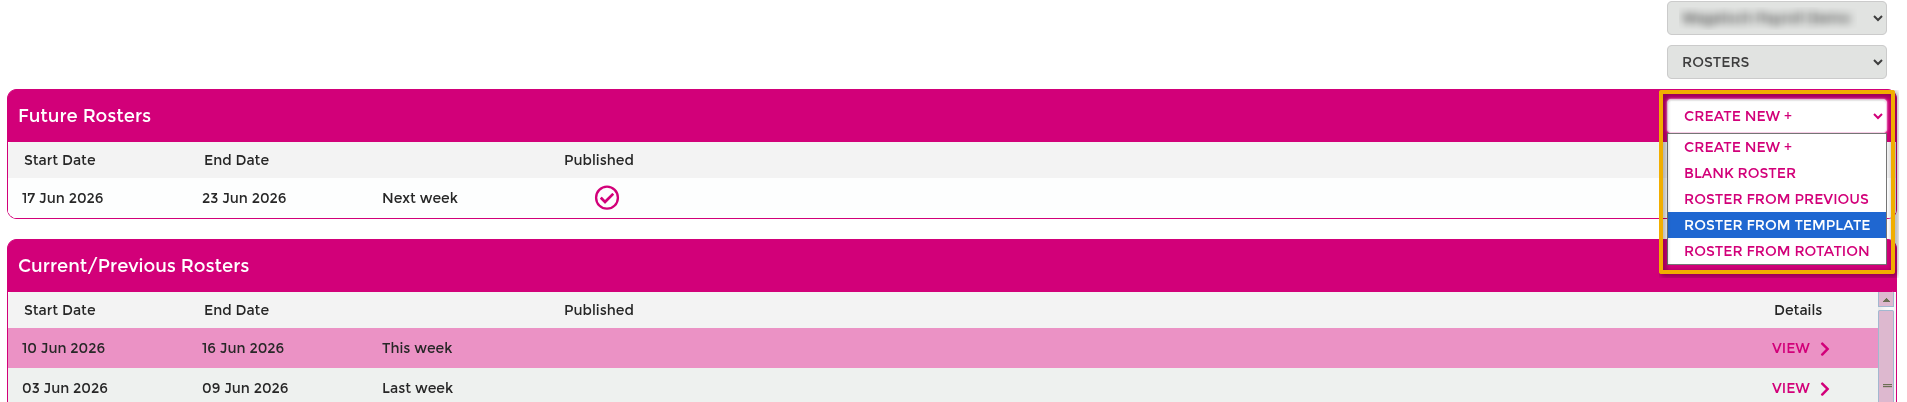
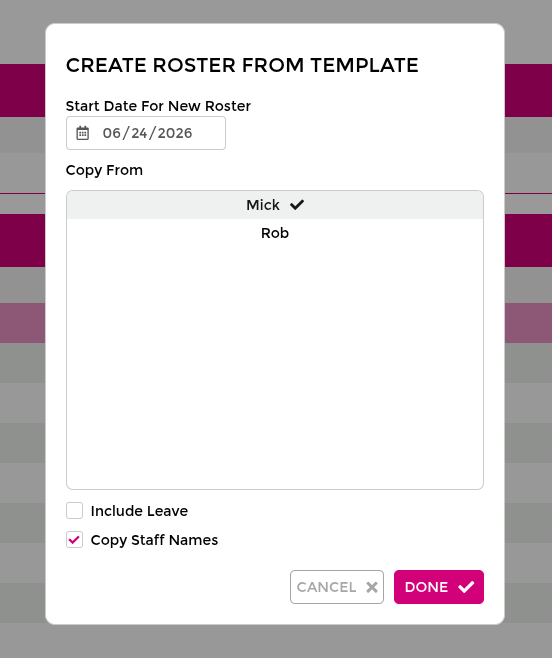
Create a roster from a template
- Open Roster.
- Select Create New+.
- Select From Template.
- Confirm the roster start date.
- Select the template to use.
- Keep Copy Staff Names enabled when you want assigned names copied across.
- Leave Copy Leave disabled unless your process specifically requires it.
- Select Done.
After creation:
- Assign any unassigned shifts.
- Save as you go.
- Publish when ready.
For large allocation passes, use Advanced Rostering.
Assign unassigned shifts
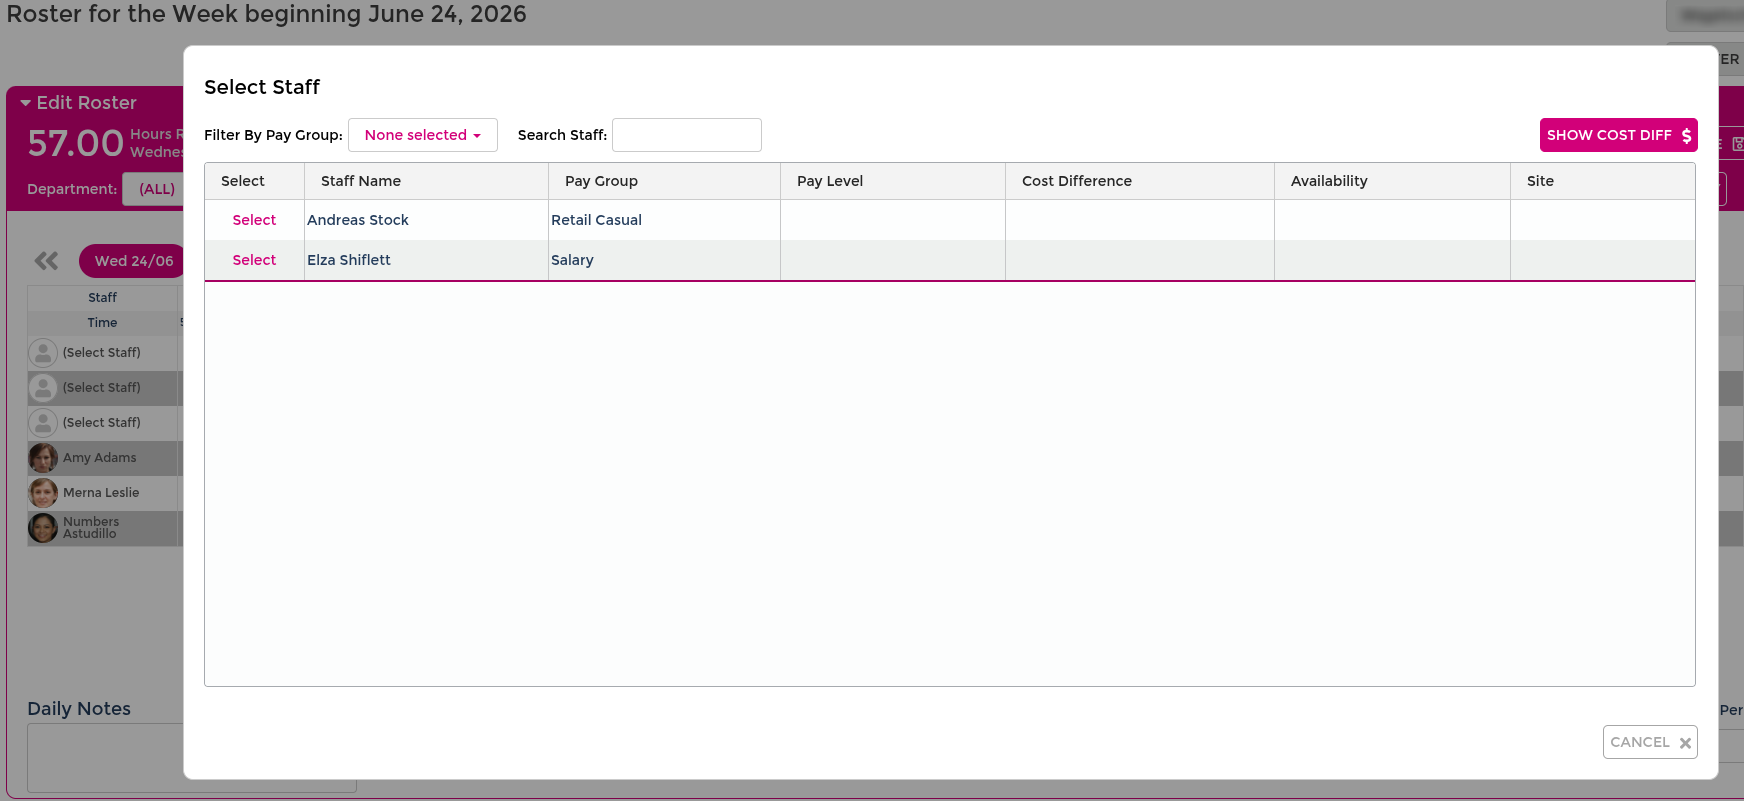
- Select (Select Staff) on an unassigned shift.
- Review available staff (including availability indicators where shown).
- Select the staff member.
- Repeat for remaining unassigned shifts.
- Select Save.
Edit existing templates
Templates are designed to evolve as staffing, opening hours, and coverage needs change.
Add new staff or shift rows
- Open Templates from the roster menu.
- Select the template to edit.
- Select the relevant day.
- Select Add.
- Add staff and/or shift times.
- Select Save.
Edit, unassign, reassign, or remove shifts
- Open the template and select the day.
- For time edits, drag shift edges to adjust start or finish times.
- To unassign, select the assigned name and choose unassign.
- To reassign, select the shift and choose another staff member.
- To remove only one shift, use Cut on that shift.
- To remove a full row, right-click empty row space and select Delete Row.
- Select Save.
For additional shift-level context and communication, see Advanced Rostering.
Delete a template
- Open Templates.
- Select the template.
- Select Delete Template.
- Confirm deletion.
Access and permissions
In restricted environments, template deletion may require elevated permissions. Review your access rules in User Permissions.