Managing availability
3 min read
Managing availability
Managing availability keeps roster planning realistic by showing when staff can generally work and when they cannot.
INFO
Availability is a rostering guidance tool. It supports scheduling decisions, but it does not strictly prevent someone from being rostered.
Before you start
- Open Wageloch and sign in with manager access.
- Select the Calendar icon in the top-right corner.
- Use Pending Requests for new submissions and Unavailability for approved entries.
INFO
Availability requests shown in Pending Requests are submitted by employees through the Staff Portal or Mobile App.
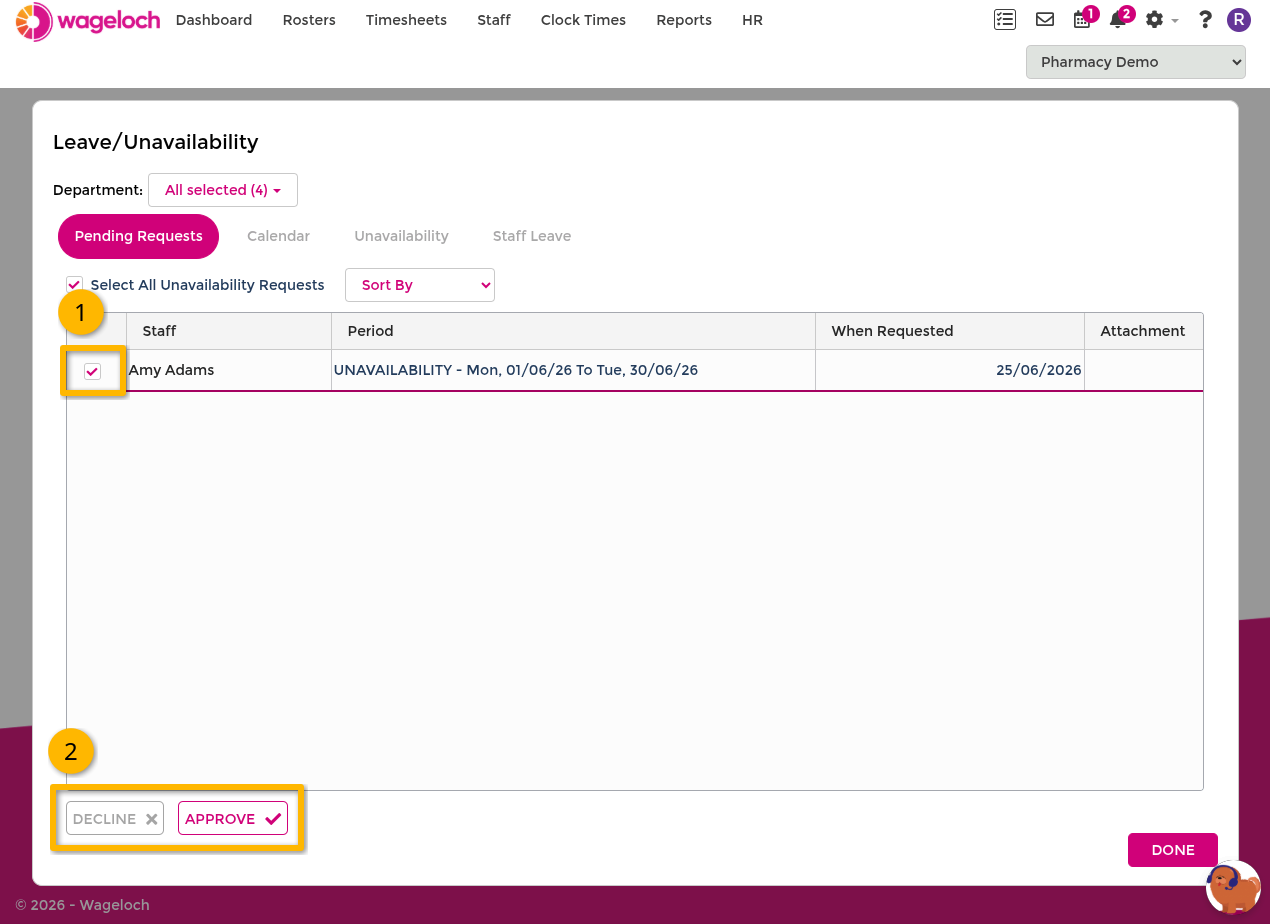
Approve or decline pending availability
- In Pending Requests, find the relevant availability request.
- Tick the checkbox next to the request.
- Select Approve or Decline.
- If declining, enter a reason so the staff member understands what to update.
- Select Done to save.
When approved, the entry moves to the availability/unavailability list and is used during roster planning.
Edit a pending availability request
- In Pending Requests, select the staff member name to open the request.
- Edit the date range, day settings, or time windows.
- Select Save to apply the changes.
Use this when a request is close to correct and only needs small adjustments.
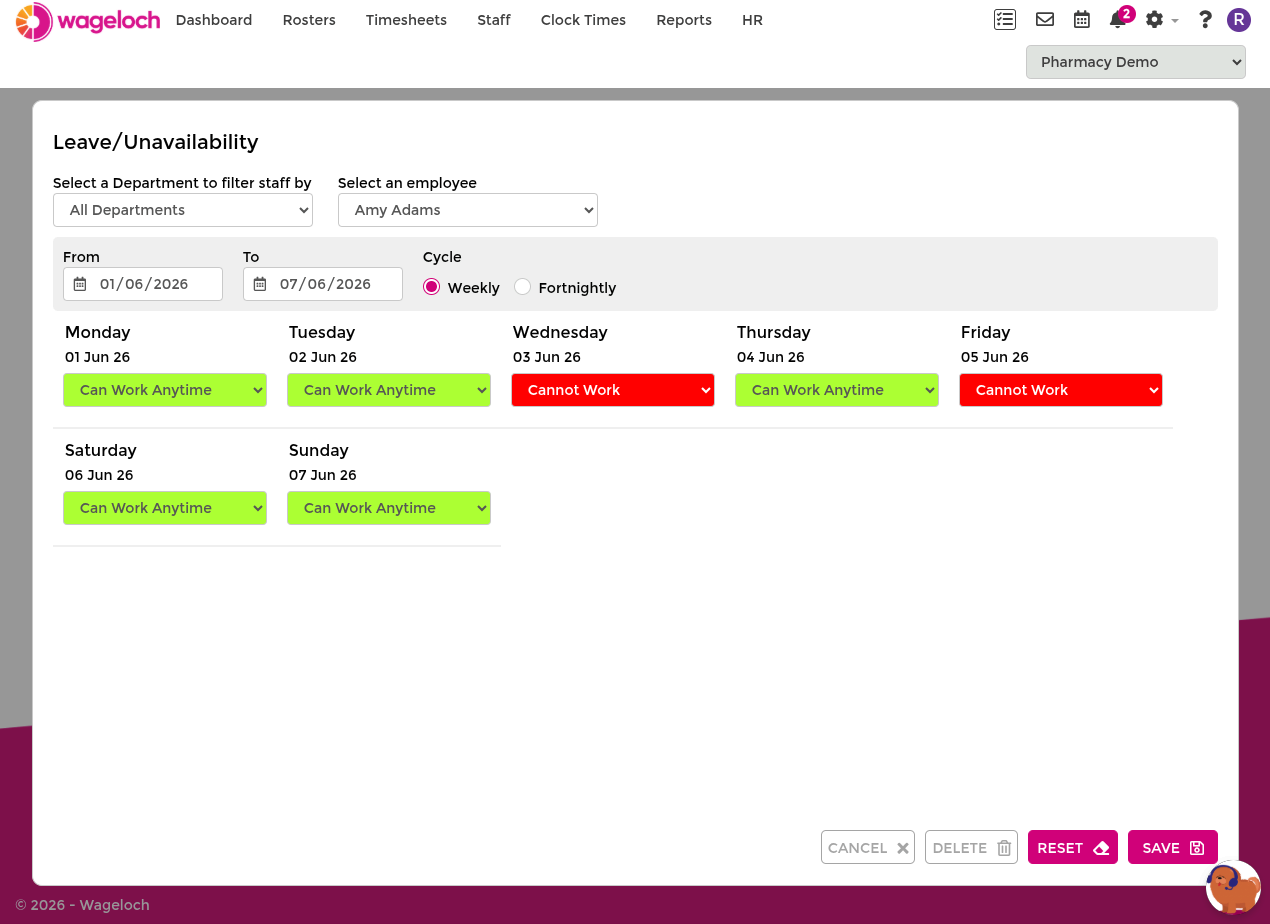
Create availability on behalf of staff
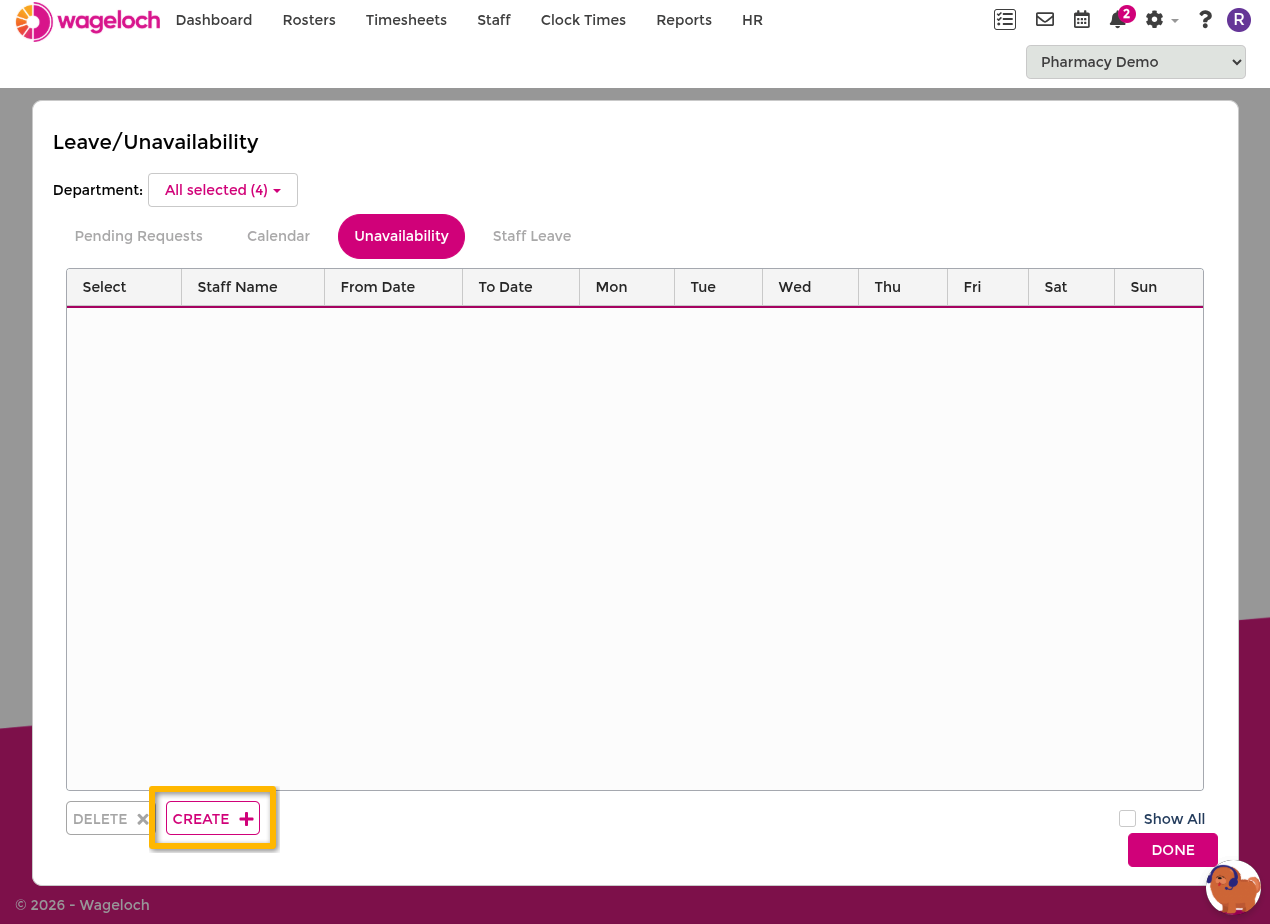
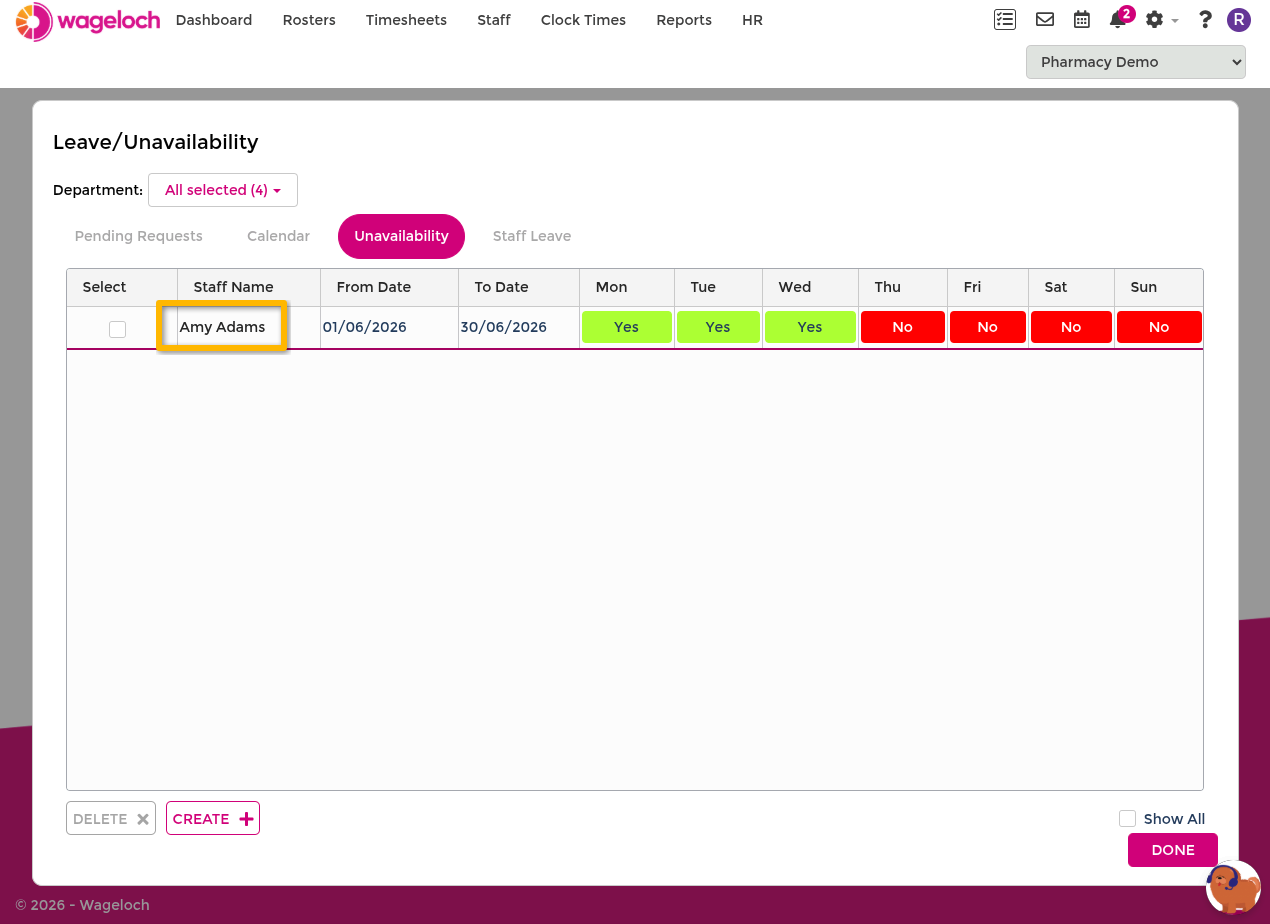
- Open the Unavailability tab.
- Select Create.
- Select the staff member.
- Set the date range.
- Choose the repeat pattern (for example weekly or fortnightly).
- Configure each day as available, unavailable, or time-limited.
- Select Save.
This is useful when onboarding new staff or when you need to enter agreed availability directly.
Edit approved availability
- Open Unavailability.
- Locate the staff member and the matching date range.
- Open the entry and update the required fields.
- Select Done to save changes.
Update approved entries whenever a regular pattern changes so upcoming rosters stay accurate.
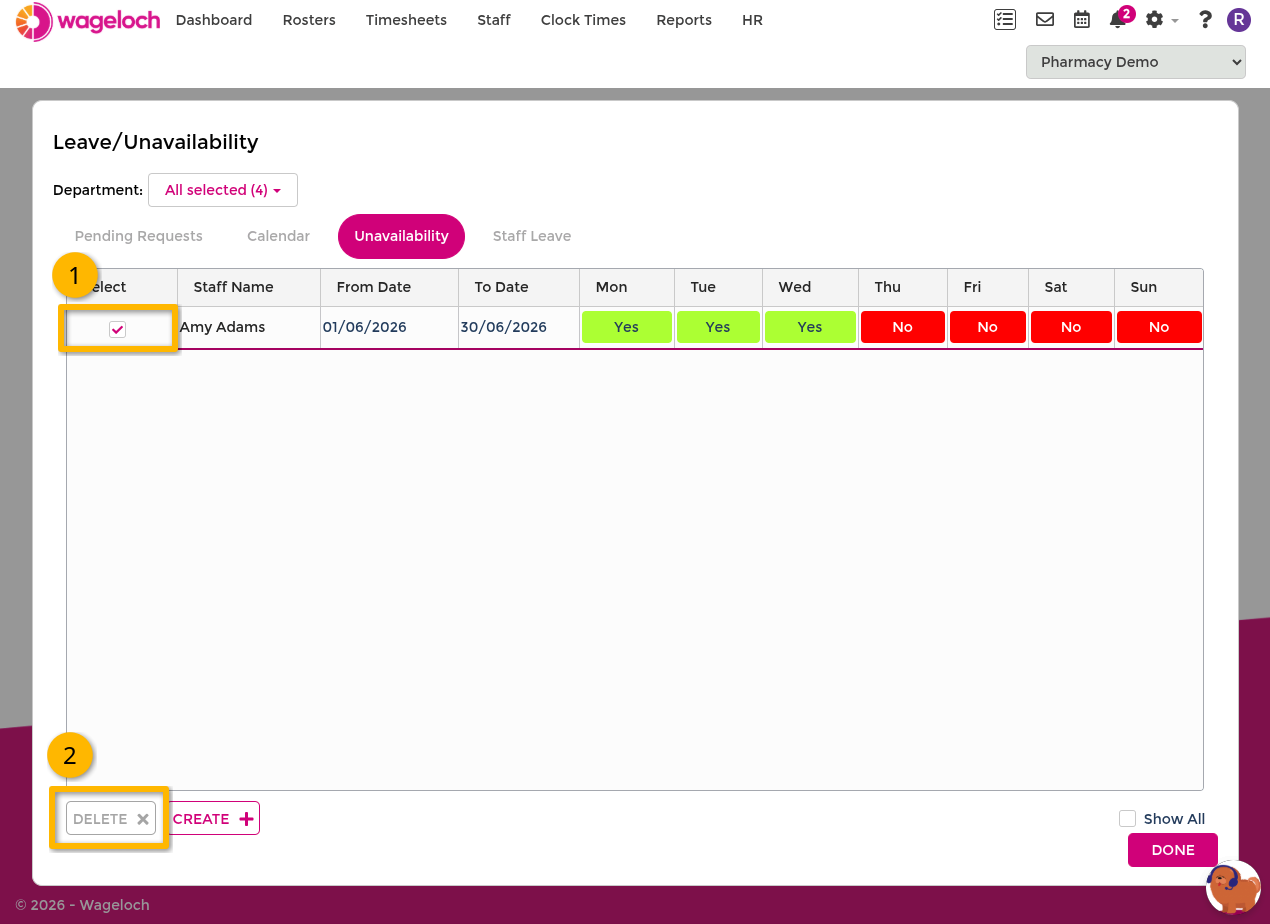
Delete approved availability
- Open Unavailability.
- Tick the checkbox next to the entry you want to remove.
- Select Delete.
- Select Done to confirm and save.
Delete an entry when it is no longer valid and should not influence future roster decisions.
INFO
Past availability entries are typically archived automatically after their date range has passed.