
Published and changed shifts
3 min read
Published and changed shifts
A roster shades each staff member's row to show whether their shifts are published, changed since publishing, or not yet published. Use the highlights to see what staff have already received and what you still need to republish.
Before you start
- The roster must have been published at least once. Published rosters show a tick in the Published column on the Rosters page.
- To change the colours or turn highlighting off, you need access to the Settings (gear) menu.
Read the roster highlights
-
Select Rosters in the top menu.
-
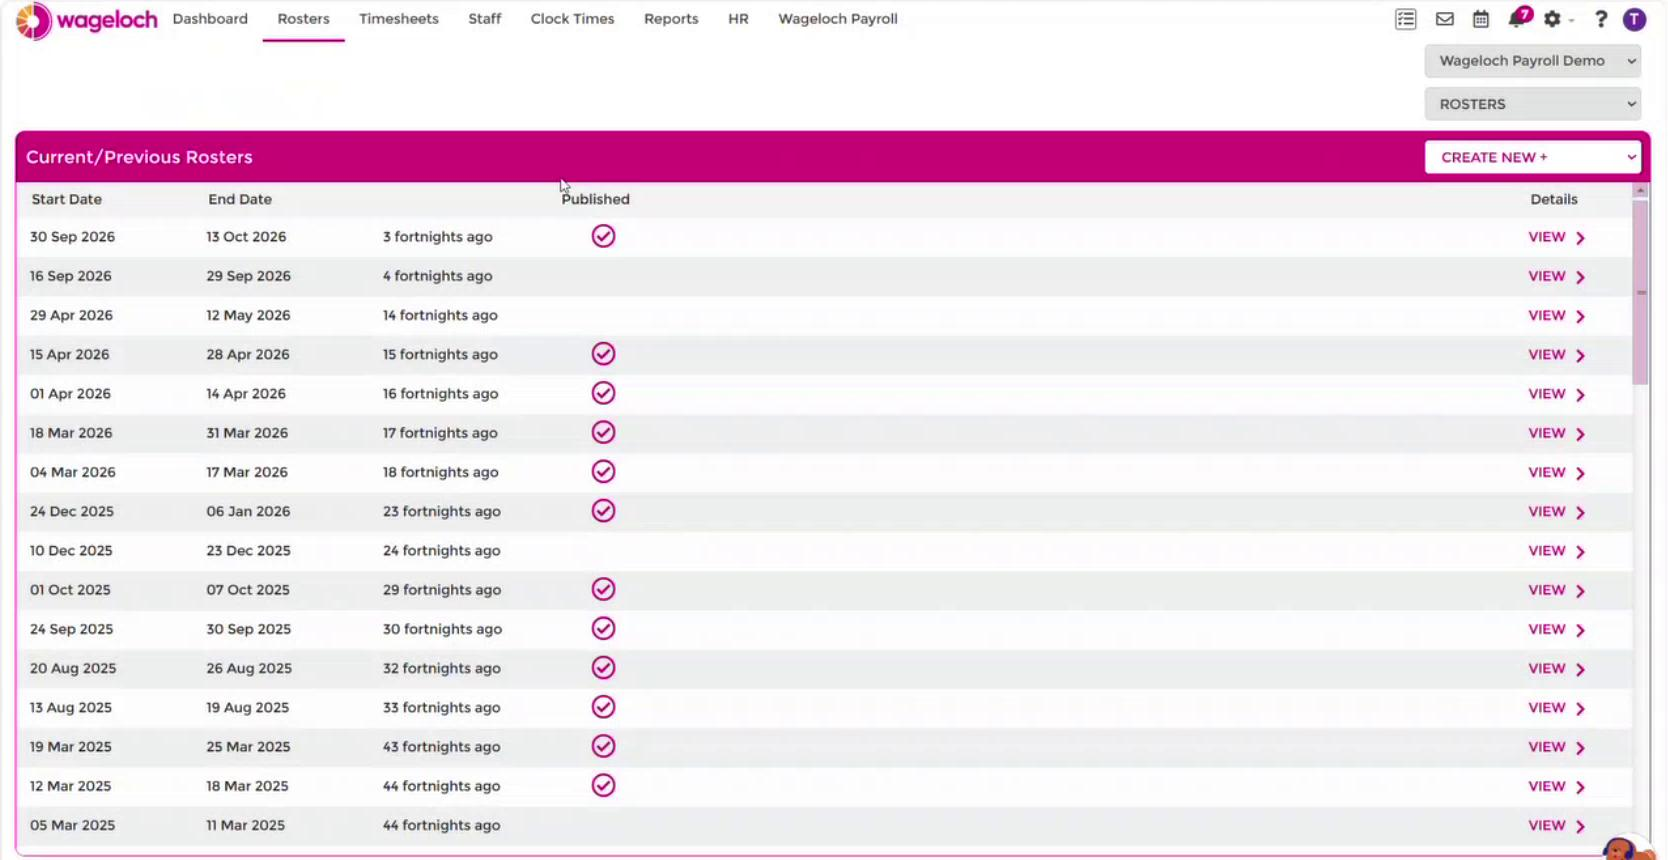
In Current/Previous Rosters, find a roster with a tick in the Published column.
-
Select View to open the roster.
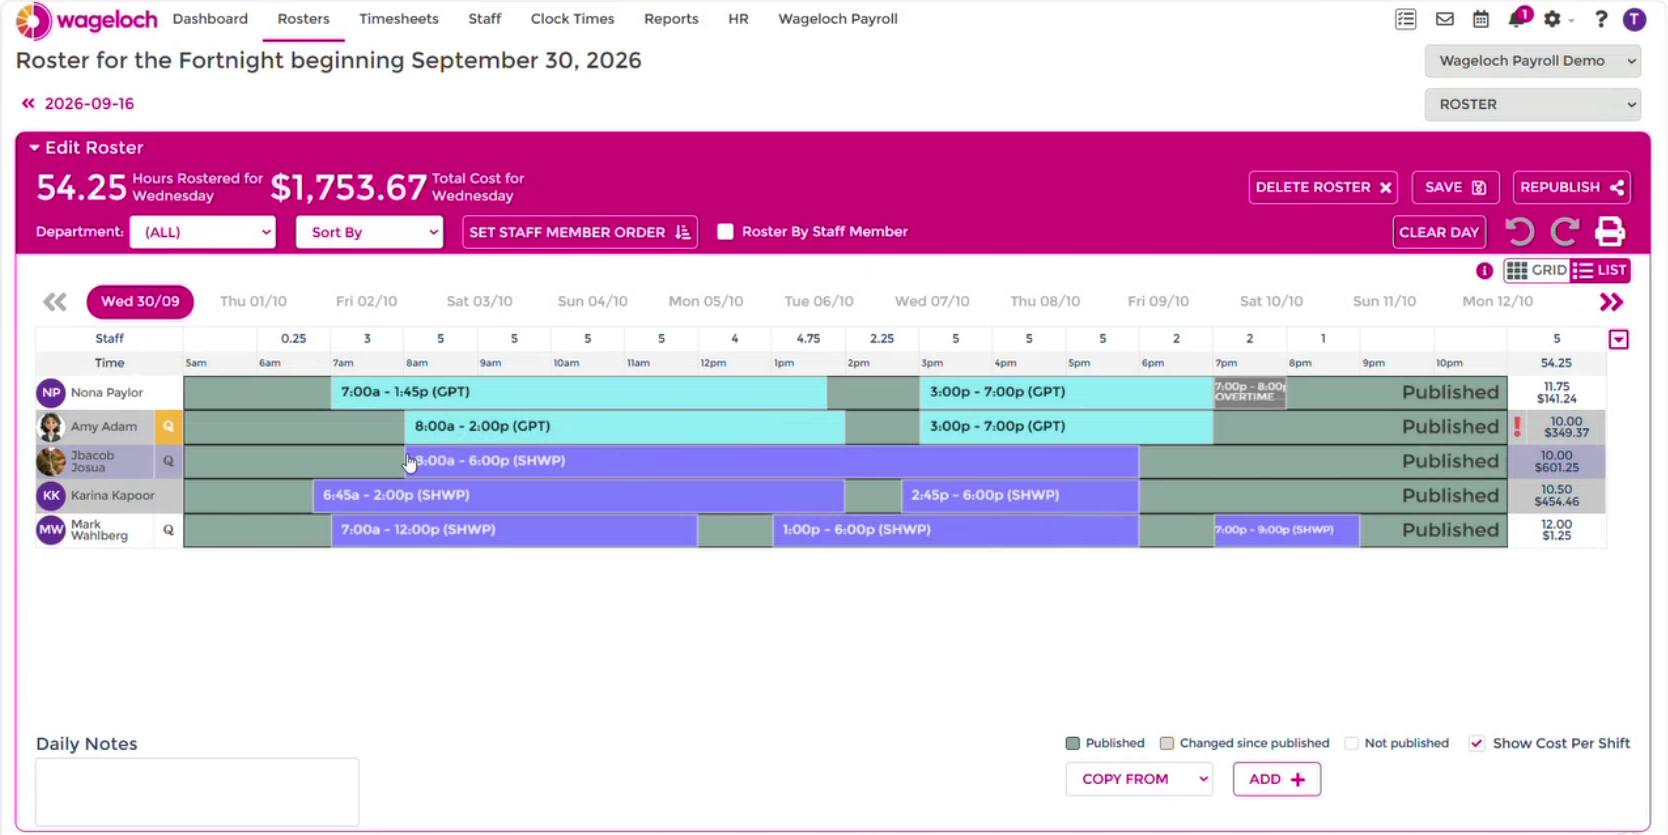
Each staff member's row is shaded, and the status is also written at the end of the row.
| Row | Default colour | Meaning |
|---|---|---|
| Published | Green | The shifts in the row match the roster when it was published. |
| Changed | Yellow | A shift in the row was added, moved or edited after the roster was published. |
| Not published | No background colour | A new shift was added but not yet published. You cannot change this. |

The colour legend is at the bottom right of the roster, next to Show Cost Per Shift. It lists Published, Changed since published and Not published.
After you change a published roster, select Re-Publish to send the changes. See Creating rosters.
Change the highlight colours
-
Select the Settings (gear) icon at the top right of the screen.
-
Select Colours.
-
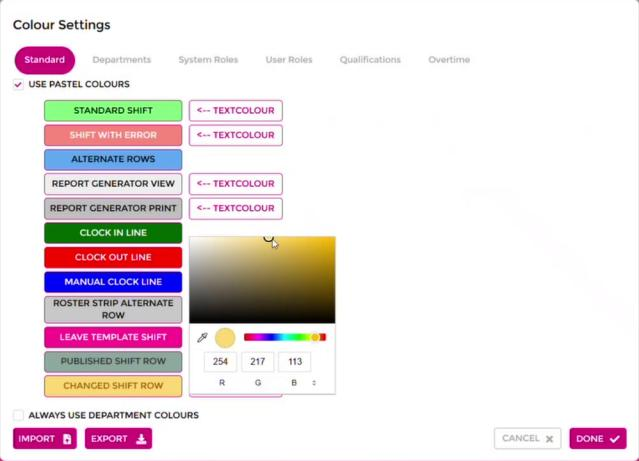
On the Standard tab, select Published Shift Row or Changed Shift Row.
-
Choose a colour in the colour picker, or enter the R, G and B values.
-
Optional: select the text colour button (TEXTCOLOUR) next to the option and choose a colour for the row text.
-
Select Done.
-
Select OK on the Information Updated message.
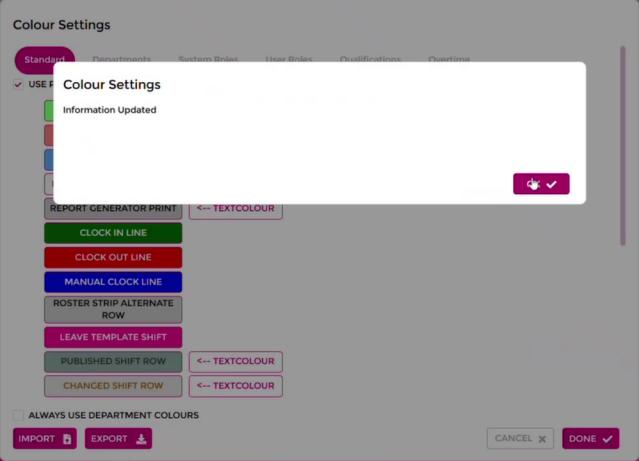
Go back to Rosters and open the roster. The new colours apply straight away. For the other roster and timesheet colours, see Colour settings.
Turn highlighting off
-
Select the Settings (gear) icon at the top right of the screen.
-
Select Roster.
-
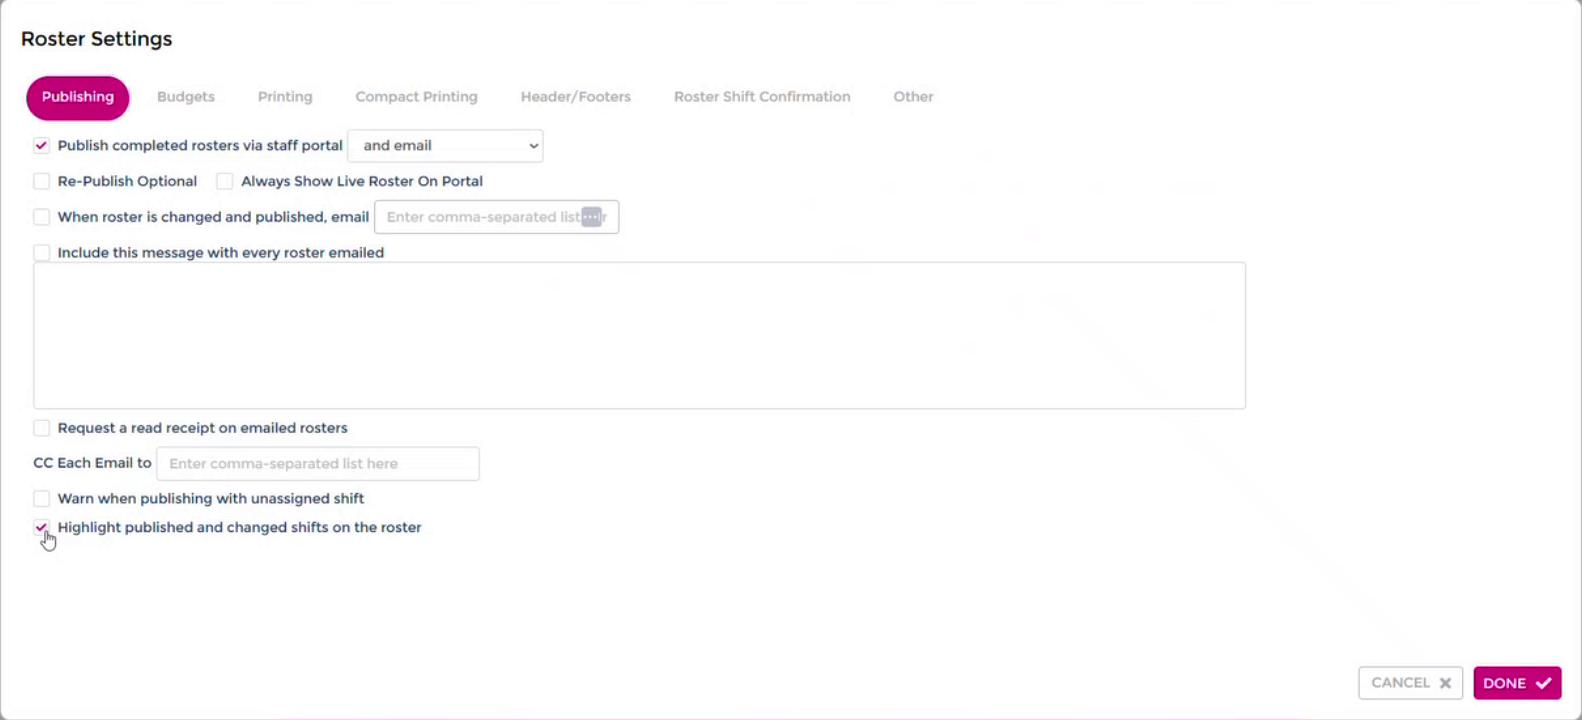
On the Publishing tab, untick Highlight published and changed shifts on the roster.
-
Select Done.
The roster no longer shows the published and changed highlights, and the colour legend is removed.
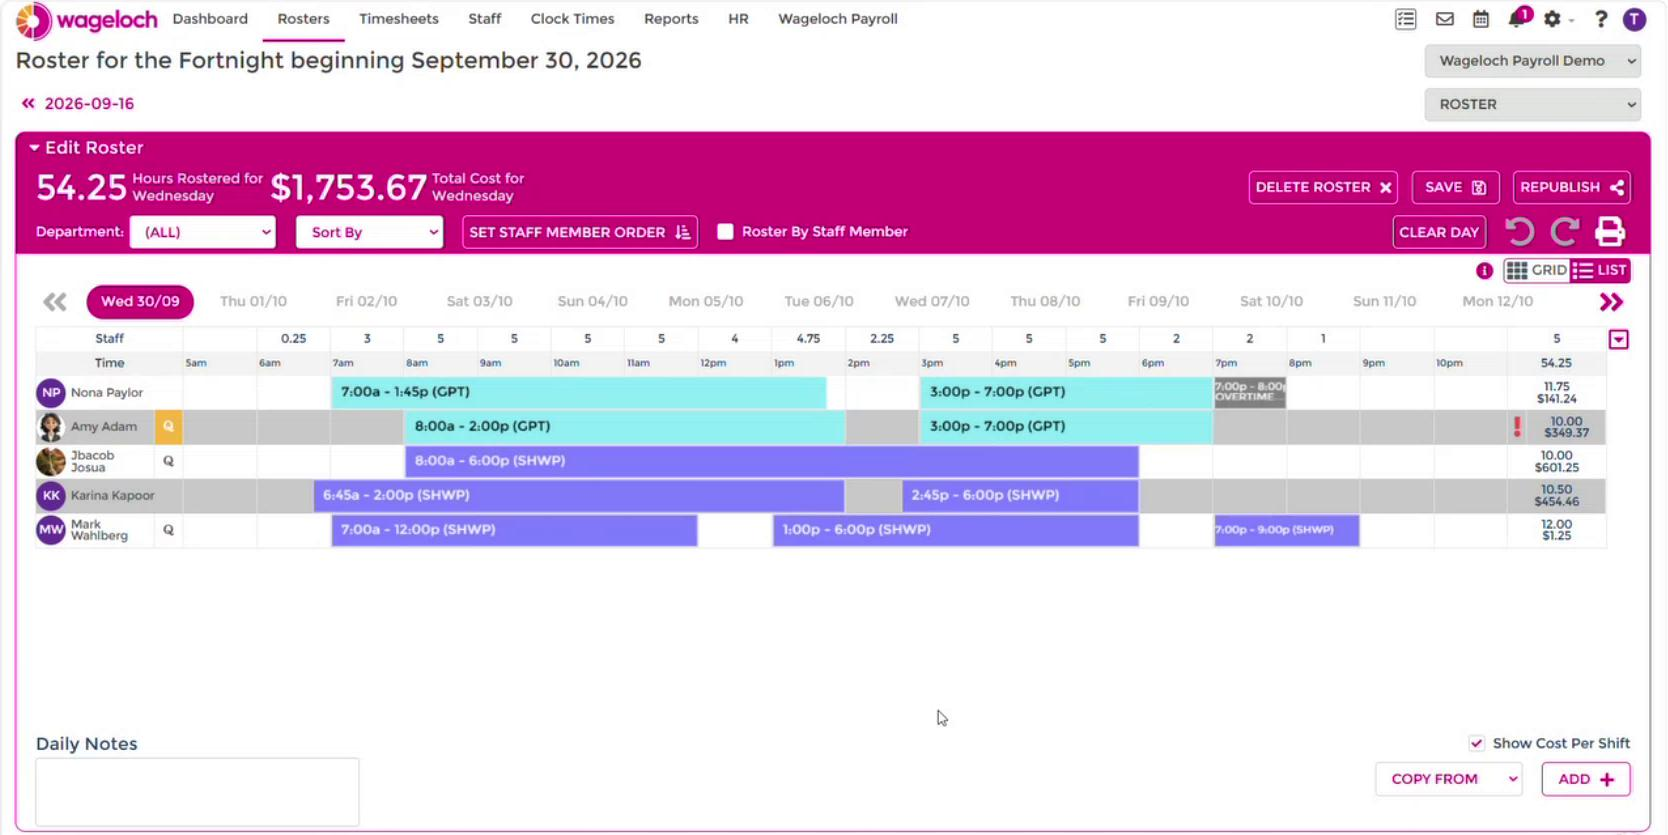
To turn highlighting back on, tick Highlight published and changed shifts on the roster again and select Done. For the other publishing options, see Roster settings.