Roles
3 min read
Roles
Roles identify the work performed on a shift. They are useful for roster clarity, timesheet accuracy, and reporting.
System roles vs user roles
- System roles: configured through your award setup and can affect pay.
- User roles: are created in settings and describe what work was done on a shift.
INFO
User roles do not change pay rates. System roles can change pay outcomes.
Create user roles
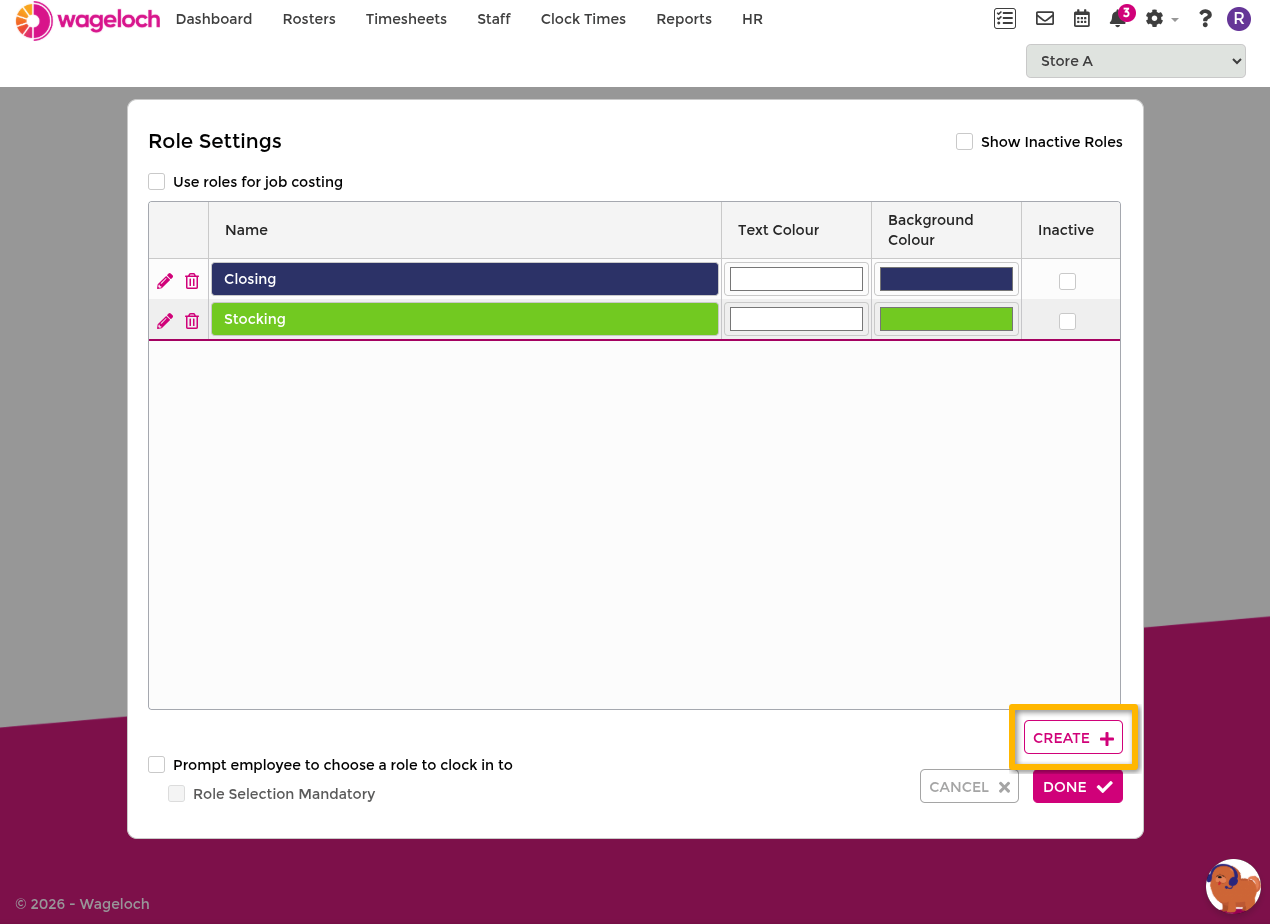
- Open Settings > Roles.
- Click Create.
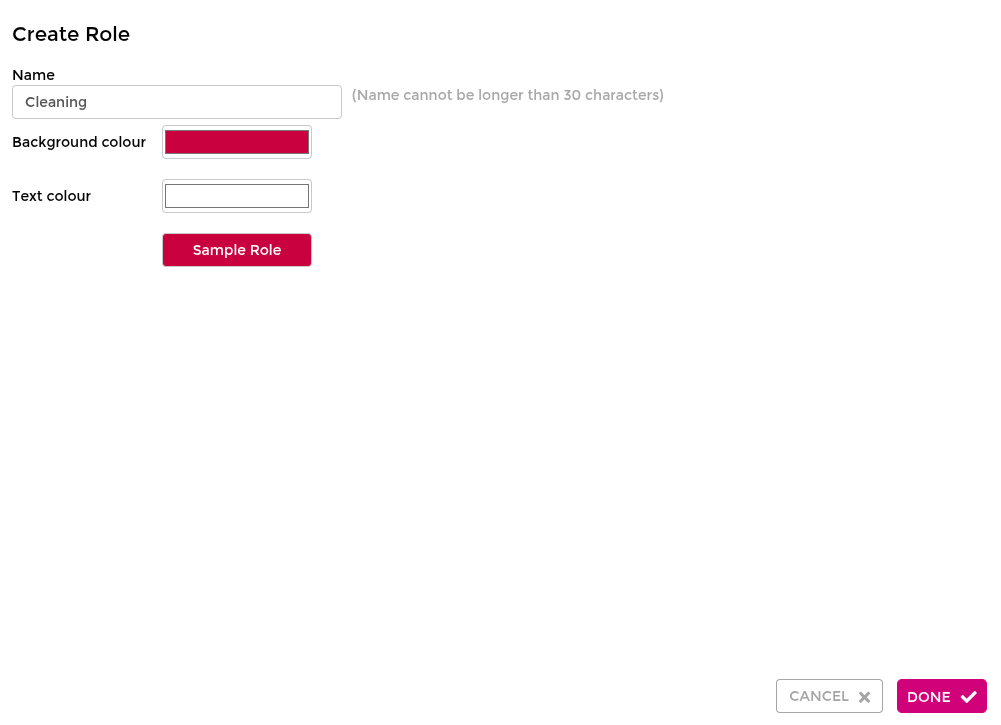
- Enter the role name.
- Choose a colour.
- Click Done.
- Repeat as needed, then click Done again to save the full list.
INFO
Role names may not be editable after creation. Confirm the name before saving.
Set roles inactive instead of deleting
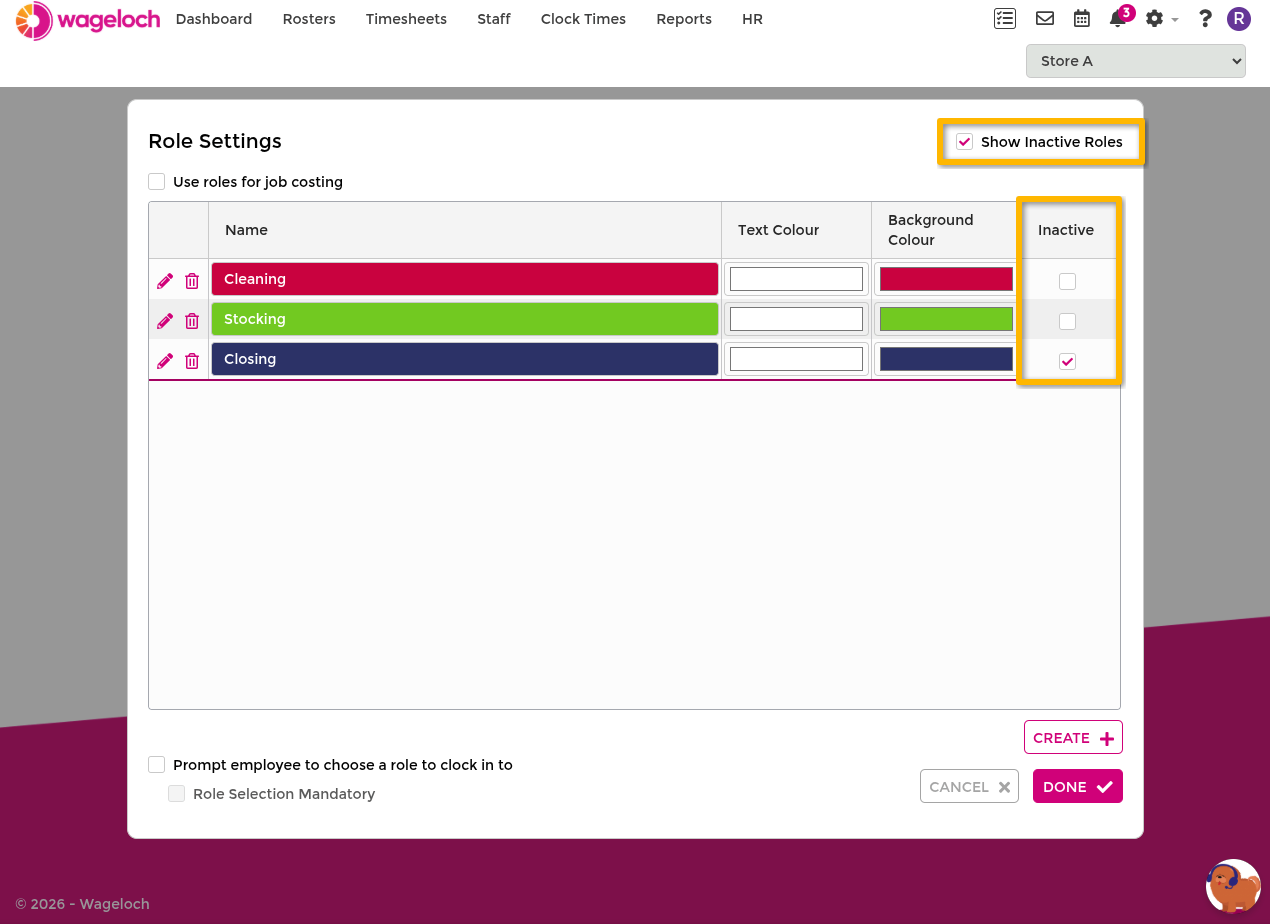
Inactive roles stay available for historical reporting and can be reactivated later.
- Open Settings > Roles.
- Find the role.
- Tick Inactive.
- Click Done.
To reactivate, enable Show Inactive Roles, untick Inactive, then save.
Delete a role
Delete a role only when you are sure it is no longer needed.
- Open Settings > Roles.
- Click the delete icon for the role.
- Confirm and click Done.
If the role appears in open rosters or timesheets, assign a replacement role to those shifts.
Prompt staff to choose a role at clock in
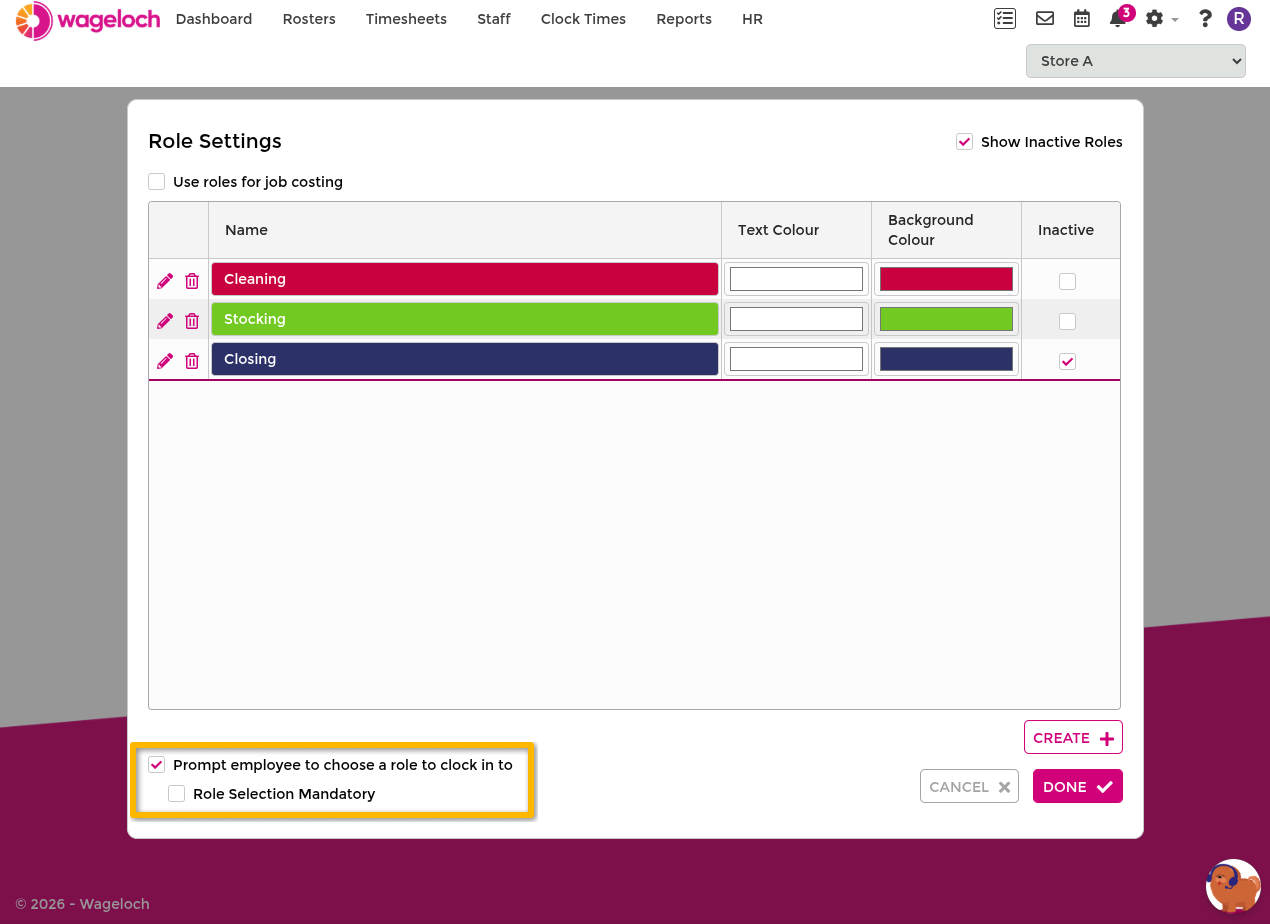
Prompt staff to select a role during clock in. You can make that selection mandatory.
Optional role selection
- Staff can choose a role when clocking.
- They can skip selection if no role applies.
Mandatory role selection
- Staff must select a role before clock in is accepted.
- Use this when payroll exports or reporting require role-level tracking.
If you also use departments, see Departments and configure department-role linking from the hub page.
Use roles for job costing
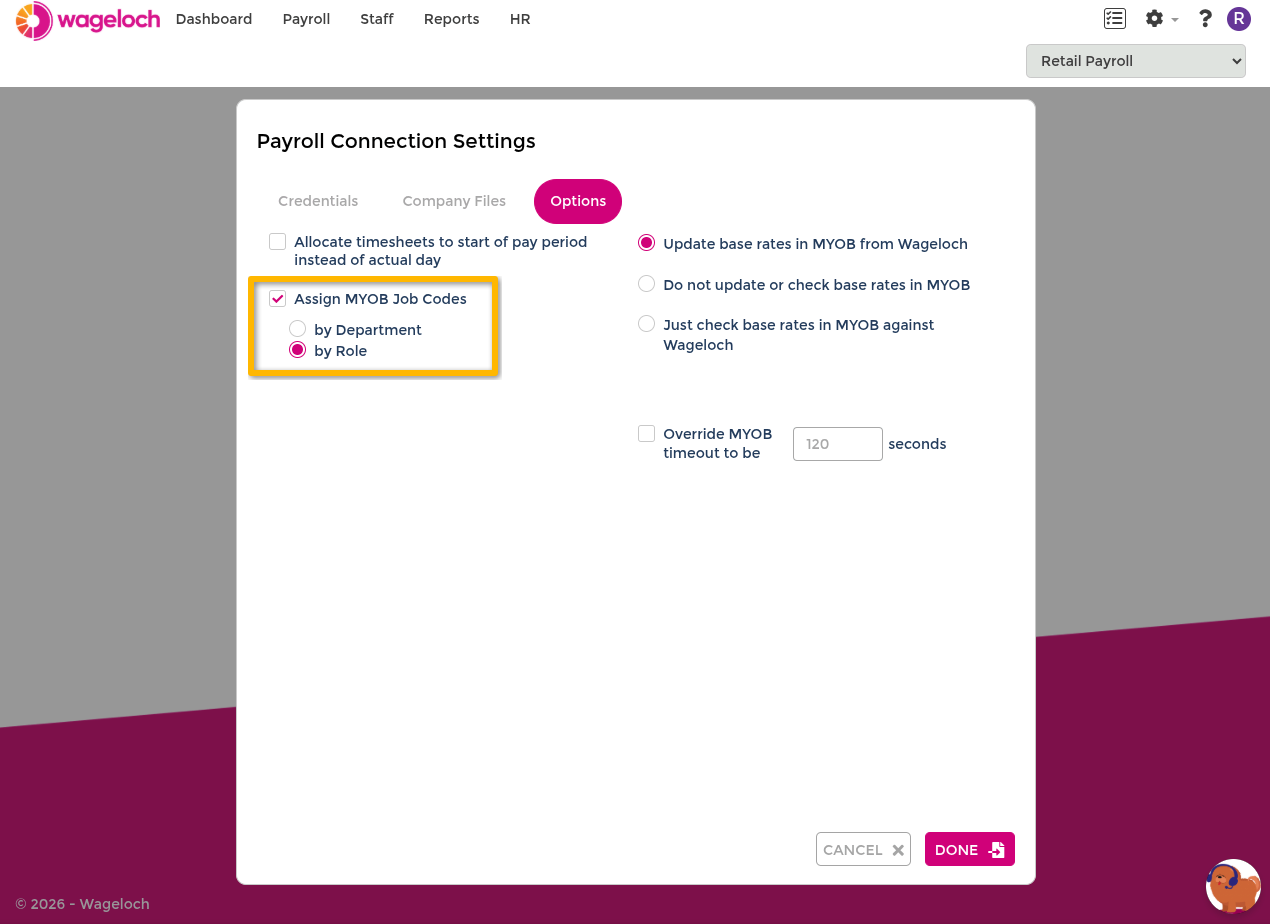
If your payroll platform supports job codes, classes, or tracking categories, you can assign those values to roles.
INFO
If your site is managed under a central payroll site, payroll settings can only be accessed and configured from that site. See Central Payroll.
- Open Settings > Payroll Connection.
- In payroll options, set job costing assignment to Roles.
- Save.
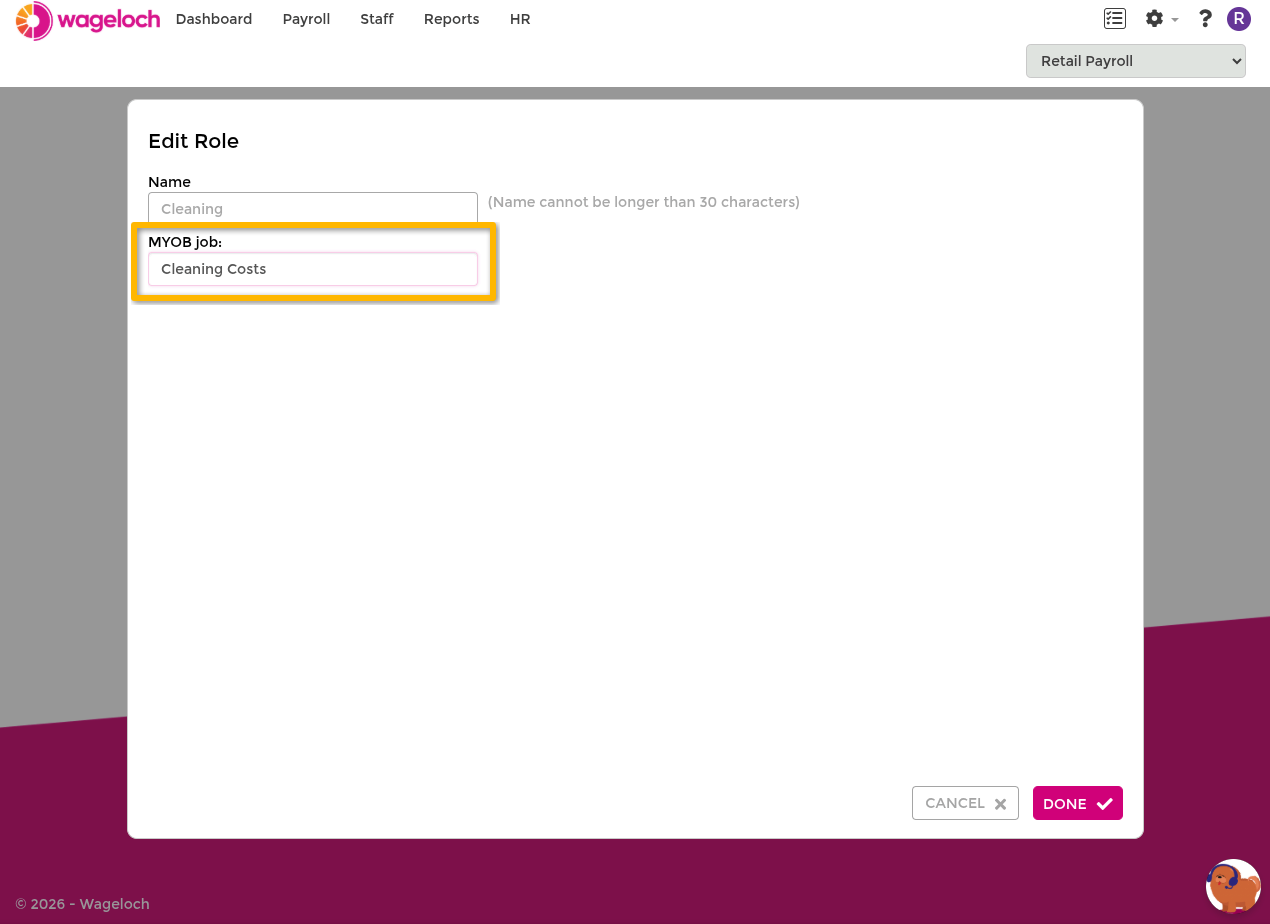
- Return to Settings > Roles.
- Enter or select the code for each role.
- Click Done.
Some payroll platforms allow both department and role mapping at the same time.