
Iris Scanner
2 min read
Iris Scanner
Use this guide to install the iris scanner driver and configure Wageloch Time Kiosk on Windows PC.
Install the iris scanner driver
If you need setup help, contact Wageloch Helpdesk.
Driver download URL (direct):
Configure Time Kiosk for iris scanning
During first-time setup
- After installing Time Kiosk (Windows PC), open Wageloch Time Kiosk.
- When prompted for Clocking Method, select Iris Scanner.
- Select Medium/High Quality.
- Select Done to save.
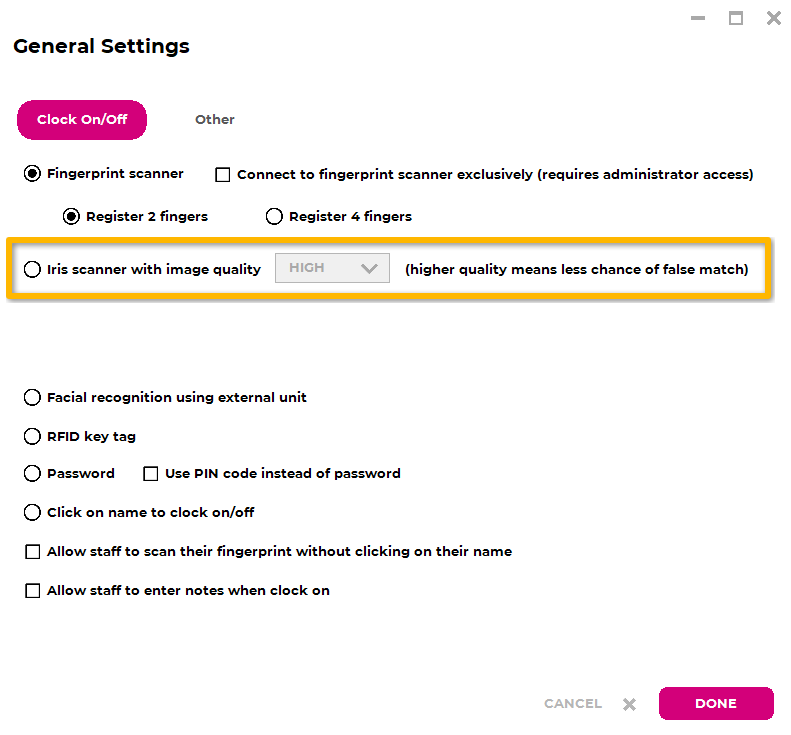
Change from another clock method
- Select the Settings cog (top-right).
- Select General.
- Sign in with Wageloch admin credentials.
- Select Iris Scanner and Medium/High Quality.
- Select Done to save.
Register iris scans
For best results, use a well-lit area.
- Select the staff member name.
- Hold the iris scanner about 10 cm from the eye.
- Ask the staff member to look directly into the scanner window with one eye open.
- Follow the on-screen preview guidance.
During scanning:
- A yellow highlight appears while attempting to scan.
- If successful, the question mark indicator disappears from the staff name.
- If unsuccessful, the prompt will suggest adjusting distance or lighting.
Clock in and clock out
- Select your name on the Time Kiosk screen.
- Hold the scanner about 10 cm from your eye.
- Keep your eye open and centred in the scanner view.
If successful, Time Kiosk shows a confirmation message (for example, Good Morning, Good Afternoon, or Goodbye).
Delete iris scans
- Open Time Kiosk.
- Select the Settings cog.
- Select Delete Iris Image.
- Sign in with Wageloch admin credentials.
- Select the staff member.
- Select Delete.
- Confirm the deletion prompt.
- Select Done.
The staff member can then be re-registered.