
Onboarding workflows
3 min read
Onboarding workflows
Onboarding templates help you collect the right information from new starters and existing staff in a consistent, clear order.
Each template is built from stages, and each stage can request a contract, policy, document upload, or custom-field response.
Before you start
Before you build a template, set up the items you plan to send or collect first:
- Contracts and policy templates in Contracts and policies
- Any required Custom fields
- Document categories for files staff must upload
INFO
If a contract or policy includes placeholders, complete those placeholder values when sending onboarding.
Create an onboarding template
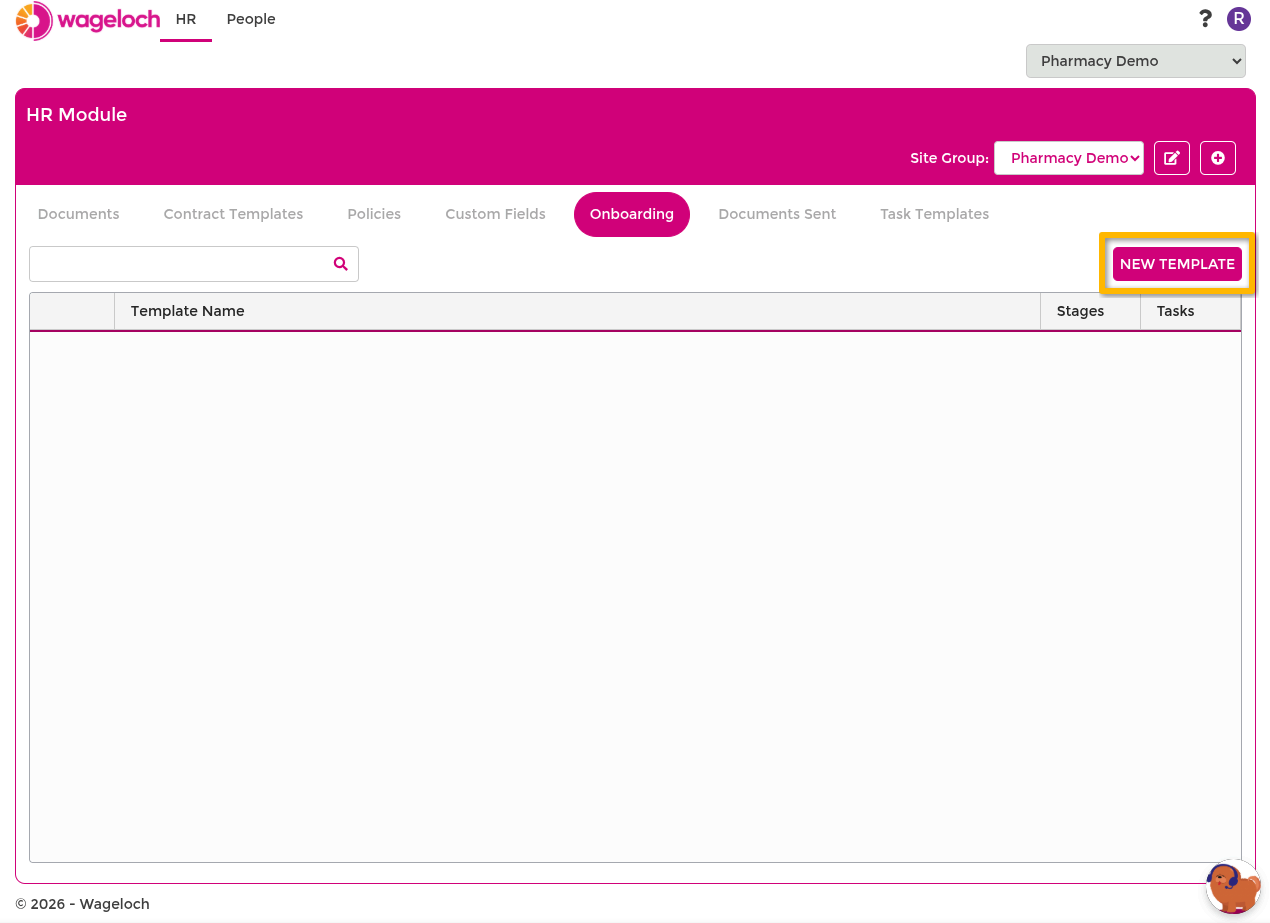
- Go to HR > Onboarding.
- Select New Template.
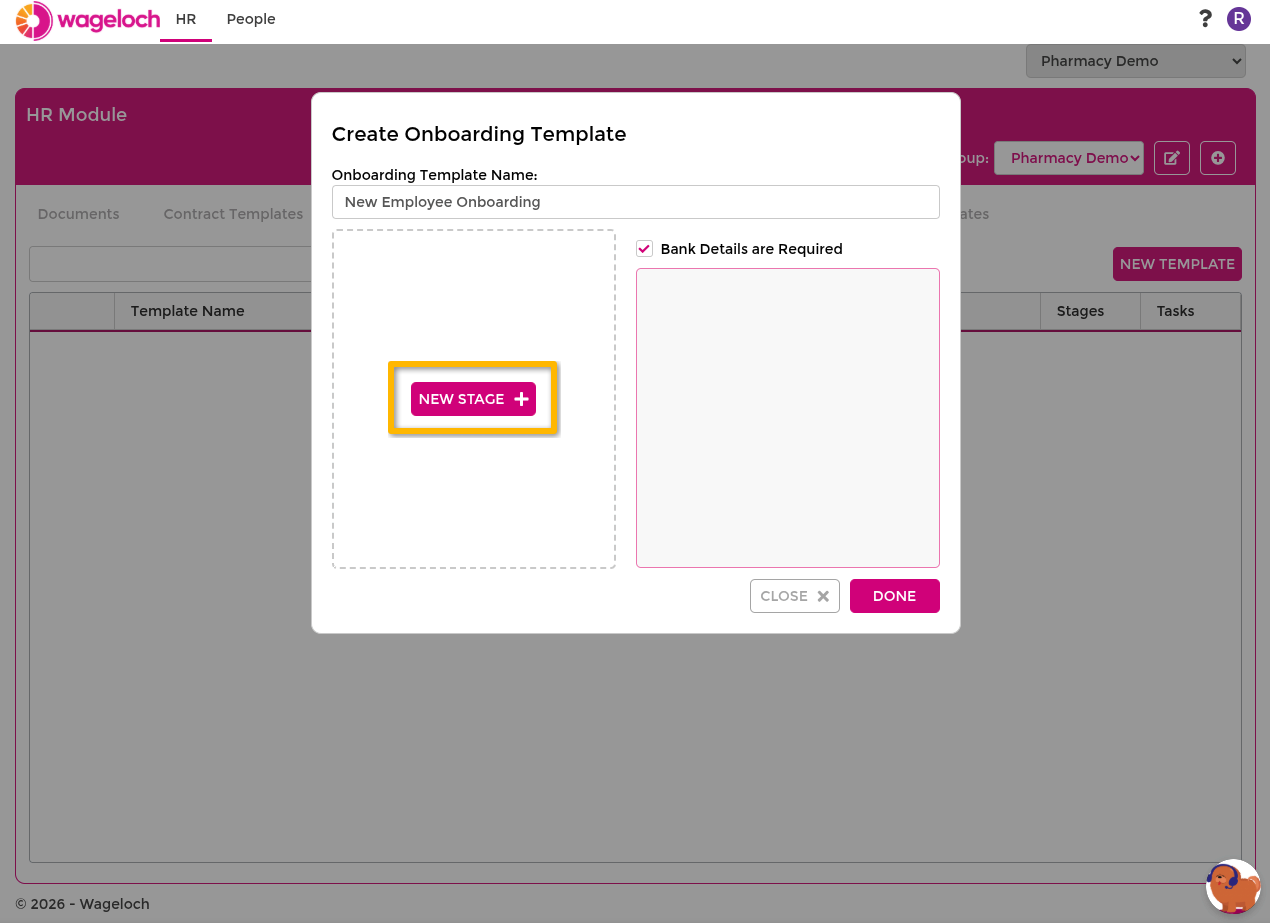
- Enter the template name.
- Set whether bank details are required.
- Select New Stage.
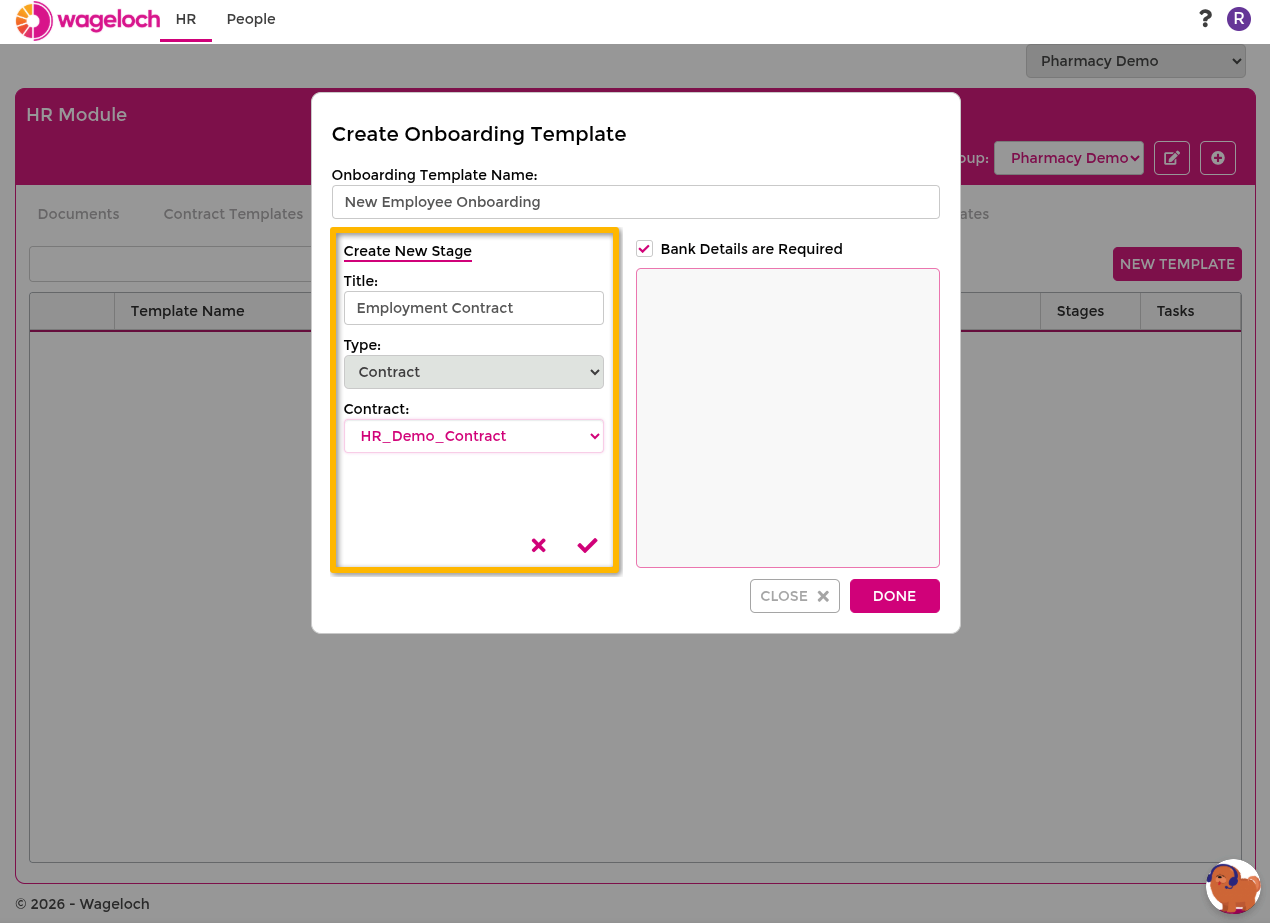
- Enter the stage details:
- Title
- Type
- Type-specific selection (for example Contract, Policy, Document Category, or Custom Fields)
- Select Save for the stage.
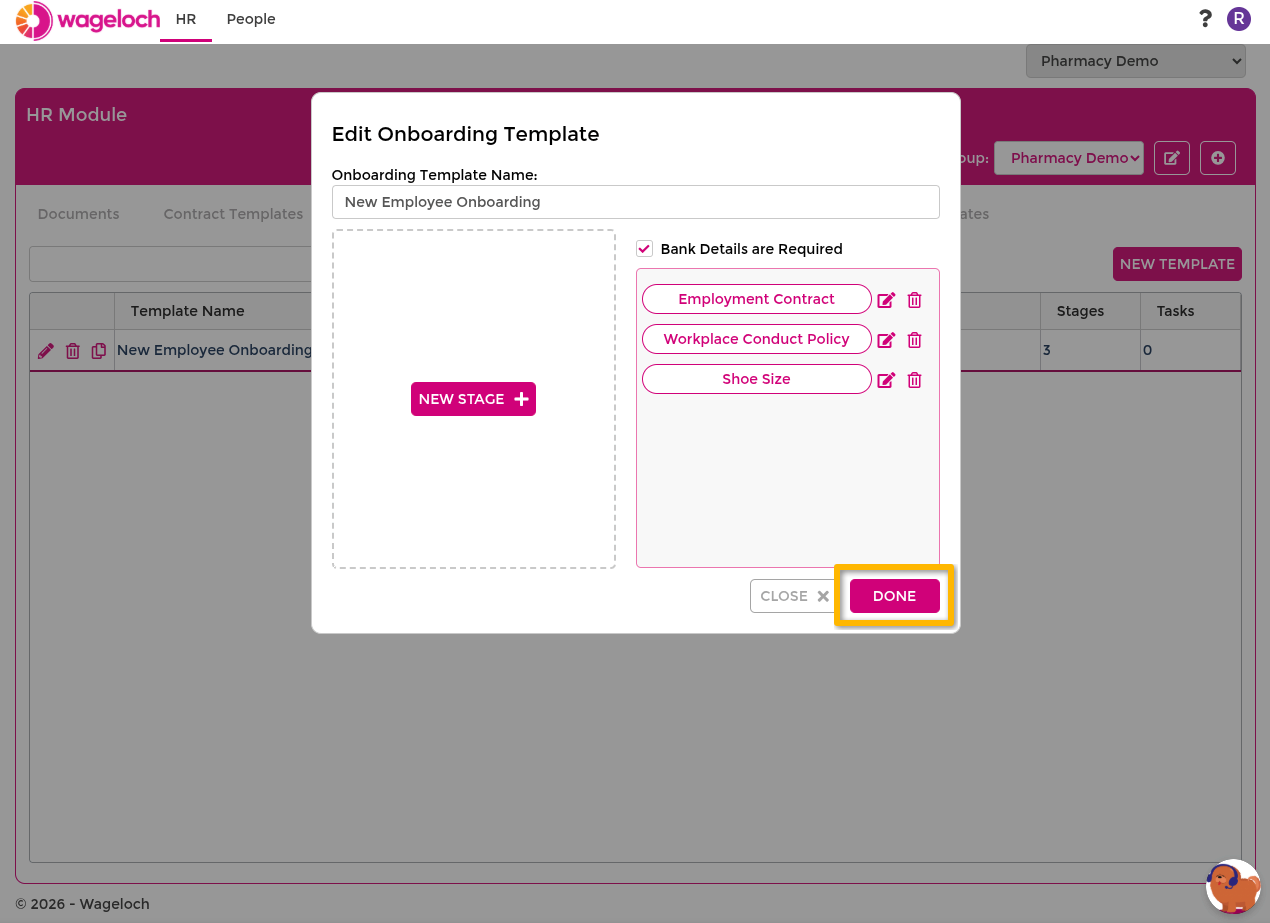
- Repeat until all stages are added.
- Select Done to save the template.
TIP
Use clear stage titles such as Employee Agreement, Upload ID, and Uniform Details so staff know what each step is for.
Stage types
Choose the stage type based on the information or action you need from the employee.
- Contract: Send a contract template for review and signature.
- Policy: Send a policy template for acknowledgement and signature.
- Document Upload: Request staff uploads (for example licences or certificates).
- Custom Field: Collect additional onboarding responses using predefined fields.
Mandatory qualifications
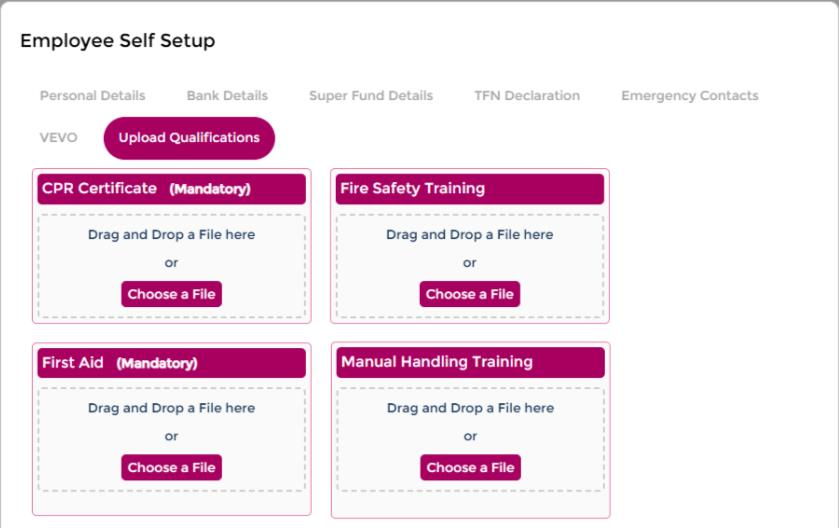
Mandatory qualifications don't need a stage. If a qualification is marked Mandatory, it's added to an employee's onboarding automatically as soon as it's assigned to them.
- The employee can't finish onboarding until they upload the document for every mandatory qualification assigned to them.
- The employee gets an email and a push notification when the qualification is assigned, and again if its renewal date changes.
INFO
Mandatory is only available on HR-enabled sites. Set it up in Qualifications, not in an onboarding template.
Send onboarding to a staff member
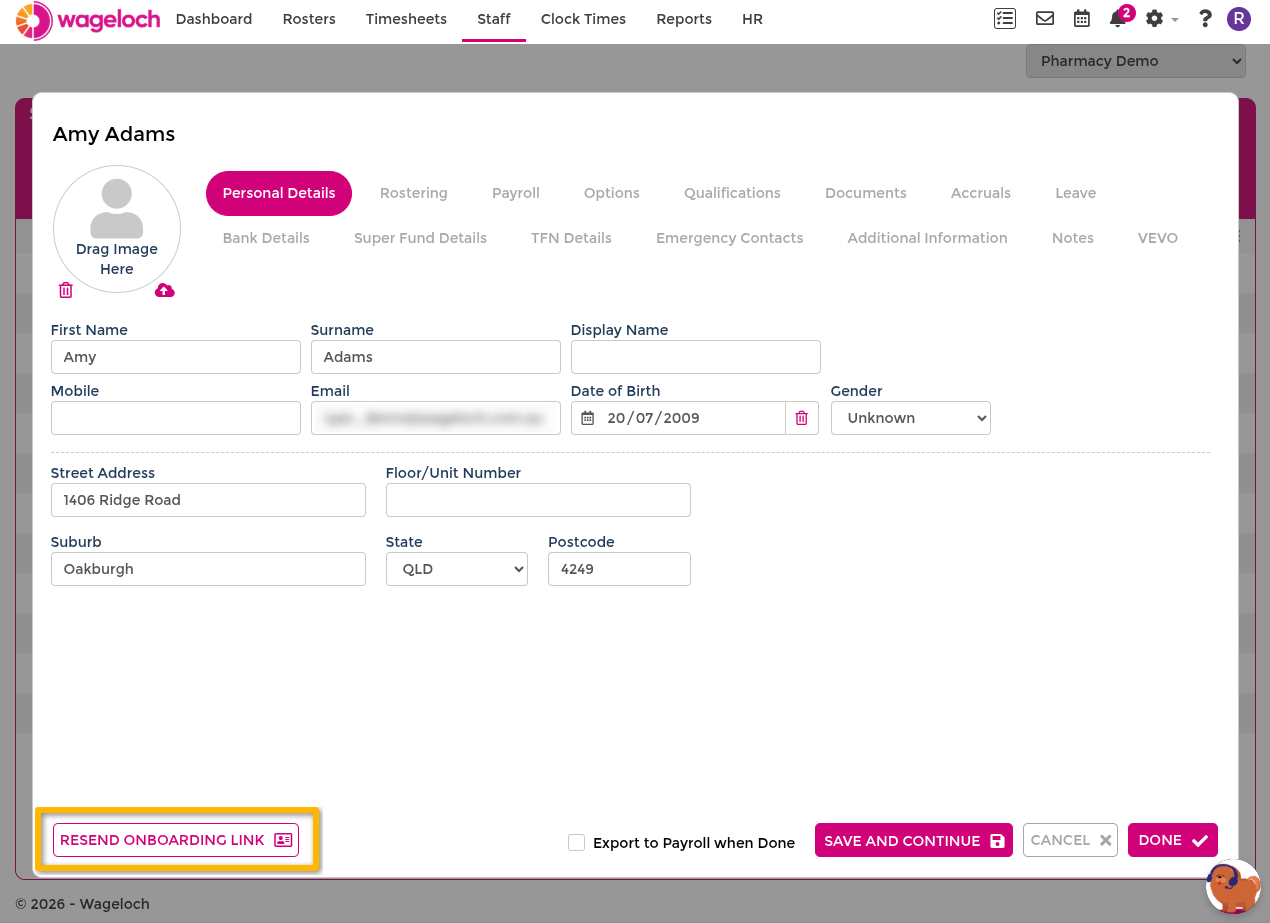
- Go to Staff.
- Select Create + for a new employee, or open an existing employee.
- Complete required staff details.
- Ensure Send Onboarding Link to Employee is selected.
- Select Done.
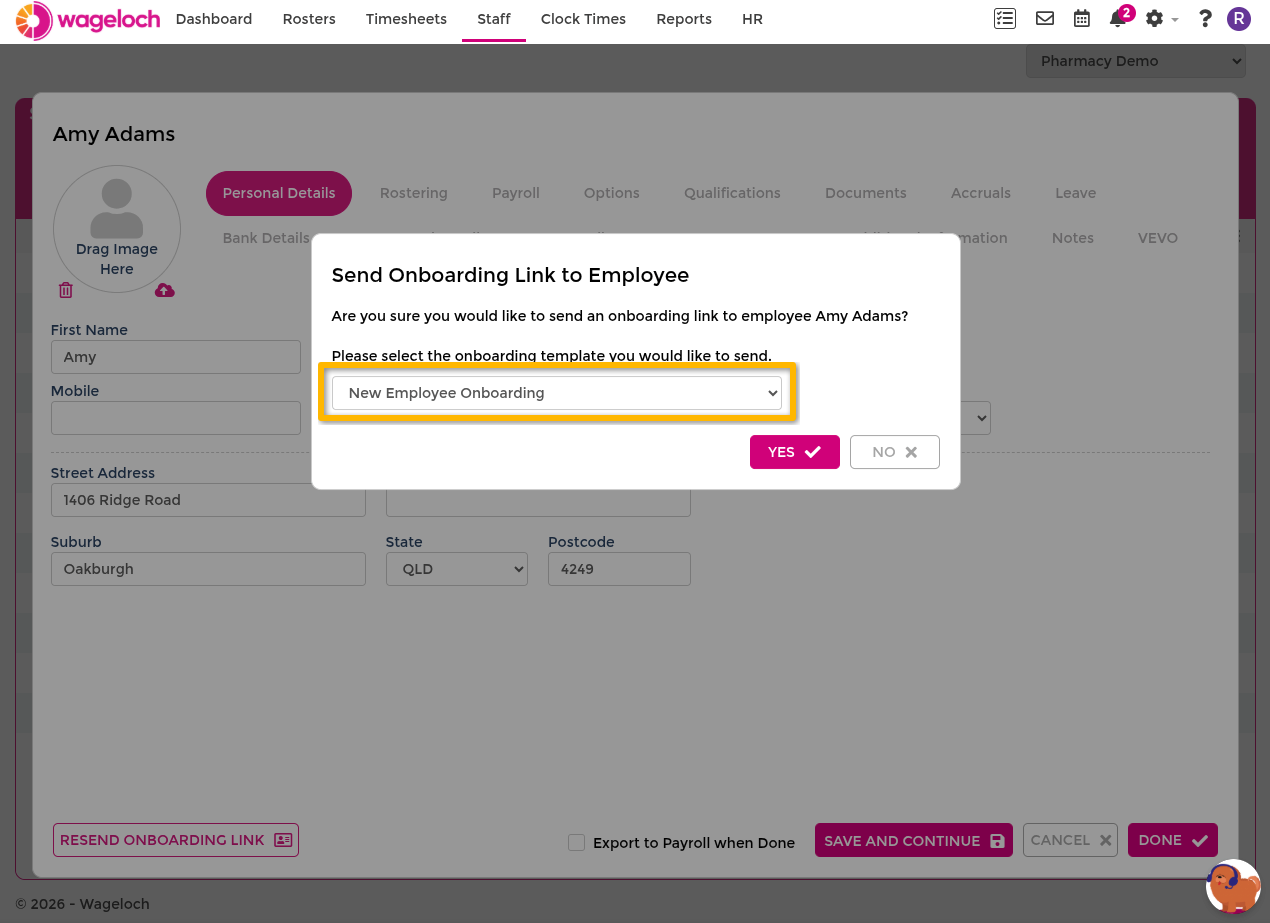
- Choose the required Onboarding Template.
- Select Done to continue.
- Complete any placeholder values in contract or policy stages when prompted.
- Select Next or Done through each stage until complete.
- Confirm the completion prompt.
IMPORTANT
An email address on the employee's staff card is required to send the onboarding link.
What happens after onboarding is sent
- The employee receives an onboarding link by email.
- Uploaded files and custom field responses are saved to their staff record.
- Signed documents can be tracked in Locating documents.
Edit or remove a template
- Go to HR > Onboarding.
- Find the template.
- Select Edit to update template details or stages.
- Select Delete to remove the template.
- Confirm the prompt.
WARNING
Updating a template affects future sends only. It does not retroactively change onboarding already sent.