
Creating rosters
3 min read
Creating rosters
Use this guide to create and publish rosters in Daily and Staff views.
Before you start
- Sign in to Wageloch.
- Open the Roster home screen.
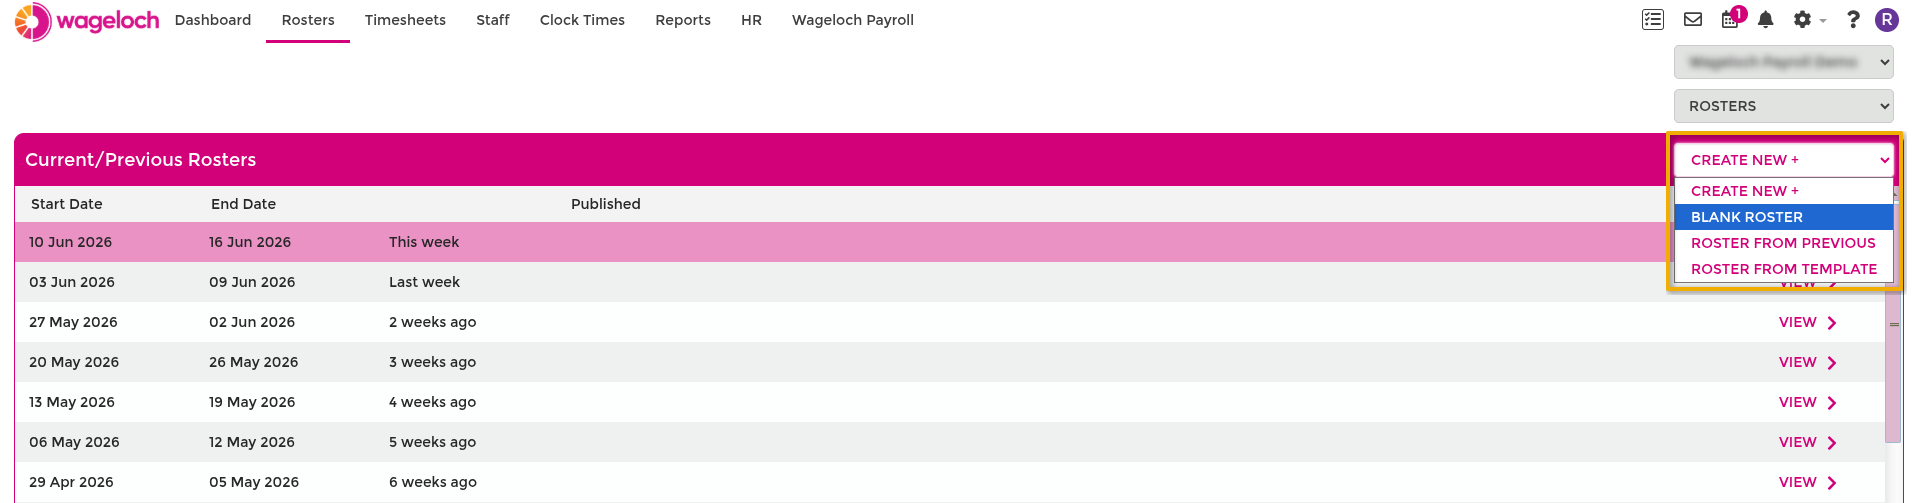
- Select Create New+ (top-right).
- Select Blank Roster.
- Confirm the roster start date (usually aligned with your timesheet period or the previous roster end date).
- Select Done.
Roster dates display from left to right.
Daily view setup
Add staff and shift rows
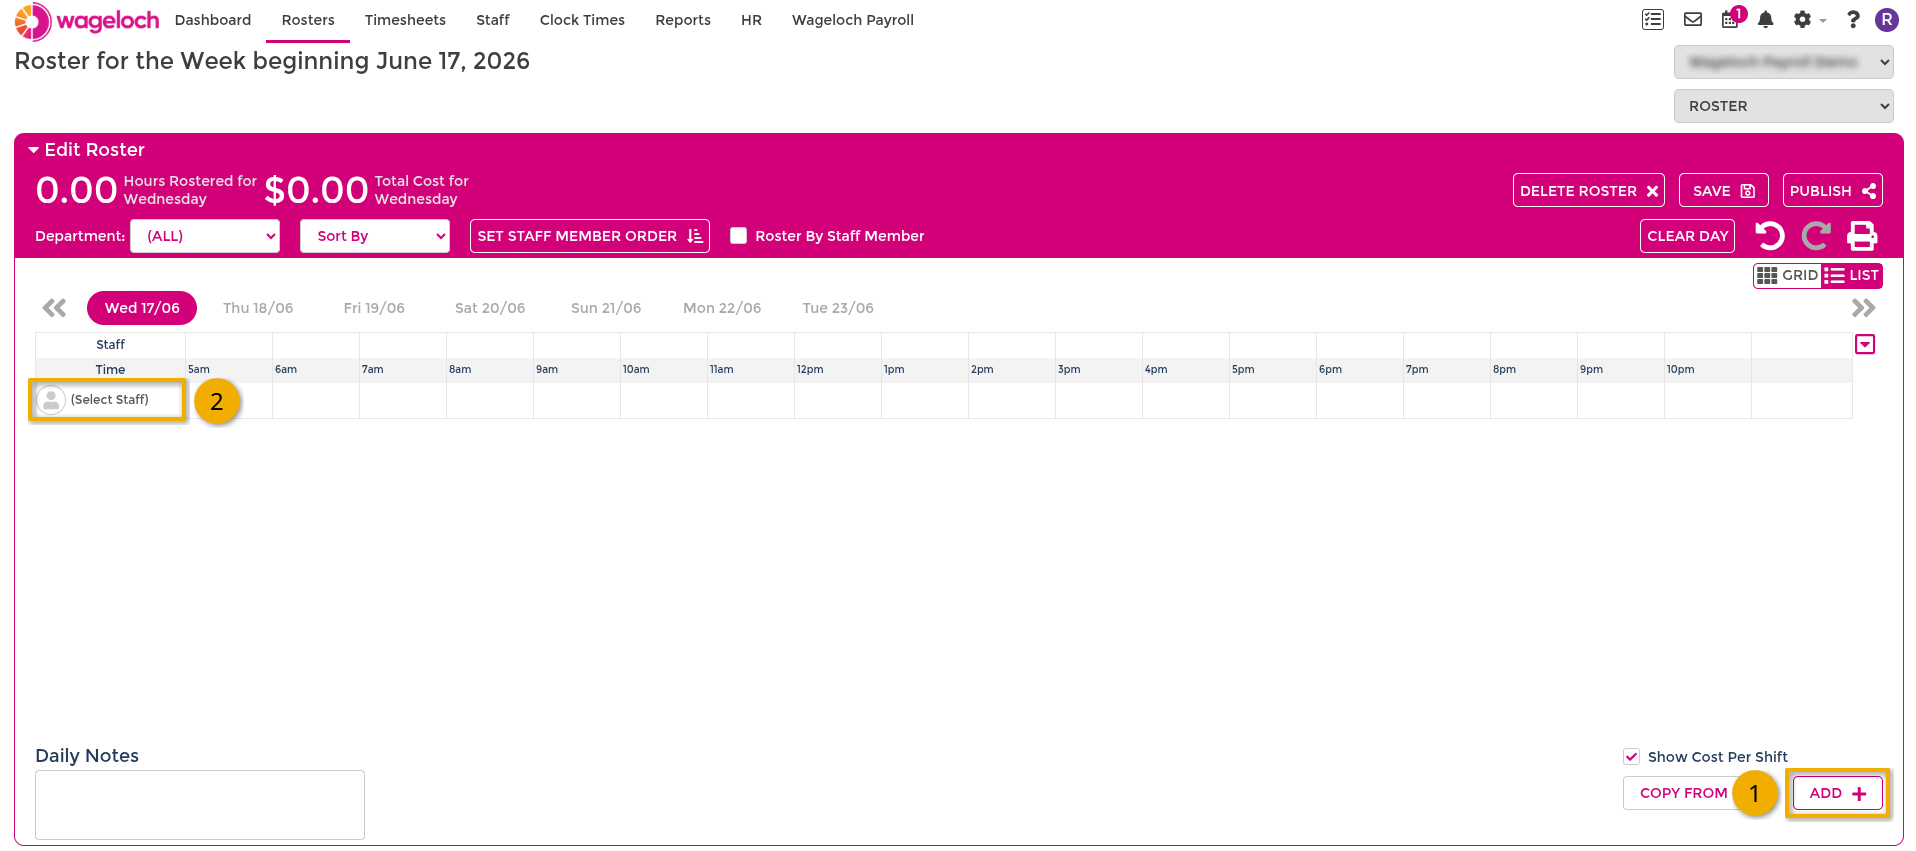
- Select ADD+ (bottom-right).
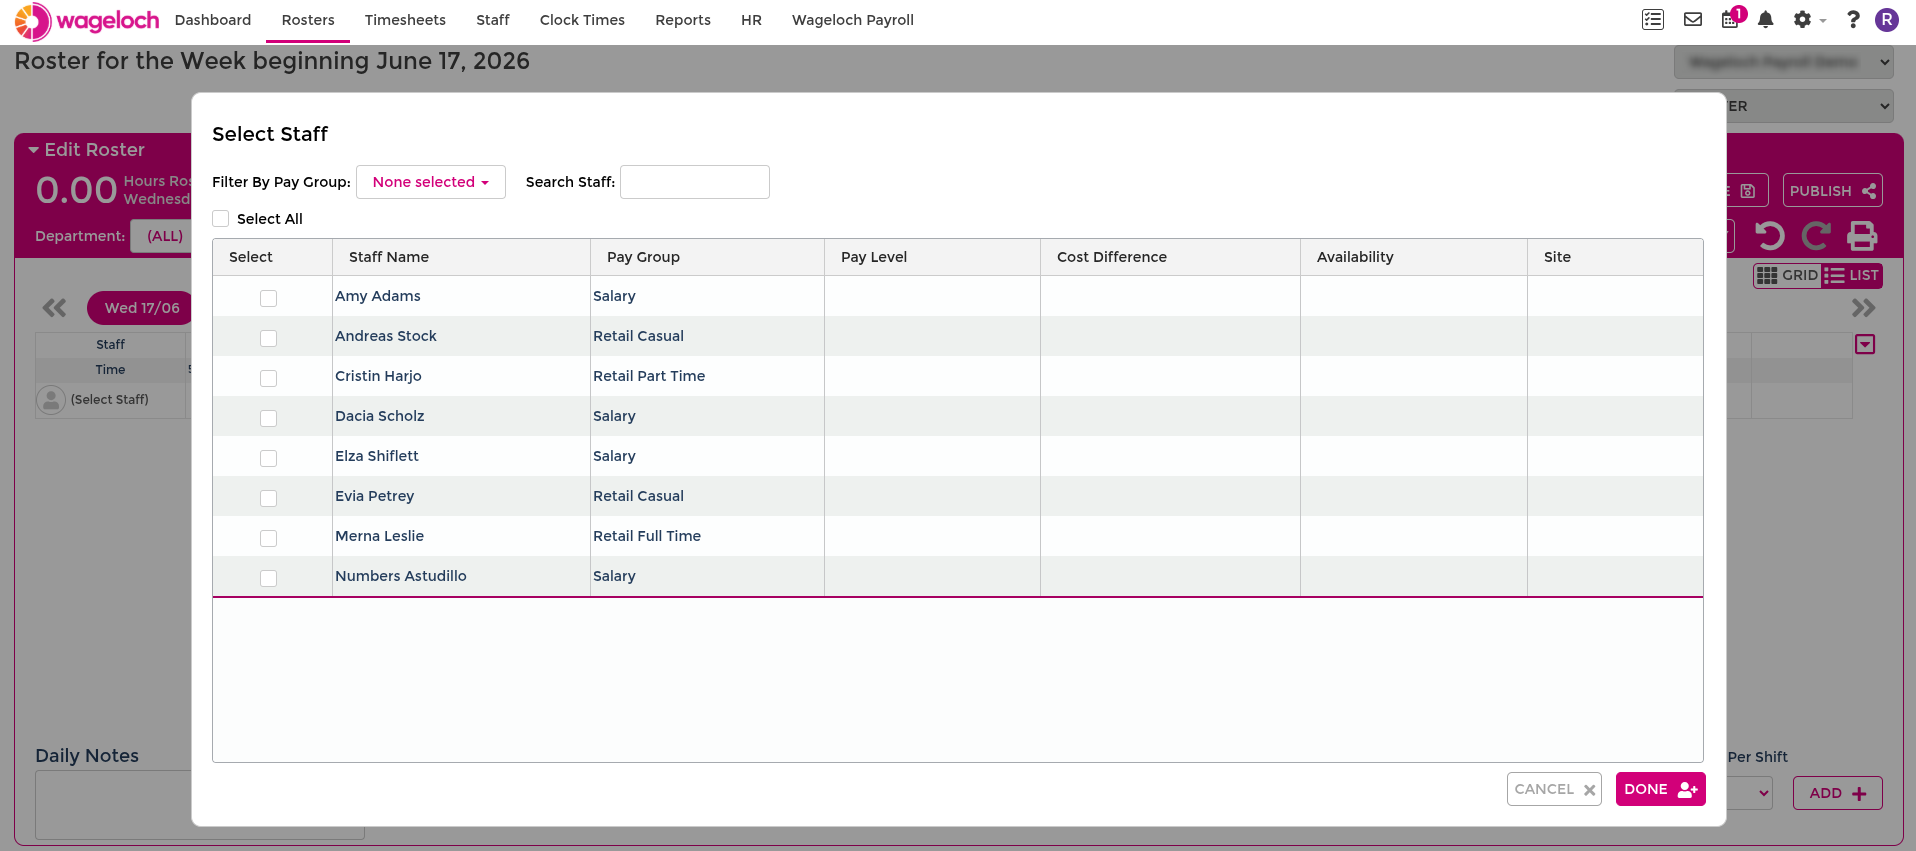
- Select (Select Staff).
- Tick the staff members you want on that day.
- Select Done.
Add and adjust shift times
- Find the employee row.
- Left-click and hold at the start time, then drag to the finish time.
- To adjust, hover over shift edges until arrows appear, then drag.
- Repeat for each employee and day.
- Select Done to save.
Saved edits and shifts appear in roster views, timesheets, and reports.

Publish and republish rosters
To notify staff, publish by email and mobile access channels.
- Select Save.
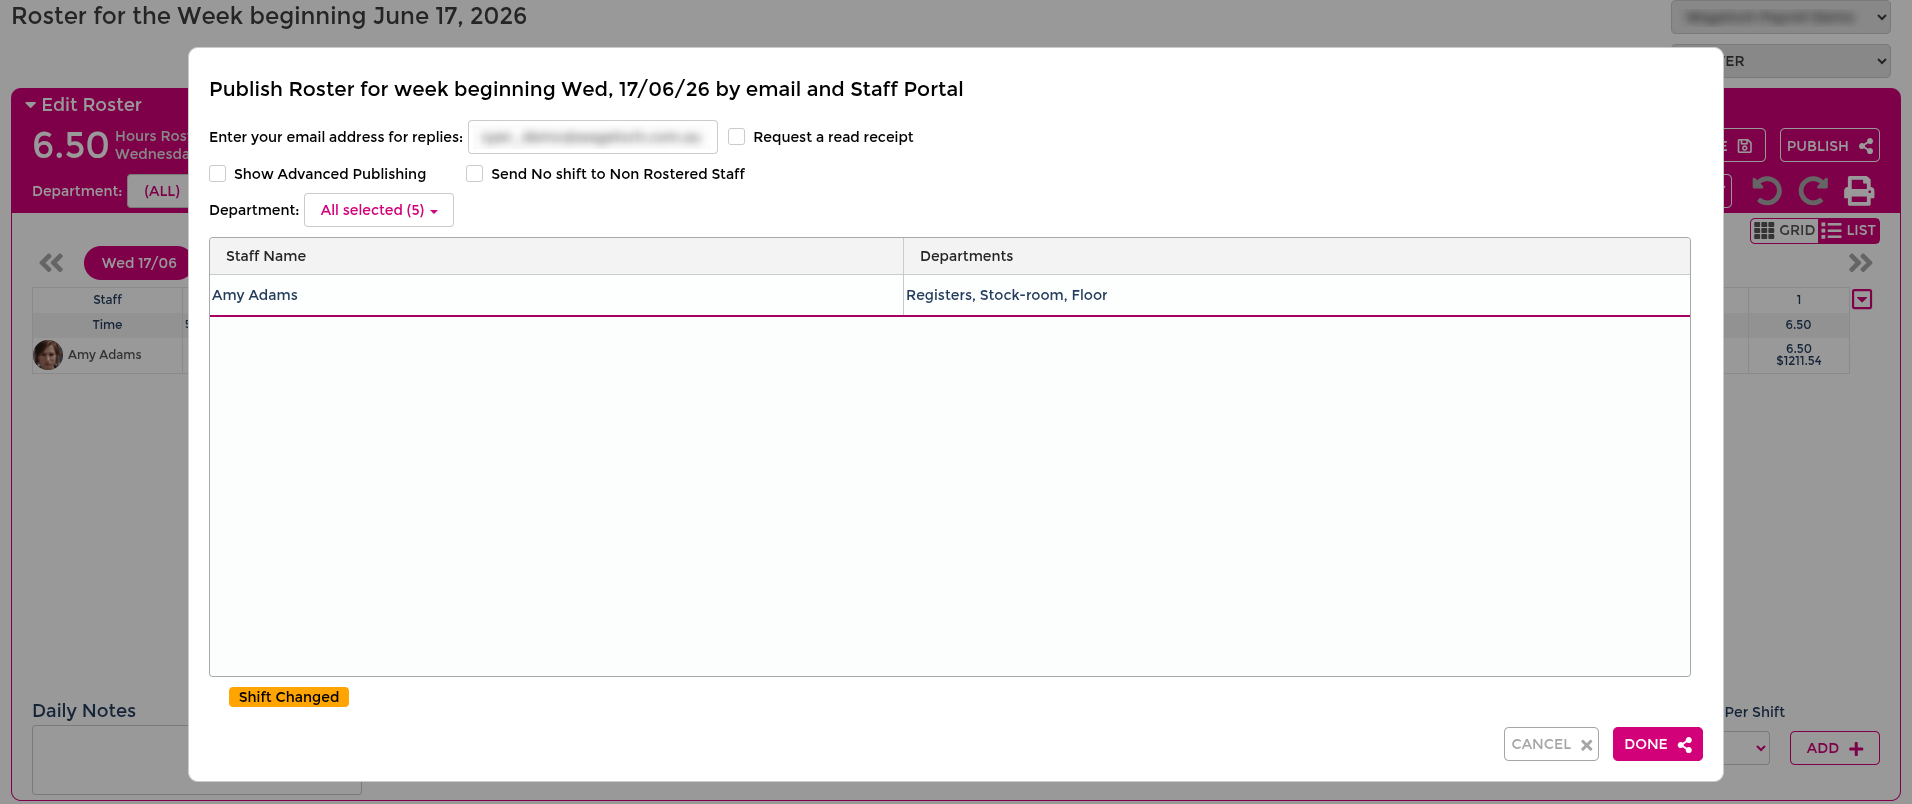
- Select Publish (top-right).
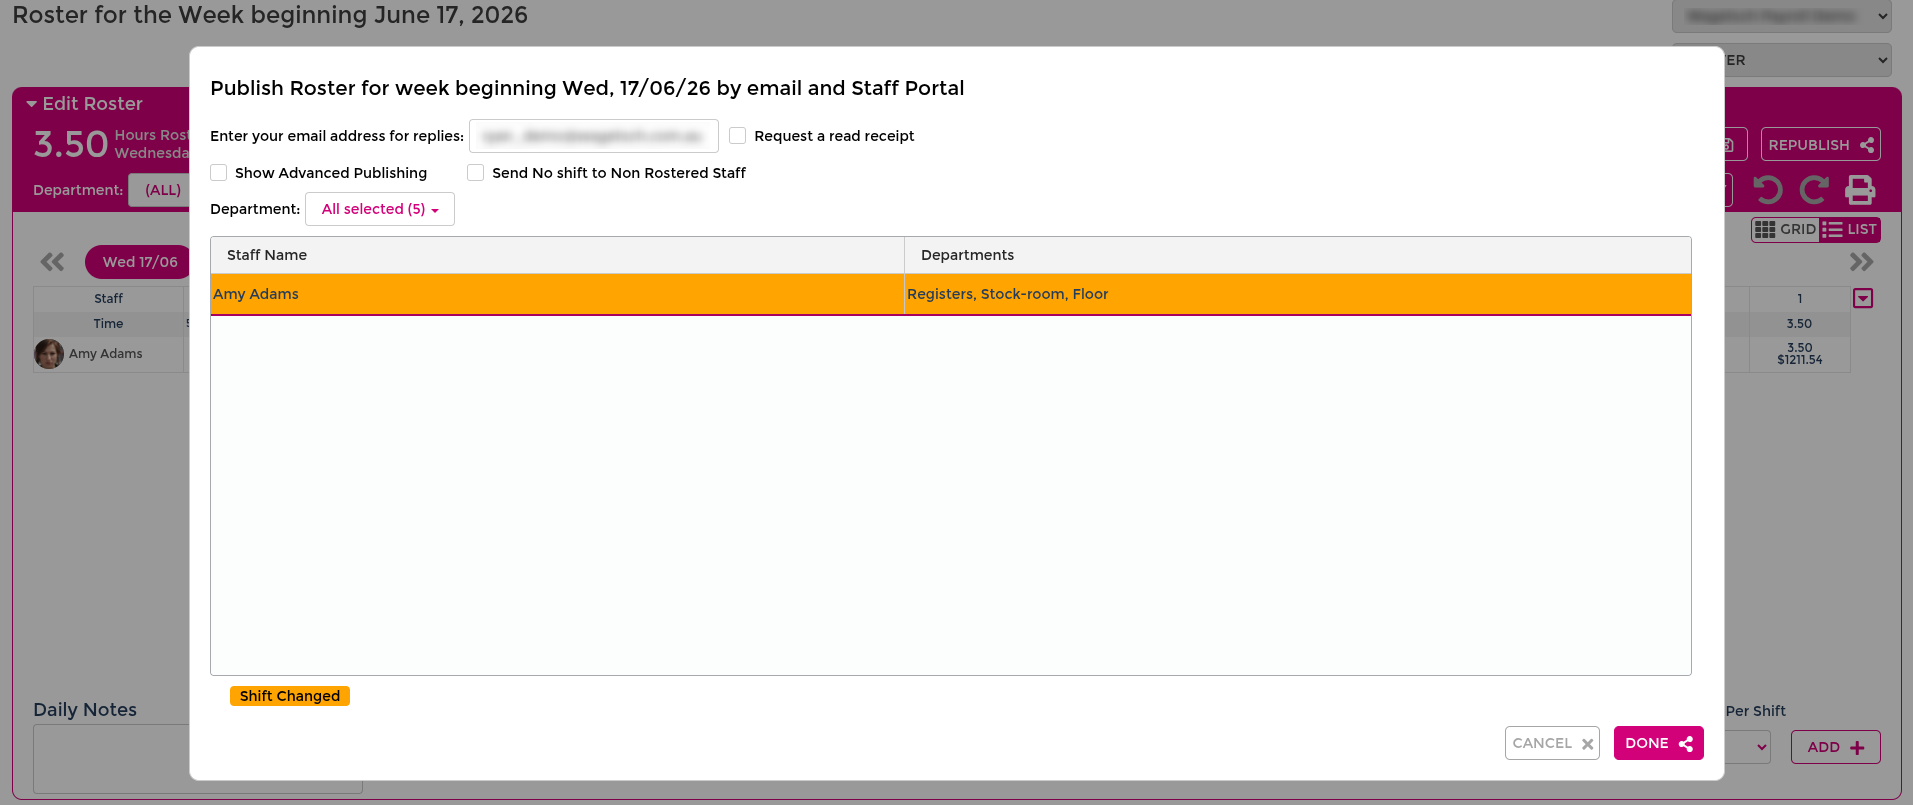
- Enter your email address for reply handling.
- Confirm the recipient list (staff with shifts and valid email addresses).
- Select Done.
If you make changes after publishing:
- Open the published roster.
- Update shifts, staff, times, or days.
- Select Re-Publish.
- Review highlighted staff (modified shifts usually show in yellow).
- Select Done.
Reassign staff to shifts
Use reassignment when a shift was assigned incorrectly or needs to move to an available employee.
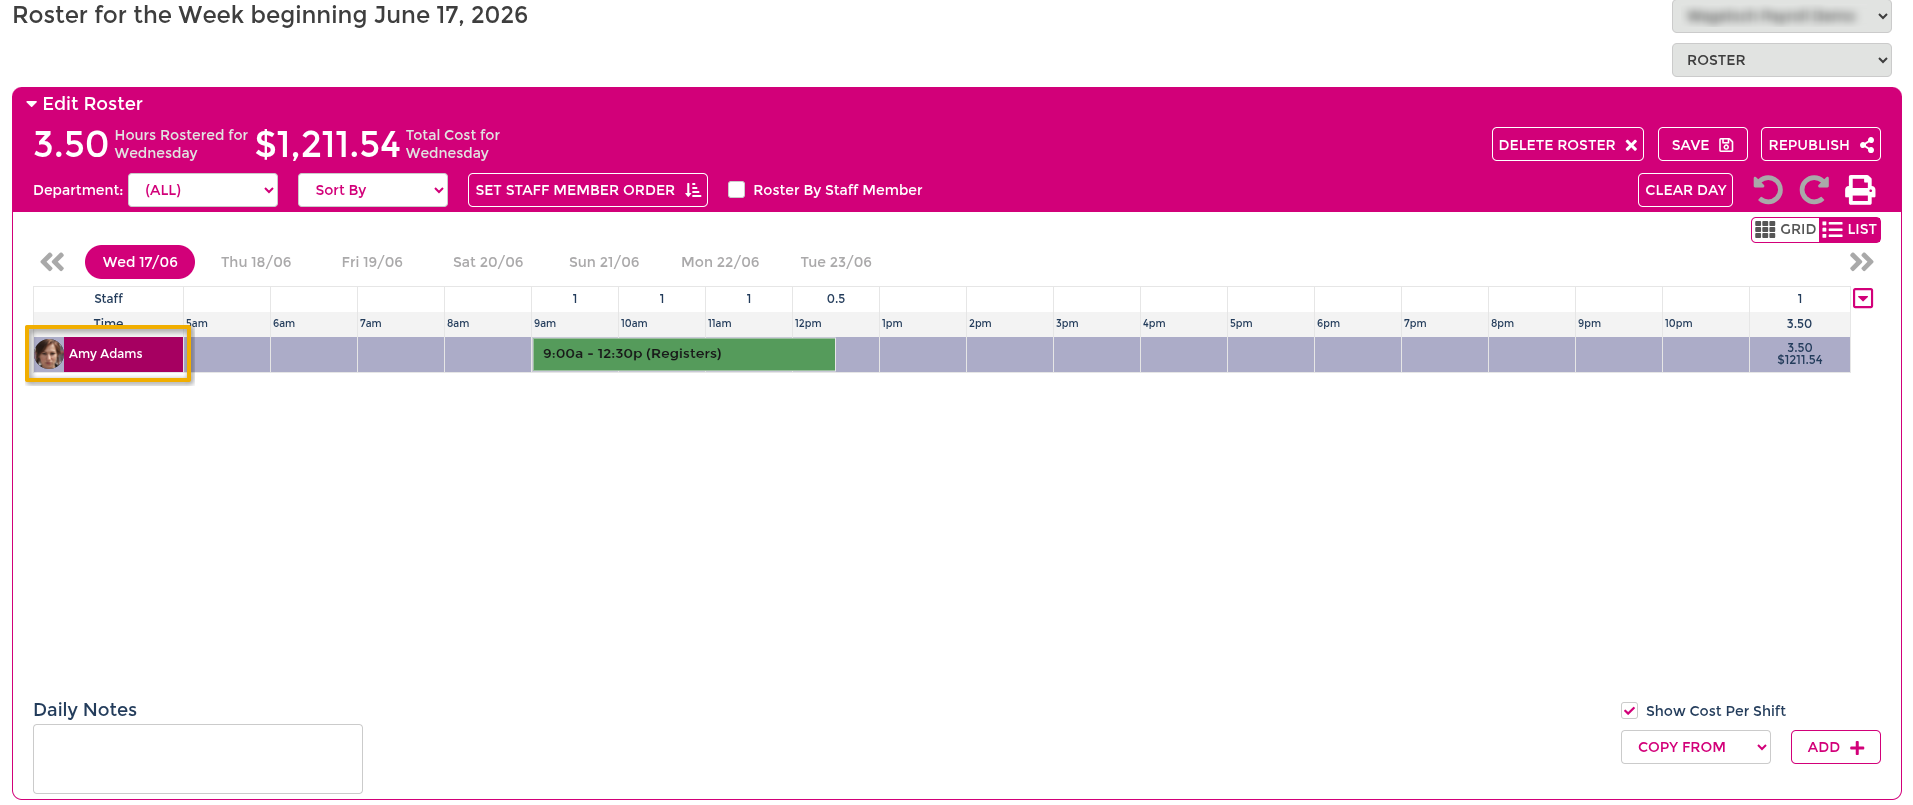
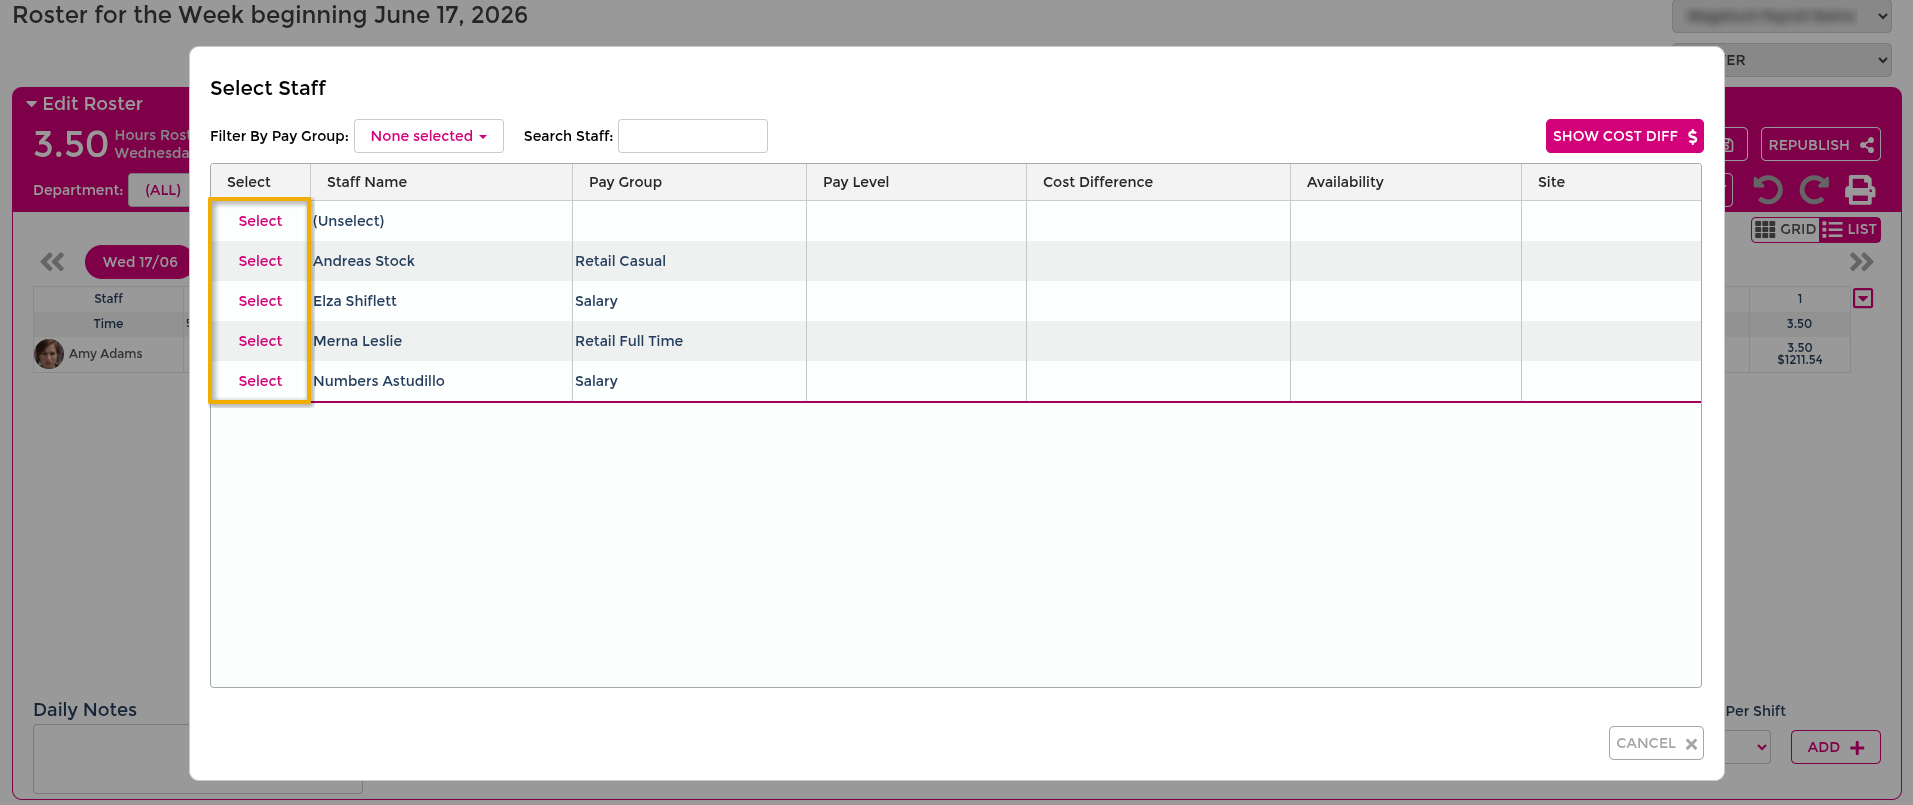
- Select the current employee name on the shift.
- Select another eligible staff member from the list.
- Select Done.
- Re-publish if the roster was already sent.
Related workflows
For staff-initiated replacement requests, see Shift Replacement. If you want to offer unassigned shifts to employees to accept or decline instead of assigning directly, see Send open shifts.
Staff view setup
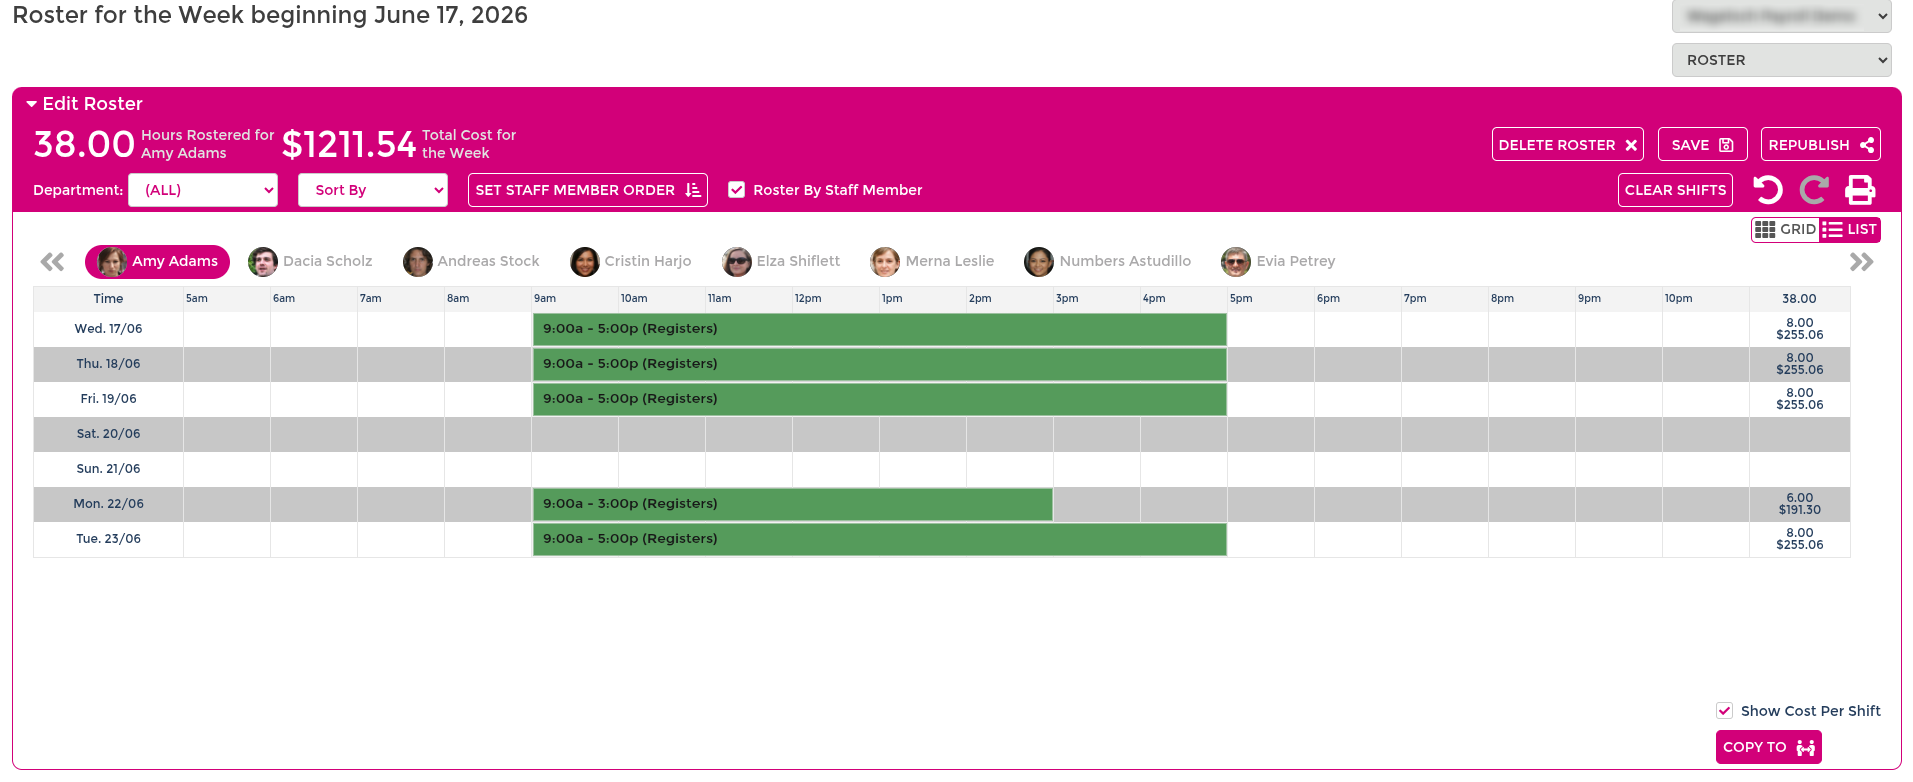
Switch to staff-centric planning when you want to build one employee at a time.
- Open the roster.
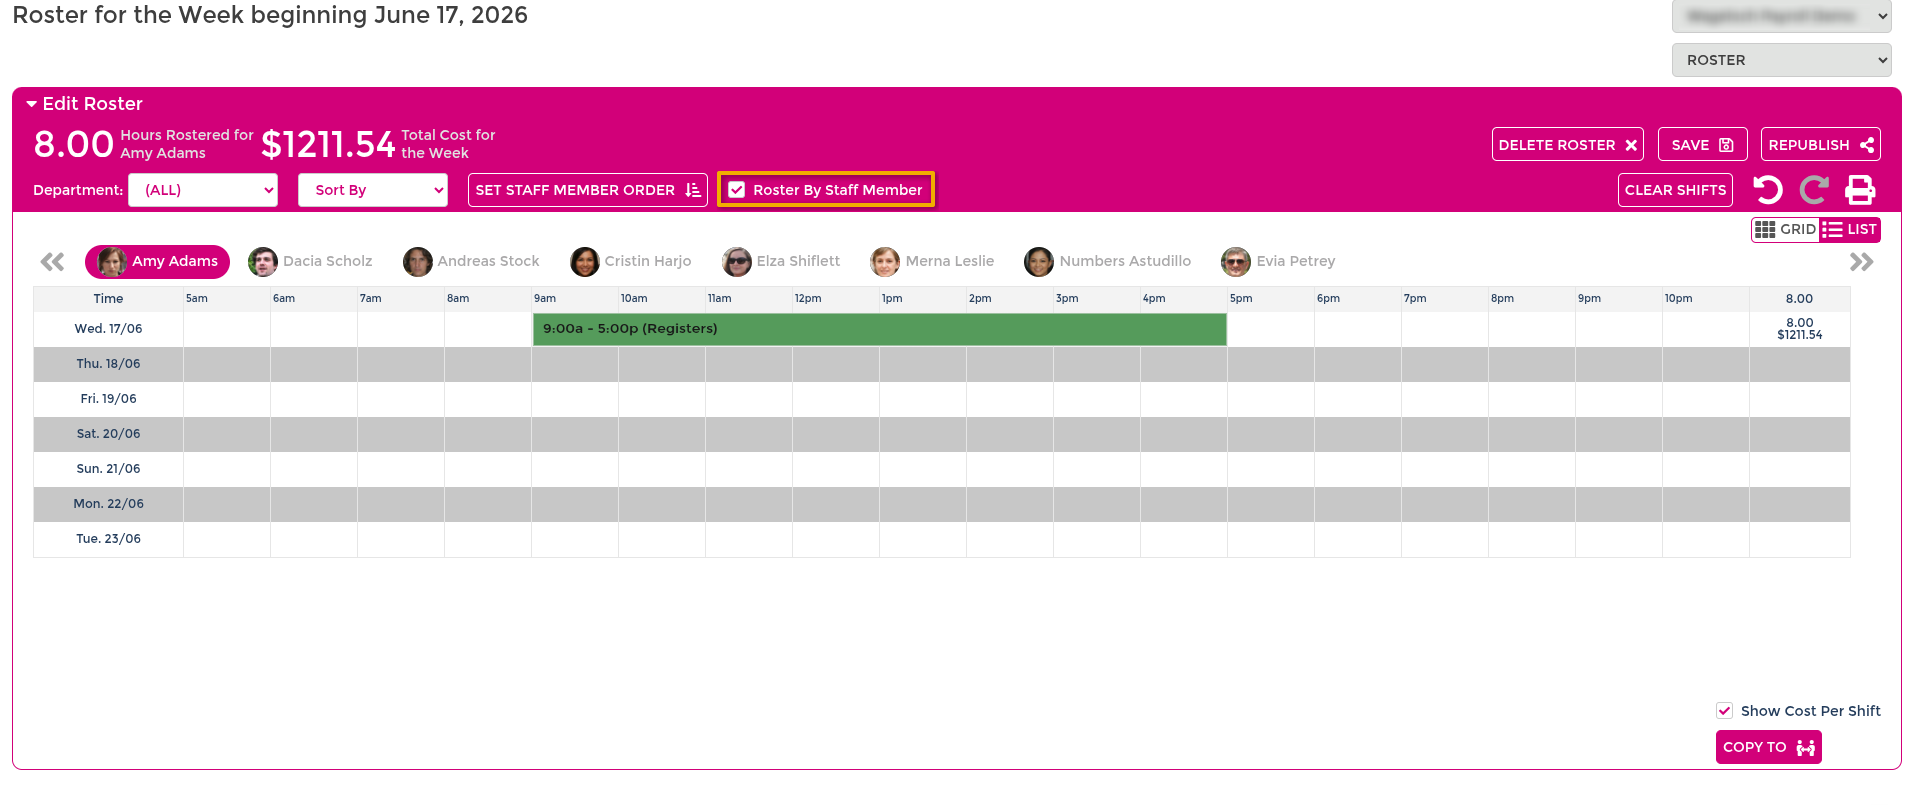
- Enable Roster by Staff Member in the top bar.
- Confirm employee names run left to right and dates run down the page.
Add shifts in staff view
- Select the employee.
- Drag from start to finish time to create a shift.
- Adjust shift edges as needed by dragging arrow handles.
Copy shifts to other staff
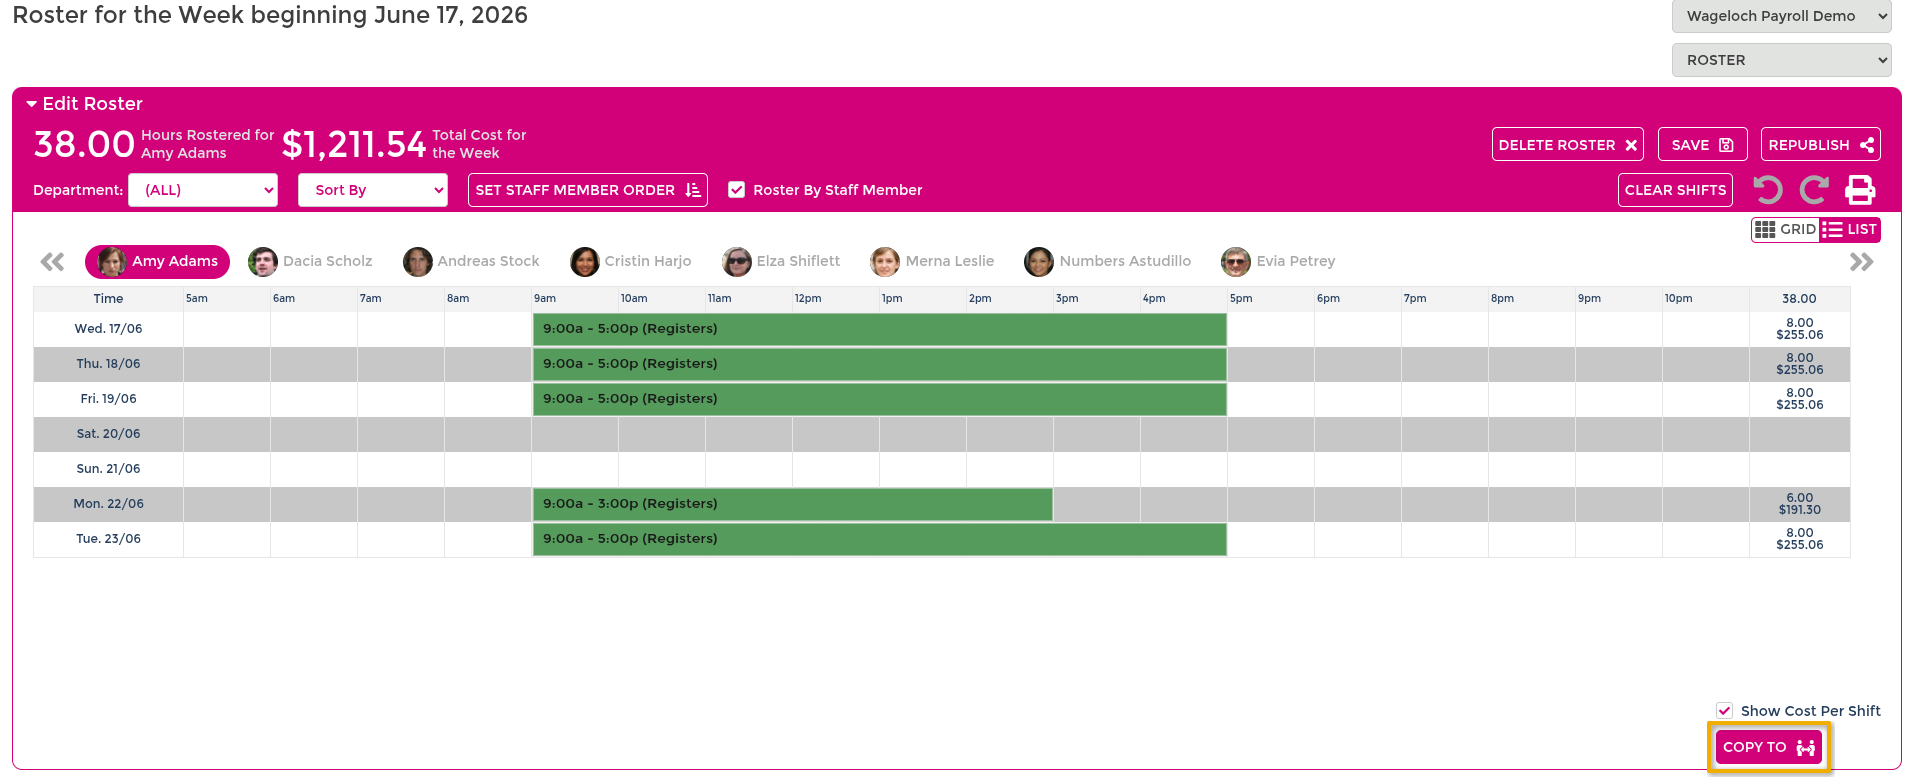
- Build the source employee schedule.
- Select COPY TO (bottom-right).
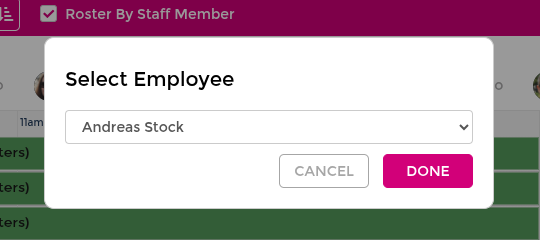
- Select another employee.
- Select Done.
If using departments, confirm both employees are in the same department. See Departments.
Edit or delete shifts
Edit in Daily/Staff view:
- Hover over shift edges.
- Drag to adjust times.
- Select Done.
Delete in Daily/Staff view:
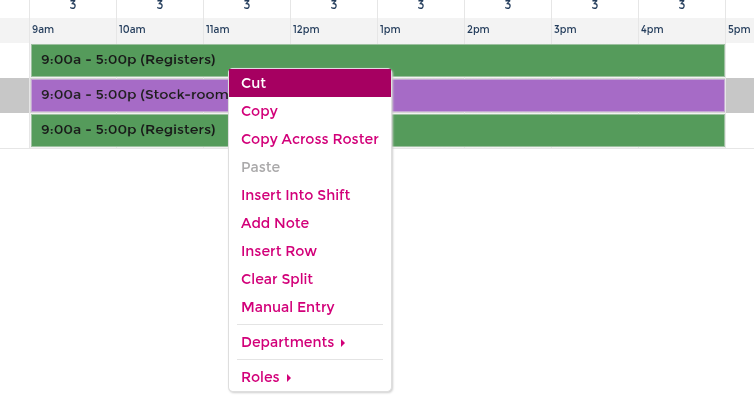
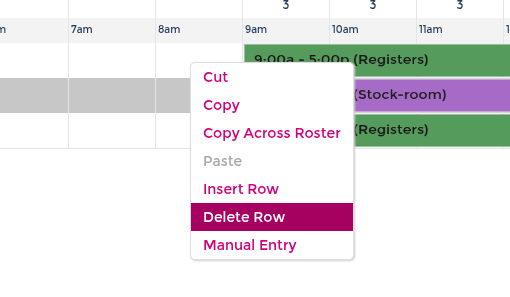
- Right-click a shift and select Cut to remove that shift only.
- Right-click blank row space and select Delete Row to remove the row and shift.
For grid-based planning, pre-publish coverage checks, and managing unassigned shifts across the full period, see Advanced Rostering.