Fingerprint Scanner
2 min read
Fingerprint Scanner
Use this guide to configure fingerprint clocking in Wageloch Time Kiosk on Windows PC.
Set up Time Kiosk for fingerprint clocking
After Wageloch Time Kiosk is installed and you have signed in with admin credentials:
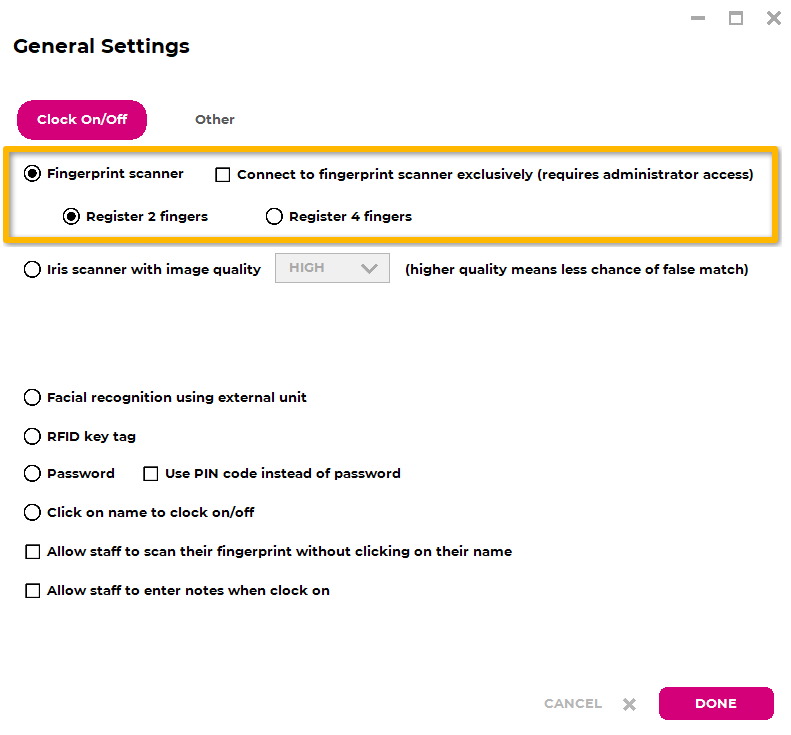
- Select Fingerprint Scanner as the clock method.
- Choose the fingerprint count:
- 2 fingers (one from each hand), or
- 4 fingers (two from each hand).
- Open Other from the top menu.
- Select Get current time from computer time.
- Select Done to save settings.
Staff will now appear in the list with a question mark indicator to show they are waiting for fingerprint registration.
Register fingerprints
- Select the employee name from the Time Kiosk list.
- Ask the employee to place one finger flat on the scanner with light pressure.
- Do not roll the finger while scanning.
- Repeat the same finger scan four times in total.
- When prompted, repeat the process with the second finger.
When registration is complete, the employee should no longer show a question mark beside their name.
Clock in and clock out
To clock in or out using the fingerprint scanner:
- Open Wageloch Time Kiosk.
- Select your name.
- Follow on-screen prompts and place your finger flat on the scanner.
- Apply light pressure until the scan is accepted.
The scanner flashes during validation, and a confirmation message appears when clocking is successful.
Delete fingerprint data
Permission requirement
Only users with management permissions can delete fingerprint records.
- Open Wageloch Time Kiosk.
- Select the Settings cog in the top-right corner.
- Sign in with management credentials when prompted.
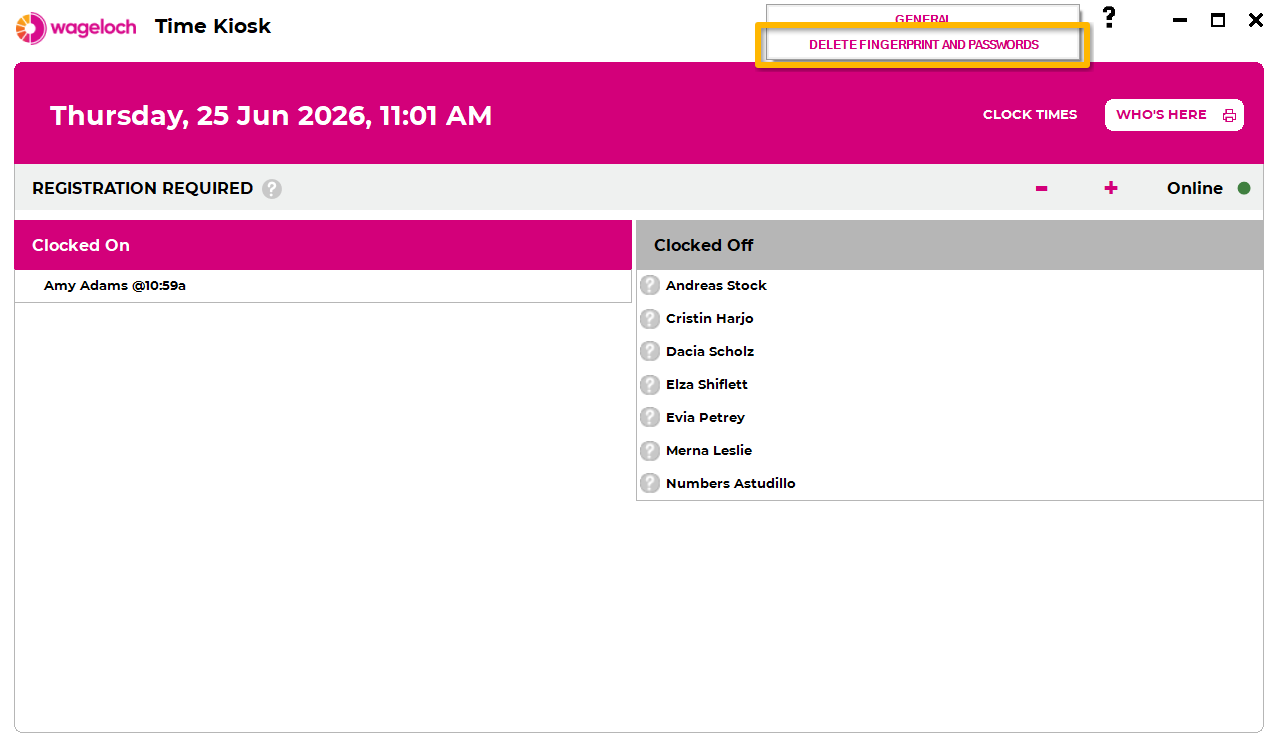
- Select Delete Fingerprints.
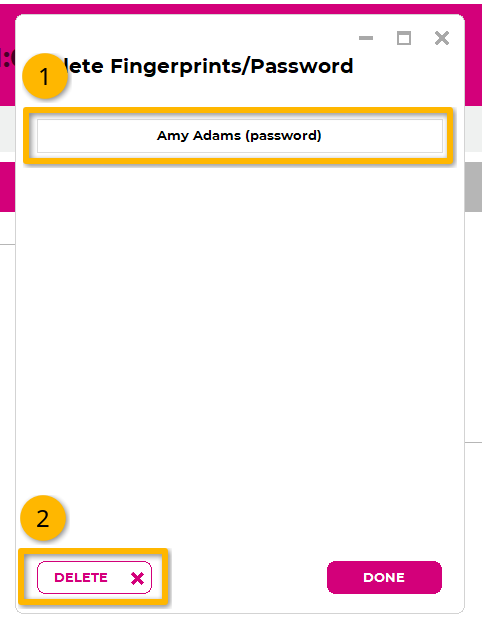
- Select the employee name.
- Select Delete.
- Confirm the deletion prompt.
- Select Done.
After deletion, the employee appears with a question mark indicator again and is ready to be re-registered.