
Completing timesheets
3 min read
Completing timesheets
Rosters record planned shifts; timesheets record what actually occurred. Review and reconcile them, then finalise each day before submitting to payroll.
Before you start
- Sign in to Wageloch.
- Open Timesheets from the top menu.
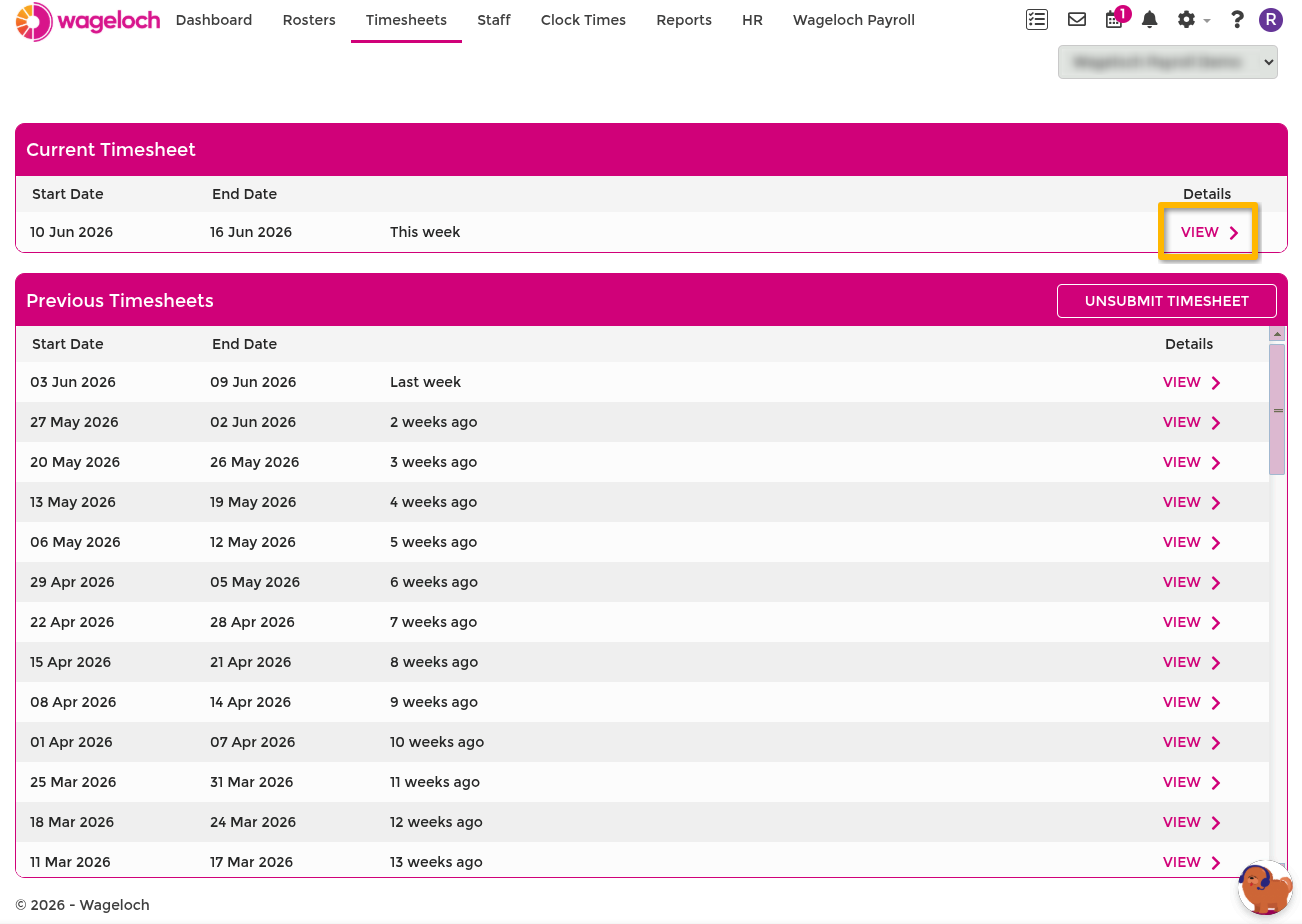
- Select the current pay period.
Understand what you are seeing
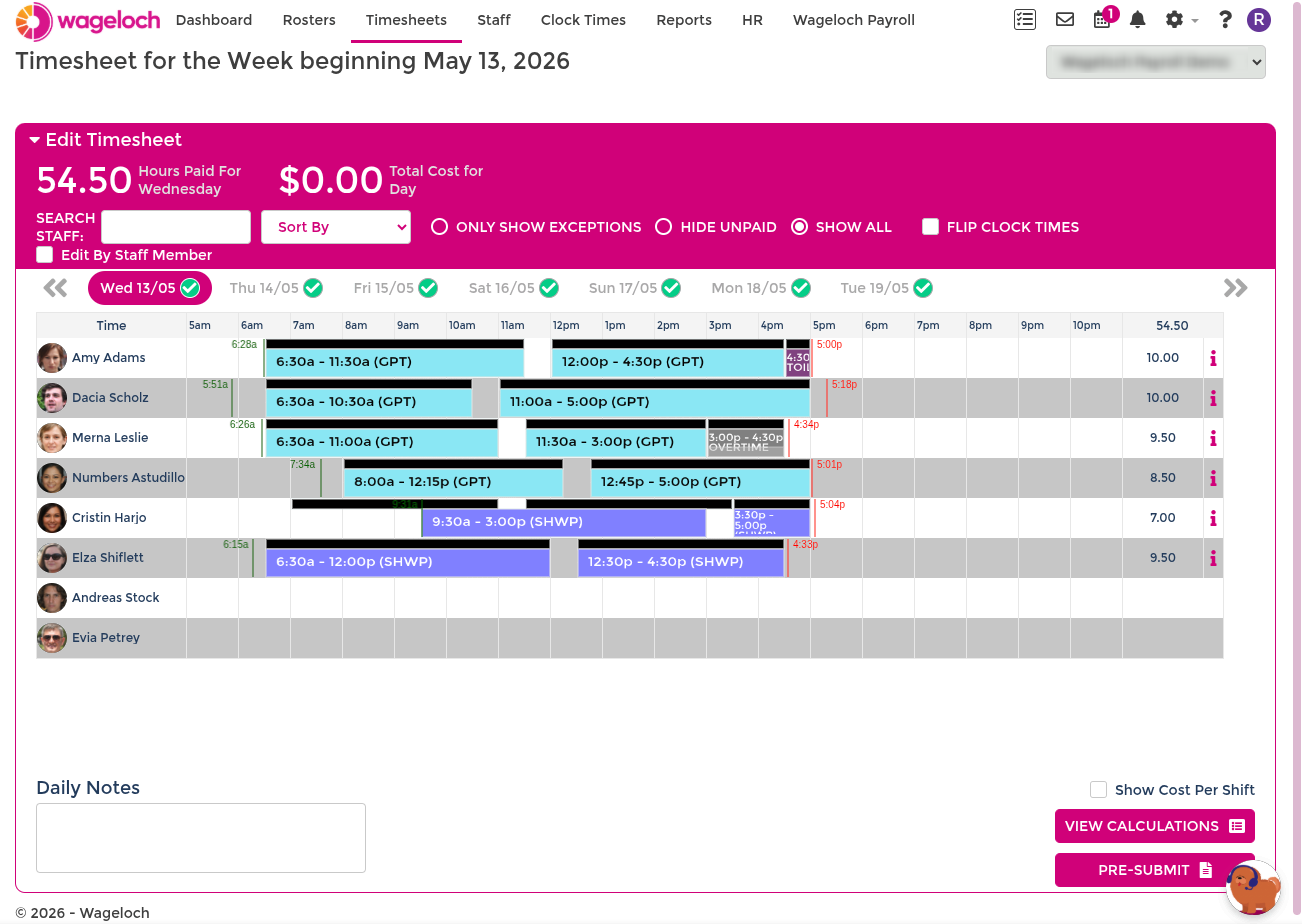
When reviewing a day, you may see:
- A black shift bar: rostered shift (planned).
- A coloured shift bar: paid shift (actual timesheet entry).
- Green and red clock markers: employee clock-in and clock-out times.
Use these indicators to determine whether changes are needed.
Adjust shift times
- Open the required day.
- Compare the coloured bar to recorded clock times.
- Drag shift edges to match what occurred.
- Leave small, non-material variances unchanged if that matches your payroll policy.
If staff forgot to clock in or out, clock markers may be present without a complete payable shift bar. Add or adjust the coloured bar so payable time is correct.

Assign leave and roles
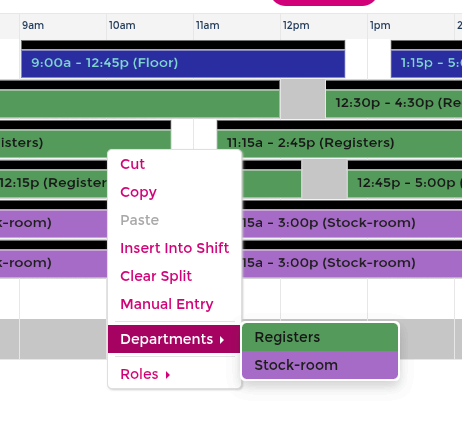
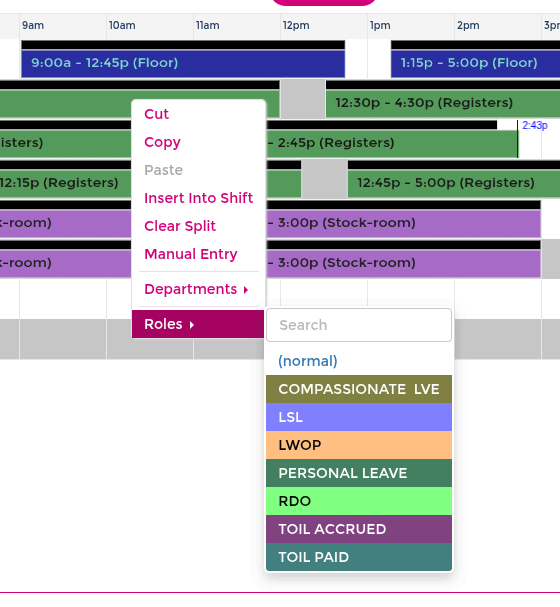
Use right-click actions on shifts to assign the correct leave or pay role.
Common scenarios:
- Full-shift leave: assign the relevant leave type (for example personal or annual leave).
- Part-shift leave: split the shift into ordinary time plus leave portion.
- Casual no-show: clear the shift where leave is not payable.
- Right-click the target shift segment.
- Select the required leave type or role.
- Save the day after changes.
For leave template setup and application details, see Leave Templates.
Finalise daily timesheets
- Confirm all staff entries are correct for the day.
- Select Finalise (top-right).
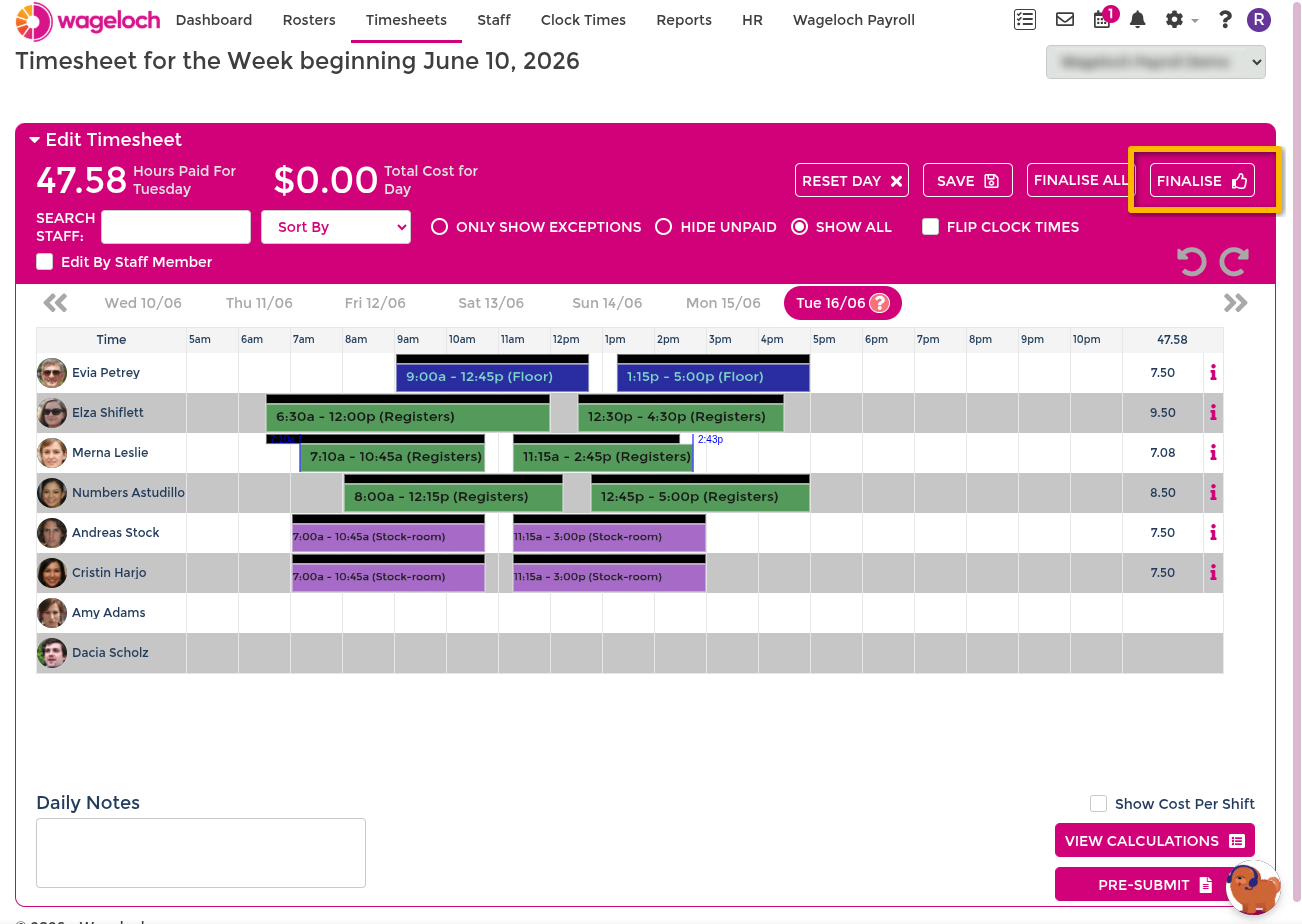
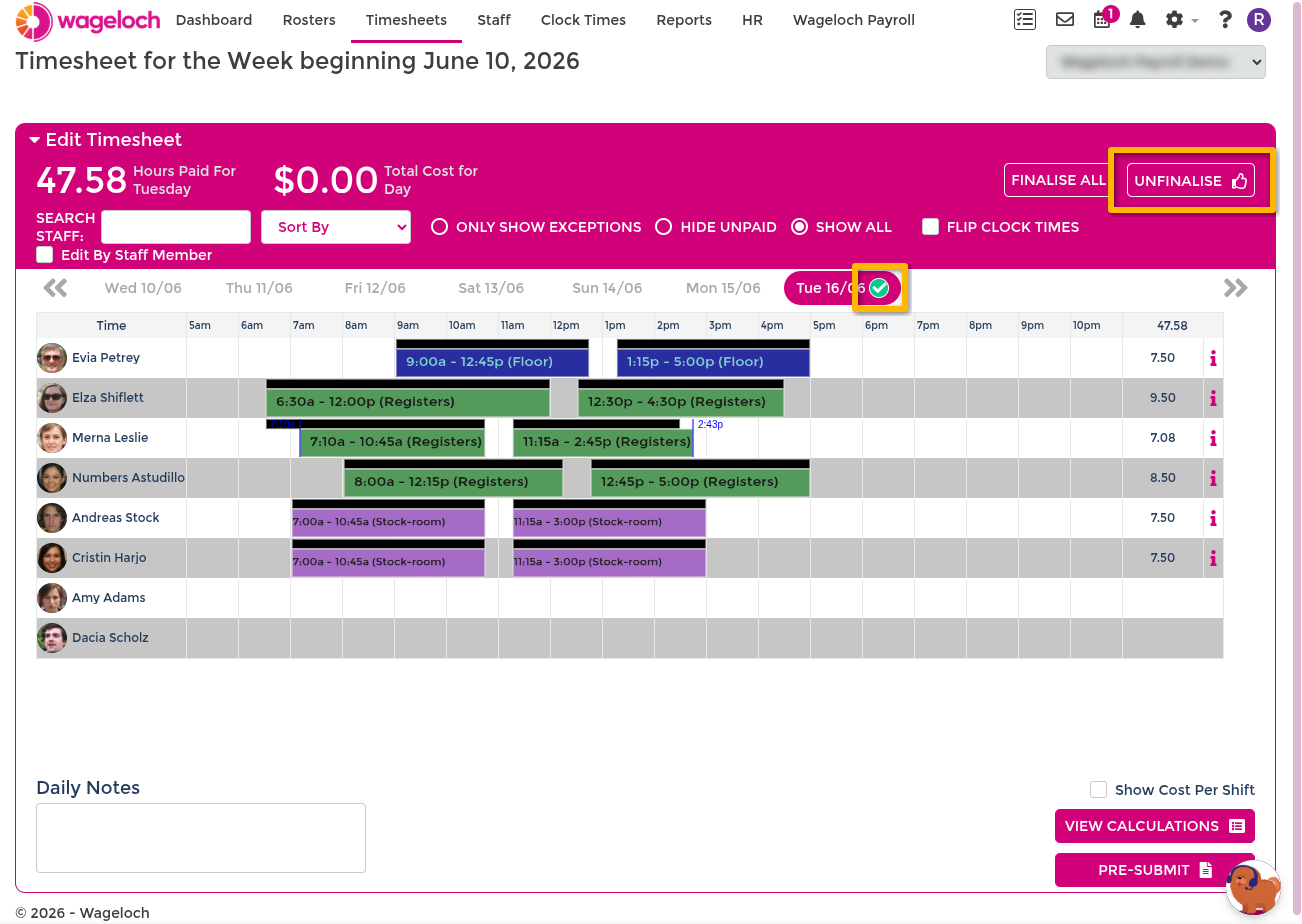
- Confirm the green tick appears for that date.
If updates are needed later, select Unfinalise, apply changes, then finalise again.
Pre-Submit and submit the period
- After all days and departments are finalised, select Pre-Submit.
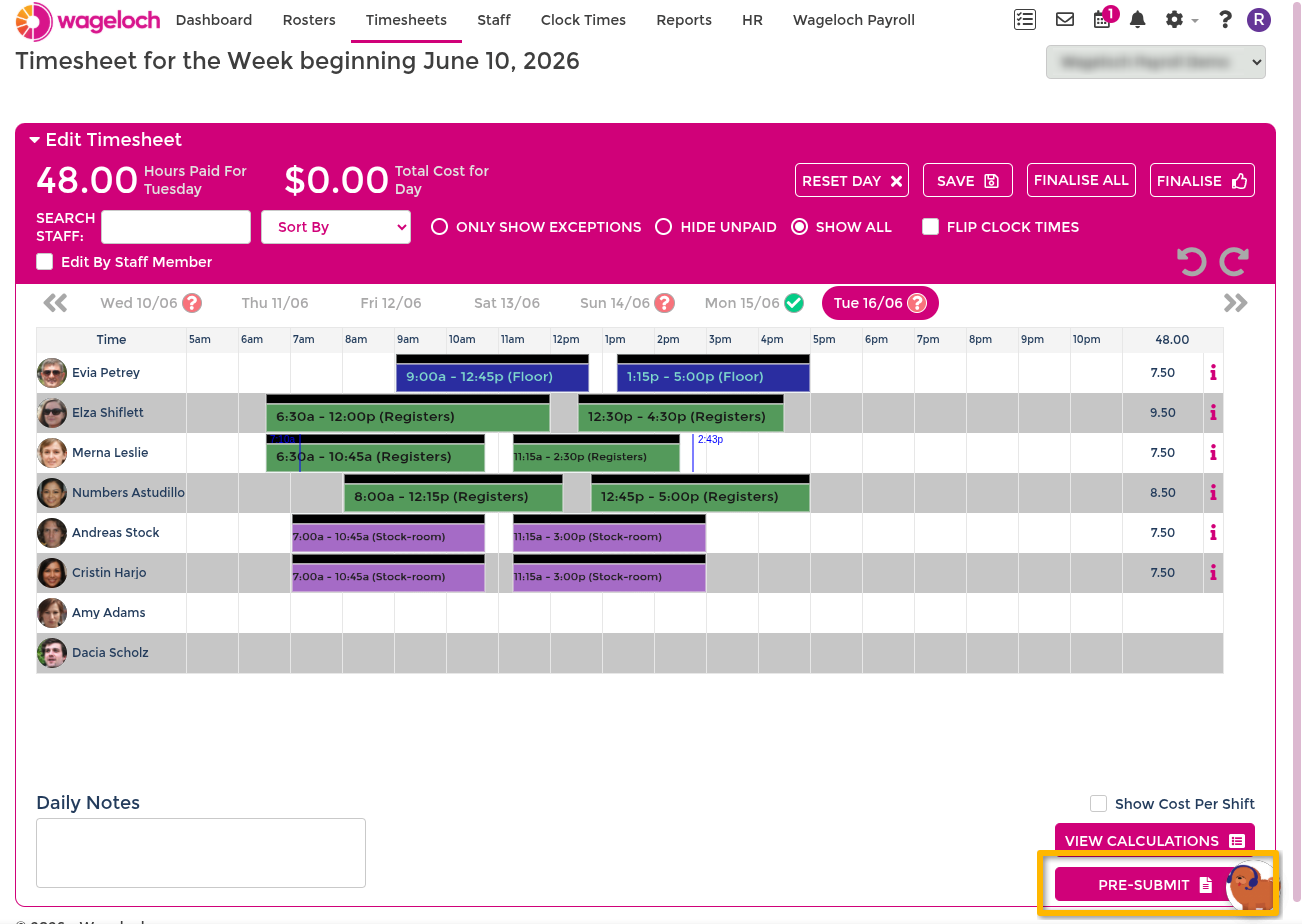
- If prompted about unfinalised days or departments, stop and resolve those first.
- Review the generated timesheet summary carefully.
- Select Submit when complete.
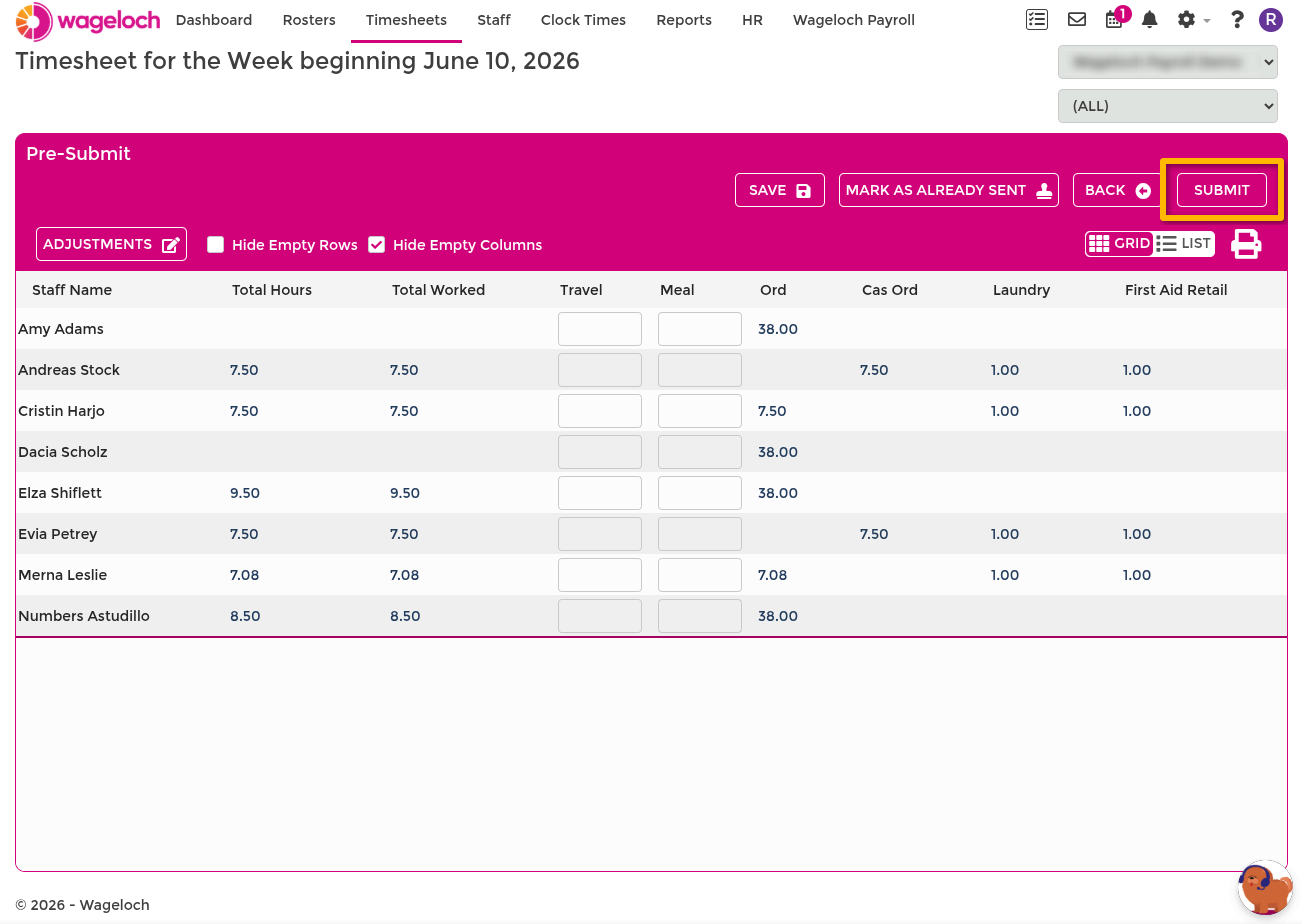
Submission sends data either directly to payroll integration or to your payroll export hand-off process.
If you need to undo a submission after it has been completed, see Unsubmit a timesheet.
Interpreting mobile and clock markers
Different marker styles indicate different clocking patterns.
- Standard Green and Red Time Markers: Typically indicate standard clock-in and clock-out activity.
- Solid Green and Red Dots: Usually indicate mobile app clock events with location data. Selecting the marker can open a map location.
- Outlined Green and Red Dots With Manual Entry Note: Indicate manual input was used on the mobile app.
- Outlined Dots With Proximity Alert: Indicate clocking outside the configured site radius when proximity checks are enabled. See Proximity Alerts.
- Outlined Dots With Server Time Alert: Indicate server-time variance between recorded and received clock data. Common causes include delayed sync from offline devices.
