
Manage staff leave
8 min read
Manage staff leave
Use Leave in the Manager tab to decide on leave requests, review booked leave and book leave for your employees. Changes you make here update Leave/Unavailability in the web app straight away, including attachments you add for an employee.
Before you start
- Log in to the Wageloch mobile app with a manager account and confirm you can see the Manager tab.
- Employees submit their own requests, so their requests appear under Pending Requests.
- If you plan to attach a certificate for an employee, have the photo or file ready on your phone, or be ready to take a photo.
Open Manager Leave
-
Open the Wageloch mobile app.
-
Select the Manager tab.
-
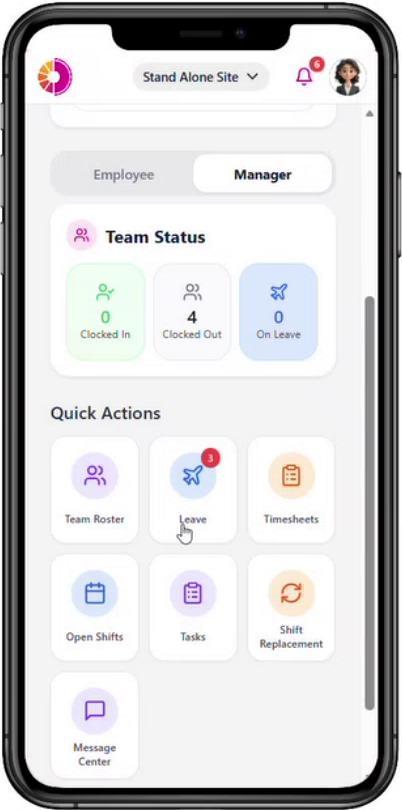
Under Quick Actions, select Leave.
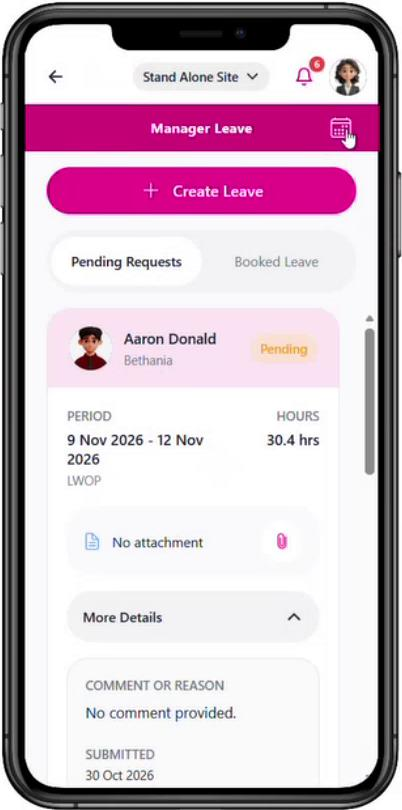
The Manager Leave screen opens. It shows a calendar icon at the top right, a Create Leave button, and two tabs: Pending Requests and Booked Leave.
Review pending requests
Select the Pending Requests tab to see requests that wait for your decision. Each request shows:
- The employee's name and location, with a Pending status.
- The Period requested and the leave type, for example LWOP.
- The total Hours.
- The attachment, or No attachment.
- A More Details section.
- Decline and Approve buttons.
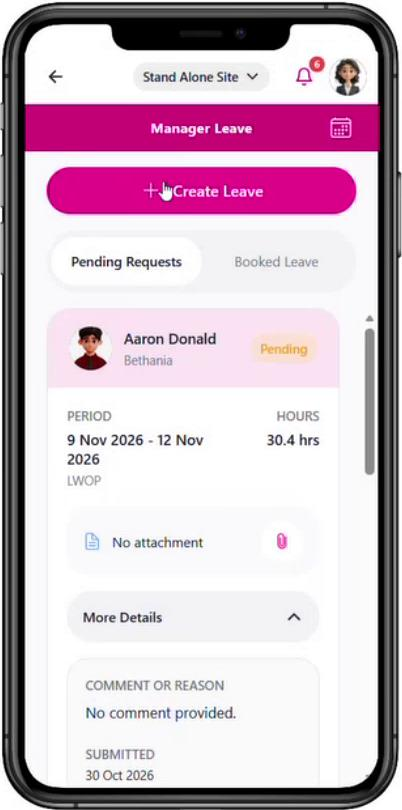
To read the employee's reason, tap More Details. It shows the employee's Comment or Reason and the date the request was Submitted. Tap More Details again to collapse it.
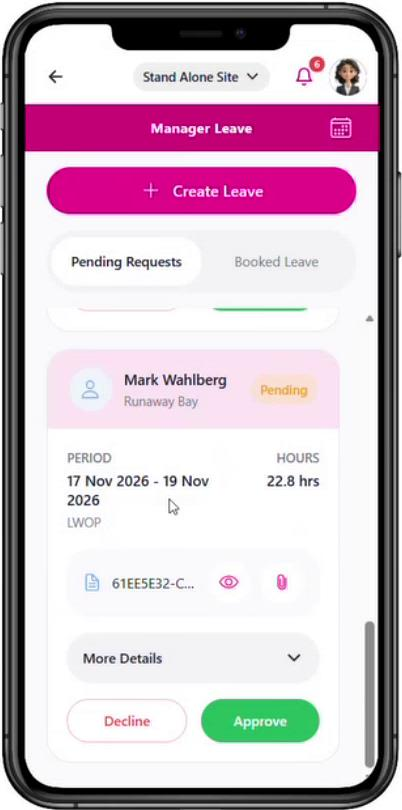
To open an attachment, tap the eye icon next to the file name.
Attach a certificate for an employee
If an employee forgets to attach a medical certificate or other document, attach it for them.
-
On the employee's pending request, tap the paper clip icon.
-
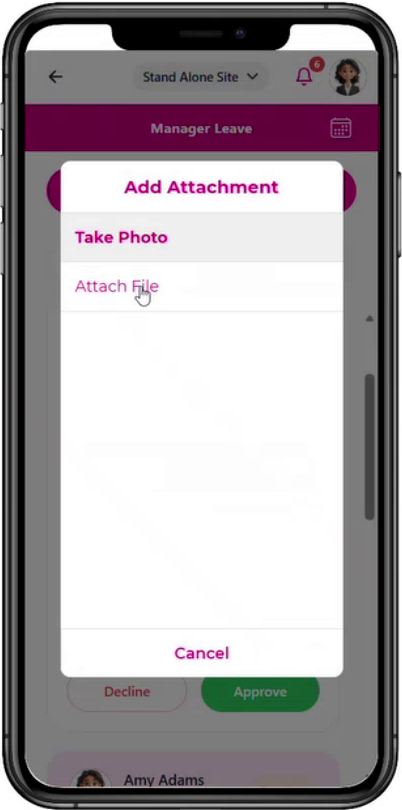
In Add Attachment, select Take Photo or Attach File.
-
Choose the photo or file.
-
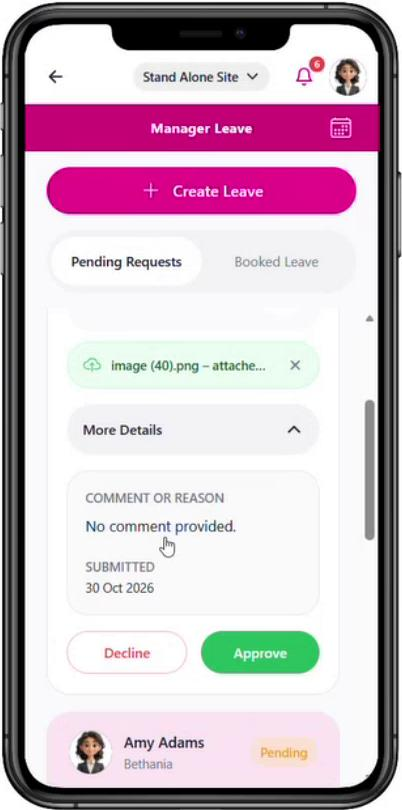
Check that the file name appears on the request.
-
Approve or decline the request.
The attachment saves with the leave. To remove a file before you approve, tap the x next to the file name.
Approve or decline a request
To approve a request:
-
On the request, select Approve.
-
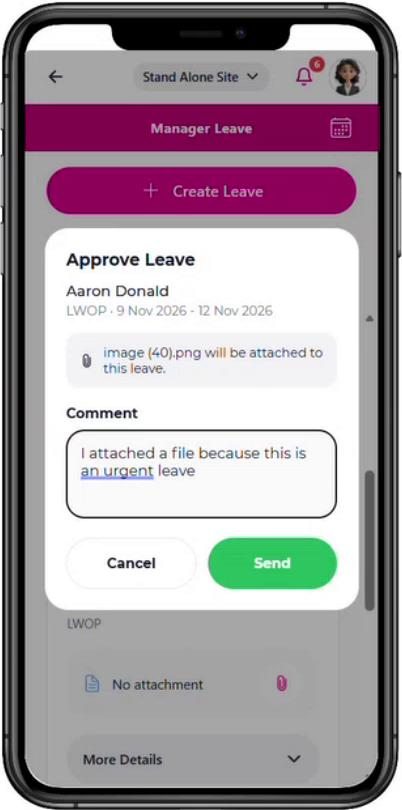
Check the employee, leave type and period in the Approve Leave pop-up. If you added an attachment, the pop-up shows that the file will be attached.
-
Enter a Comment if needed.
-
Select Send. Select Cancel to go back without approving.
-
Select OK on the Leave Approved message.
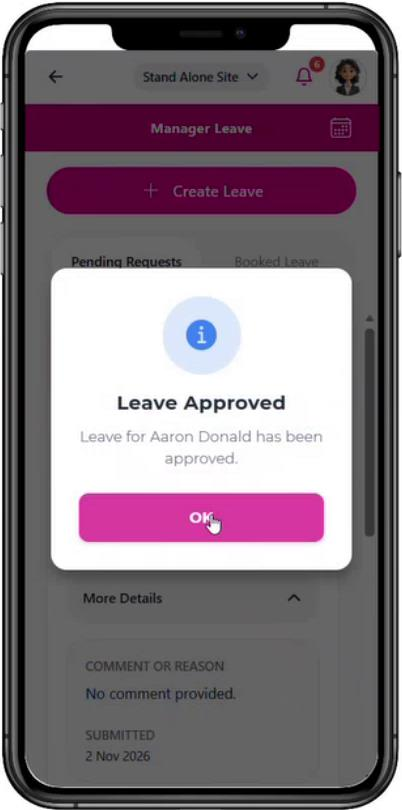
The request leaves Pending Requests and appears in Booked Leave. The employee sees your comment on their leave in the mobile app.
To decline a request:
-
On the request, select Decline.
-
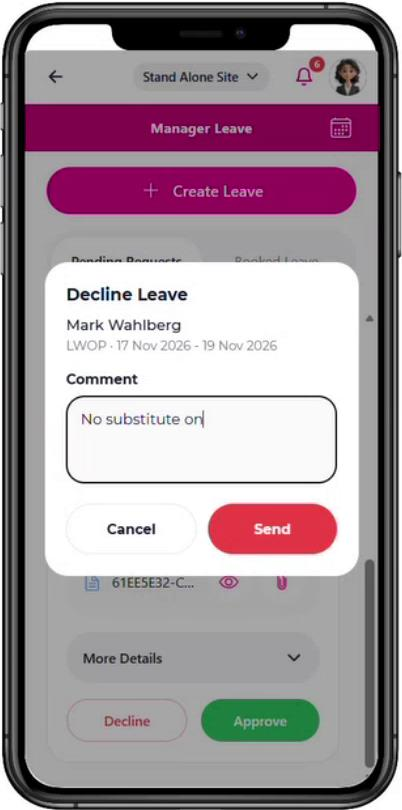
In the Decline Leave pop-up, enter a Comment with the reason. The comment is optional.
-
Select Send. Select Cancel to go back without declining.
-
Select OK on the Leave Declined message.
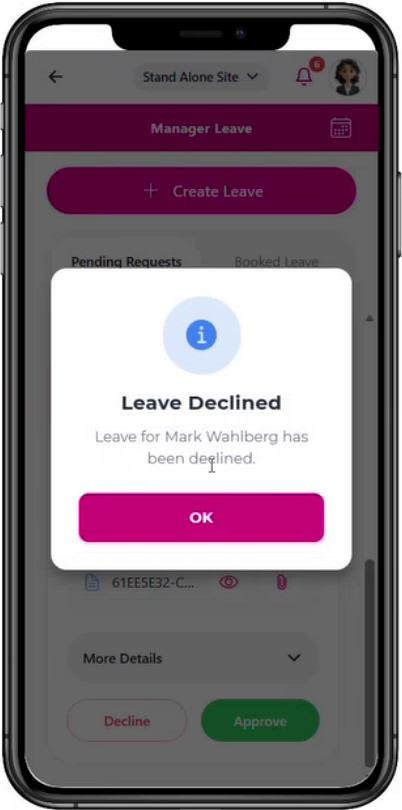
The request leaves Pending Requests. The employee receives a notification that their leave is declined.
TIP
Add a comment when you decline, so the employee knows why. Add one when you approve with an attachment you added, so the employee knows a file is on their leave.
Review booked leave
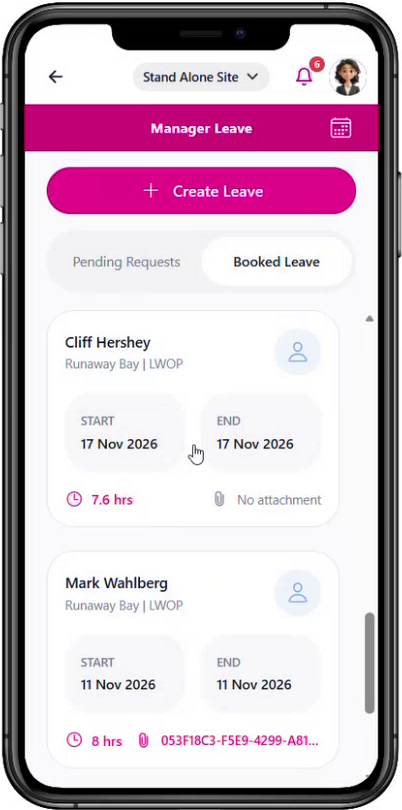
Select the Booked Leave tab to see approved leave, listed from the oldest to the newest date. Each entry shows the employee's name, location and leave type, the Start and End dates, the hours, and any attachment.
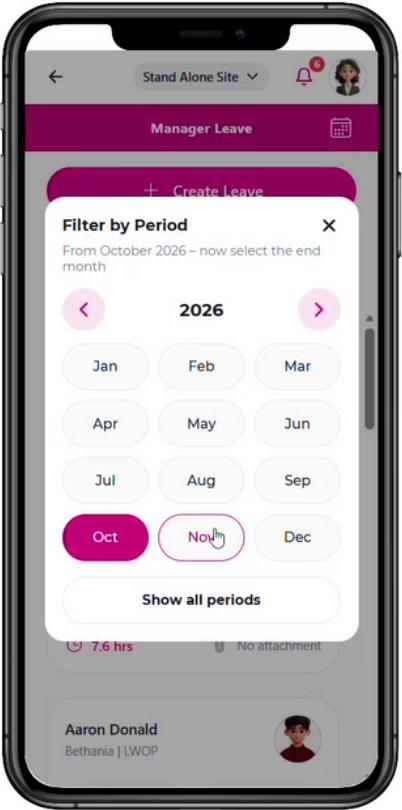
To filter by period:
-
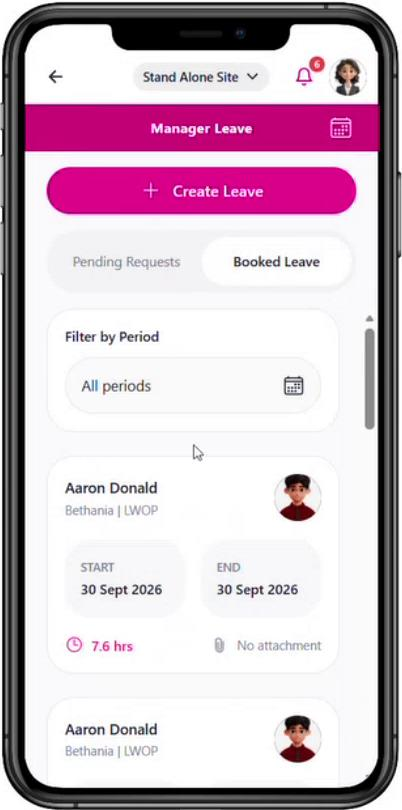
Under Filter by Period, tap the period field. It shows All periods by default.
-
Use the arrows to choose the year, then select the start month.
-
Select the end month, for example Oct to Nov.
-
To see all leave again, open the filter and select Show all periods.
Use the leave calendar
The calendar shows who is on leave on any day, and lets you edit or cancel booked leave.
-
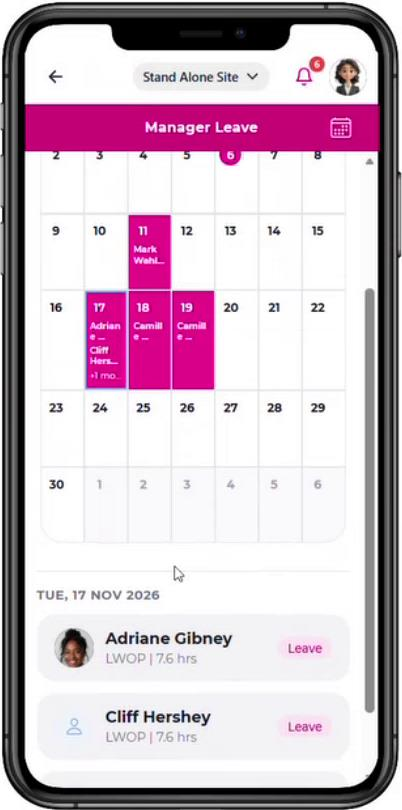
On the Manager Leave screen, tap the calendar icon at the top right.
-
Use the arrows to move between months. Days with leave show in pink with the employee's name.
-
Tap a day to see the employees on leave, with their leave type and hours.
-
Tap an employee to open Leave Details.
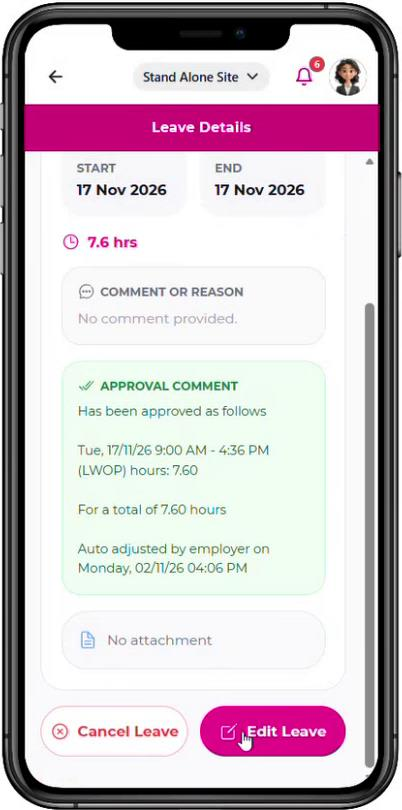
Leave Details shows the leave type, dates, hours, the employee's comment, the approval comment and any attachment. Select Edit Leave to change the leave, even if it is already approved. Select Cancel Leave to cancel it.
If nobody is on leave, the calendar shows "Nobody is on leave on this day".
Create leave for an employee
Leave you create is approved automatically. It does not go to Pending Requests.
-
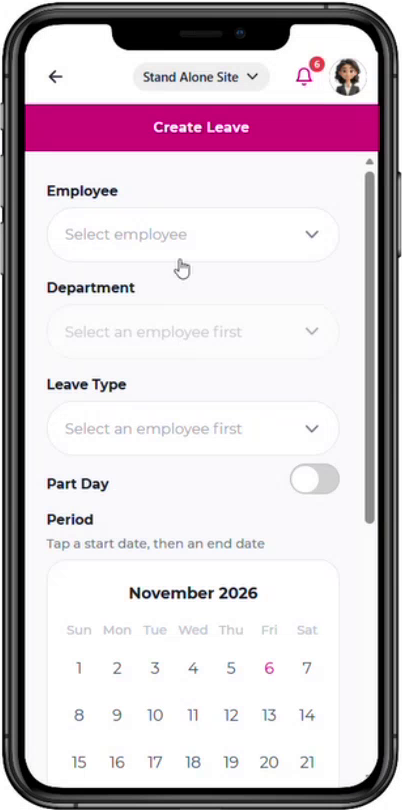
On the Manager Leave screen, select Create Leave.
-
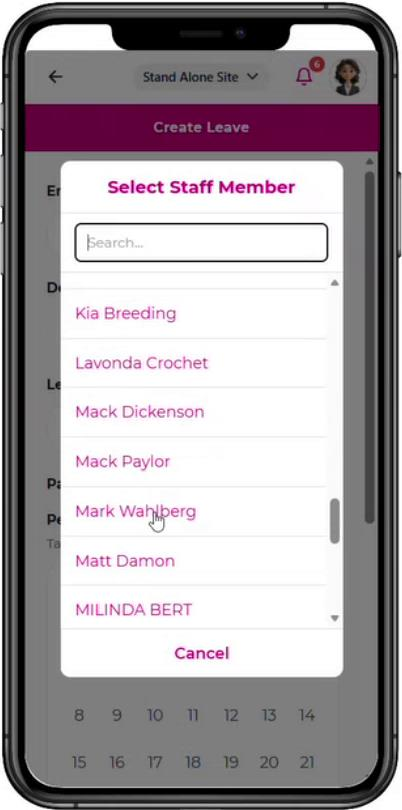
Under Employee, select the employee. You can search the list by name.
-
Check the Department, which fills in for the employee. Change it if needed.
-
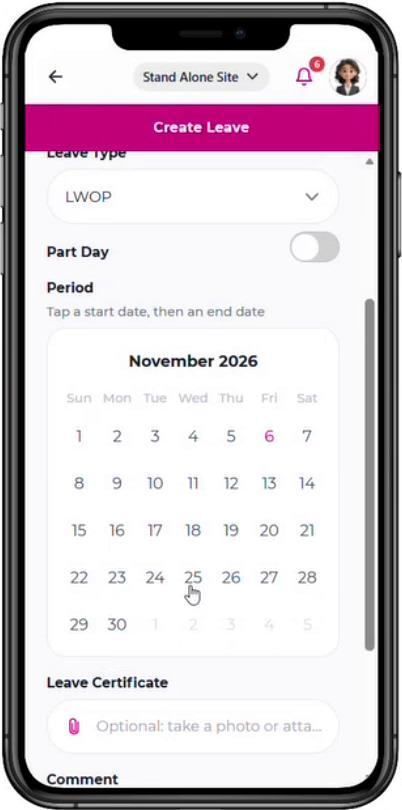
Select the Leave Type, for example LWOP.
-
Under Period, tap the start date, then the end date. For a single day, tap the same date twice.
-
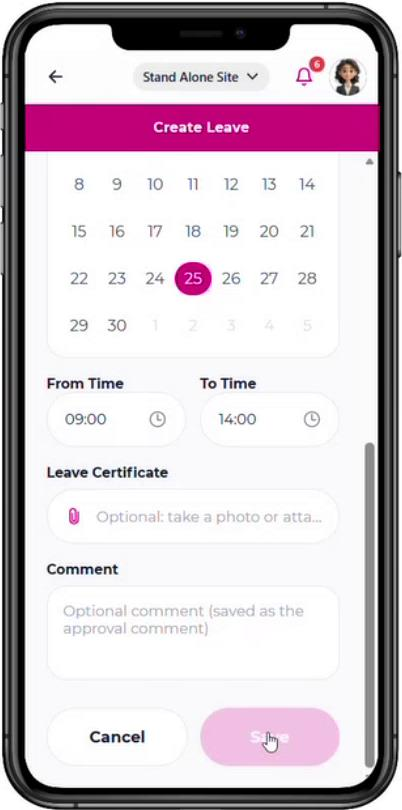
For leave shorter than a full day, turn on Part Day, set From Time and To Time, then select Confirm.
-
Optional: tap Leave Certificate and take a photo or attach a file.
-
Optional: enter a Comment. It saves as the approval comment.
-
Select Save.
-
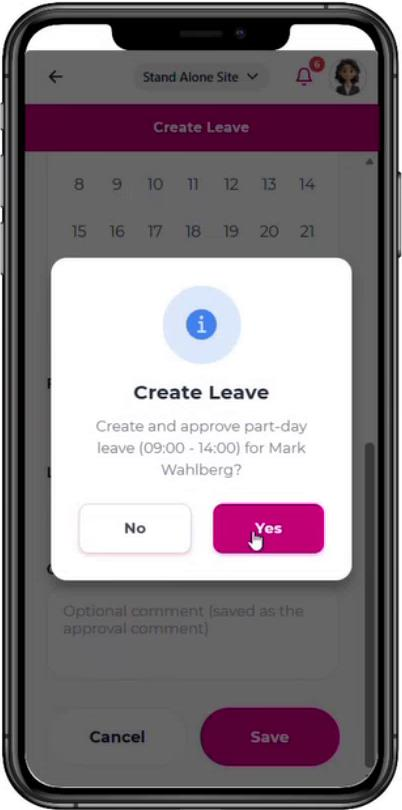
Check the employee and times in the confirmation, then select Yes. Select No to go back.
- Select OK on the Leave Created message.
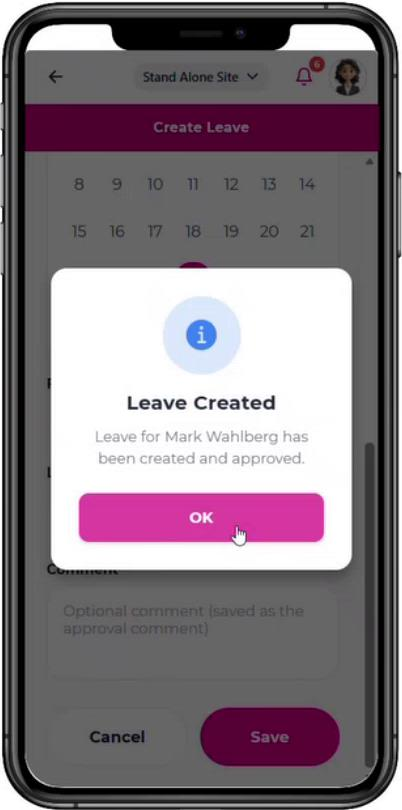
The leave appears straight away in Booked Leave and the calendar.
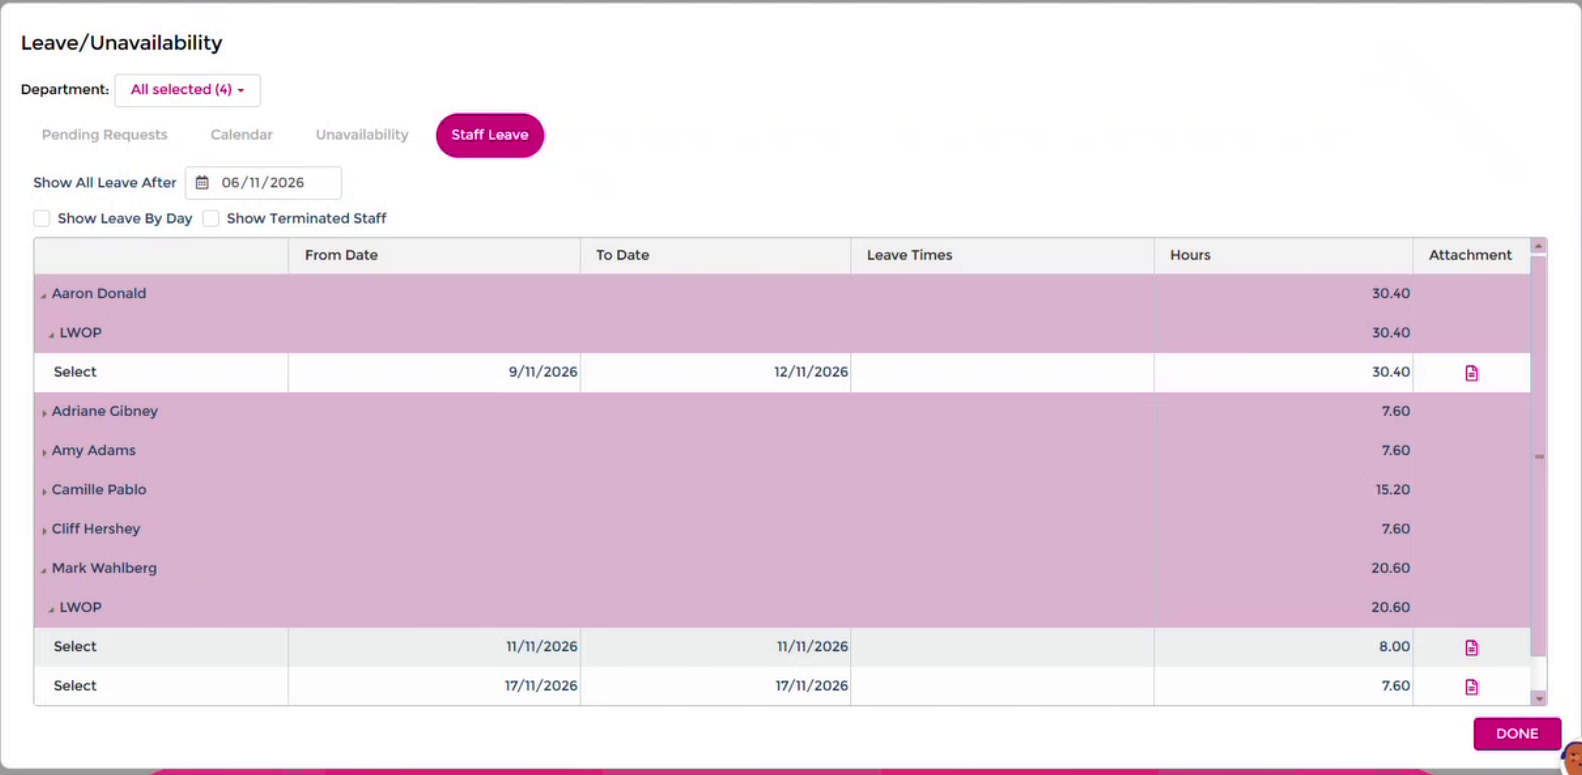
In the web app, open Leave/Unavailability and select Staff Leave to see leave you approved or created in the mobile app, including dates, hours and attachments. Requests you approved or declined in the mobile app no longer appear under Pending Requests there.
Troubleshooting
You cannot see Leave in the Manager tab. Log in with a manager account and select the Manager tab, not the Employee tab. Check you are on the correct site using the site selector at the top of the screen.
A request is missing from Pending Requests. Approved and declined requests leave this list. Check Booked Leave or the calendar. Check you are on the correct site.
You cannot filter Pending Requests by period. The period filter is only on Booked Leave. Scroll through Pending Requests to find a request.
You need to change approved leave. Open the calendar, tap the day, tap the employee, then select Edit Leave or Cancel Leave.
Leave you created is not in Pending Requests. Manager-created leave is approved when you save it. Look in Booked Leave or the calendar.
For the same tasks in the web app, see Managing leave. To see what employees see when they request leave, see Employee leave in the mobile app.