
Custom fields
3 min read
Custom fields
Custom fields let you collect extra information not covered by default staff profile fields.
You can use custom fields in:
- Onboarding workflows
- Staff card Additional Information
Create a custom field
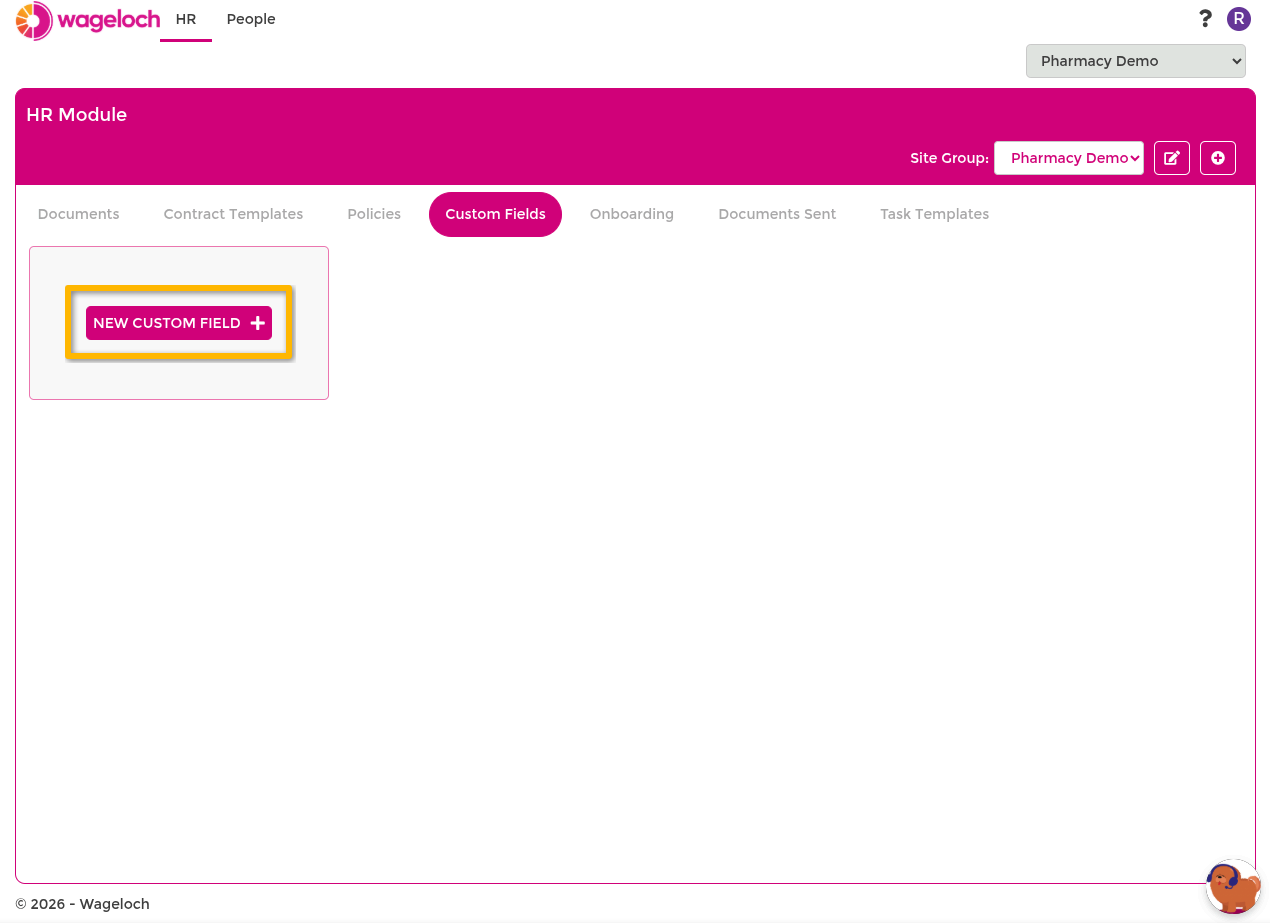
- Go to HR > Custom Fields.
- Select New Custom Field+.
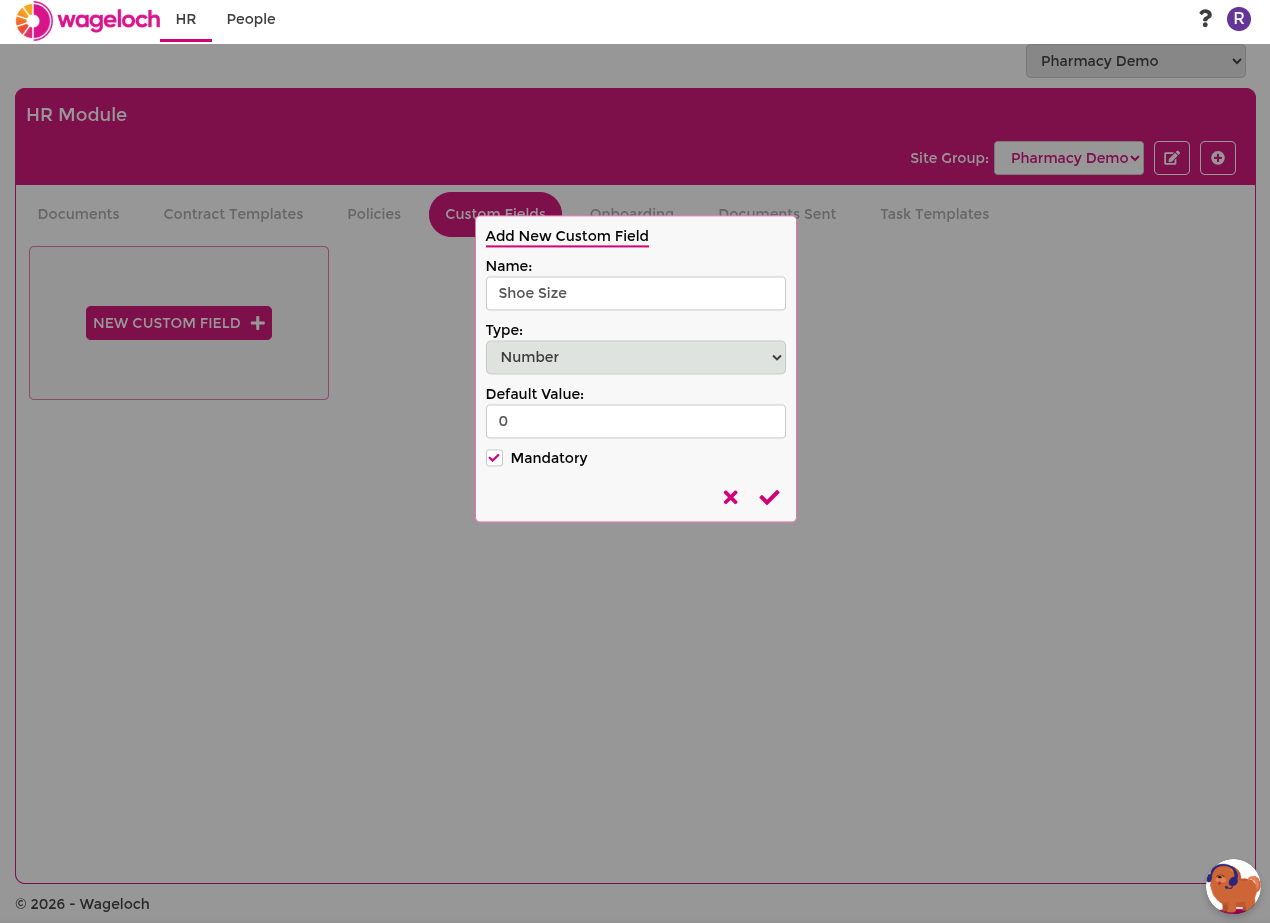
- Enter a field name.
- Select the Field Type.
- Set whether the field is mandatory.
- Select Save.
Field types and when to use them
Use the field type that best matches the answer format you need.
Text
Use for free-form responses containing letters, numbers, and symbols.
Example uses:
- Emergency contact notes
- Uniform size details
- Internal reference notes
Number
Use when the response must be a number.
Example uses:
- Employee payroll number
- Licence number suffix
- Cost centre code
Date
Use for a single calendar date.
Example uses:
- Qualification expiry date
- Probation review date
- Induction completion date
Time
Use for a single time value.
Example uses:
- Preferred shift start time
- Availability start time
Date/Time
Use when both date and time are required.
Example uses:
- Planned induction session time
- Scheduled compliance check time
Option (single choice)
Use when only one answer should be selected from a list.
- Enter an option value.
- Select Add Option+.
- Repeat for each value.
- Select Save.
Example uses:
- Employment type
- Shirt size
- Department assignment
MultiOption (multiple choice)
Use when more than one option can be selected.
- Enter an option value.
- Select Add Option+.
- Repeat for each value.
- Select Save.
Example uses:
- Certifications held
- Equipment issued
- Site access permissions
Flag
Use for yes/no style responses.
Example uses:
- Orientation completed
- Vehicle access approved
- Requires workstation setup
TIP
For Option and MultiOption fields, keep option names short and consistent so reporting and filtering are easier.
Use custom fields in onboarding
Custom fields can be included in onboarding stages so staff can complete required details during onboarding.
- Open Onboarding workflows.
- Edit the stage where information should be captured.
- Add the required custom fields.
- Save the stage.
INFO
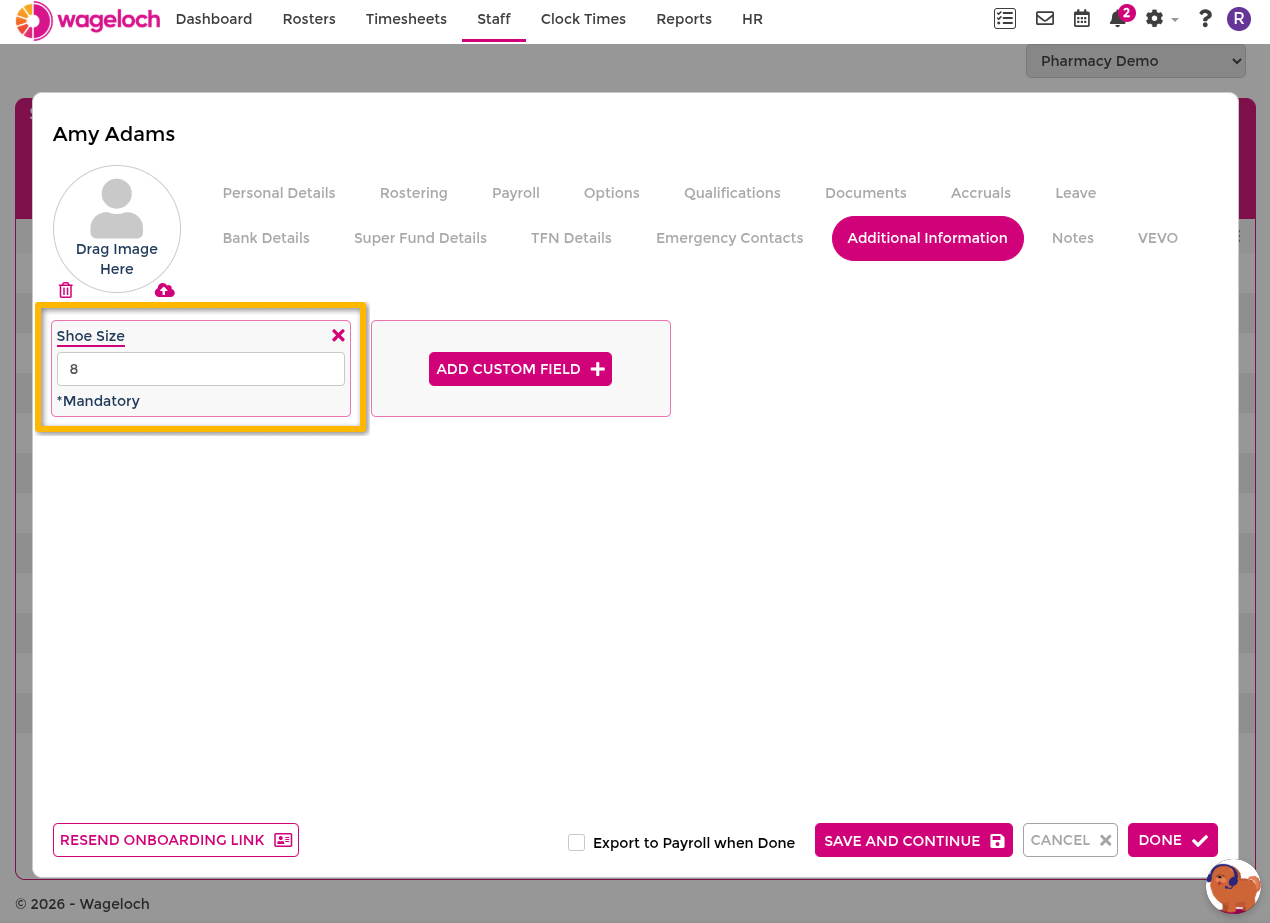
When onboarding is sent, custom field responses are stored under the employee's Additional Information area after completion.
Add custom fields in staff cards
Use this when you need to capture or update information outside the onboarding flow.
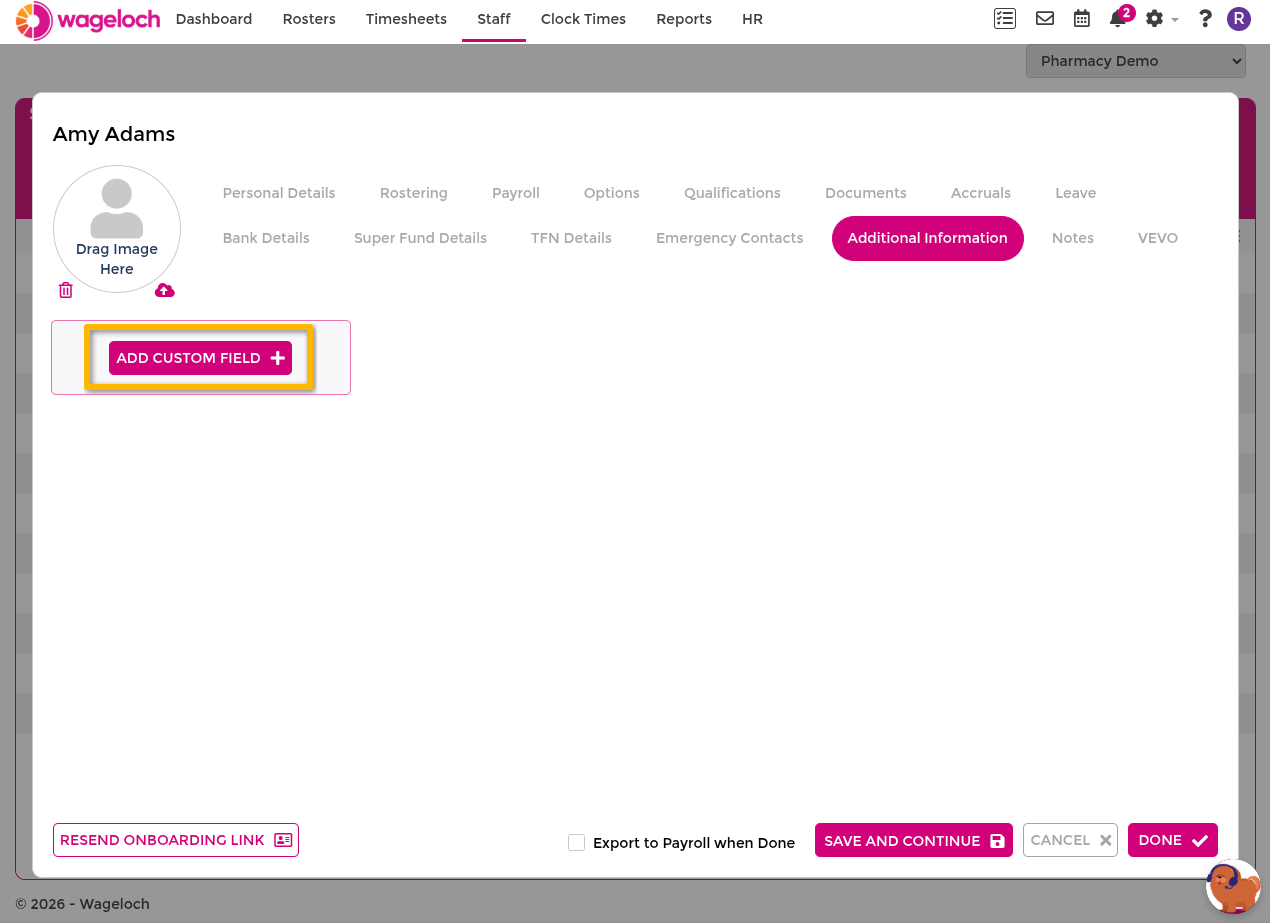
- Go to Staff.
- Open the employee record.
- Select Additional Information.
- Select Add Custom Field+.
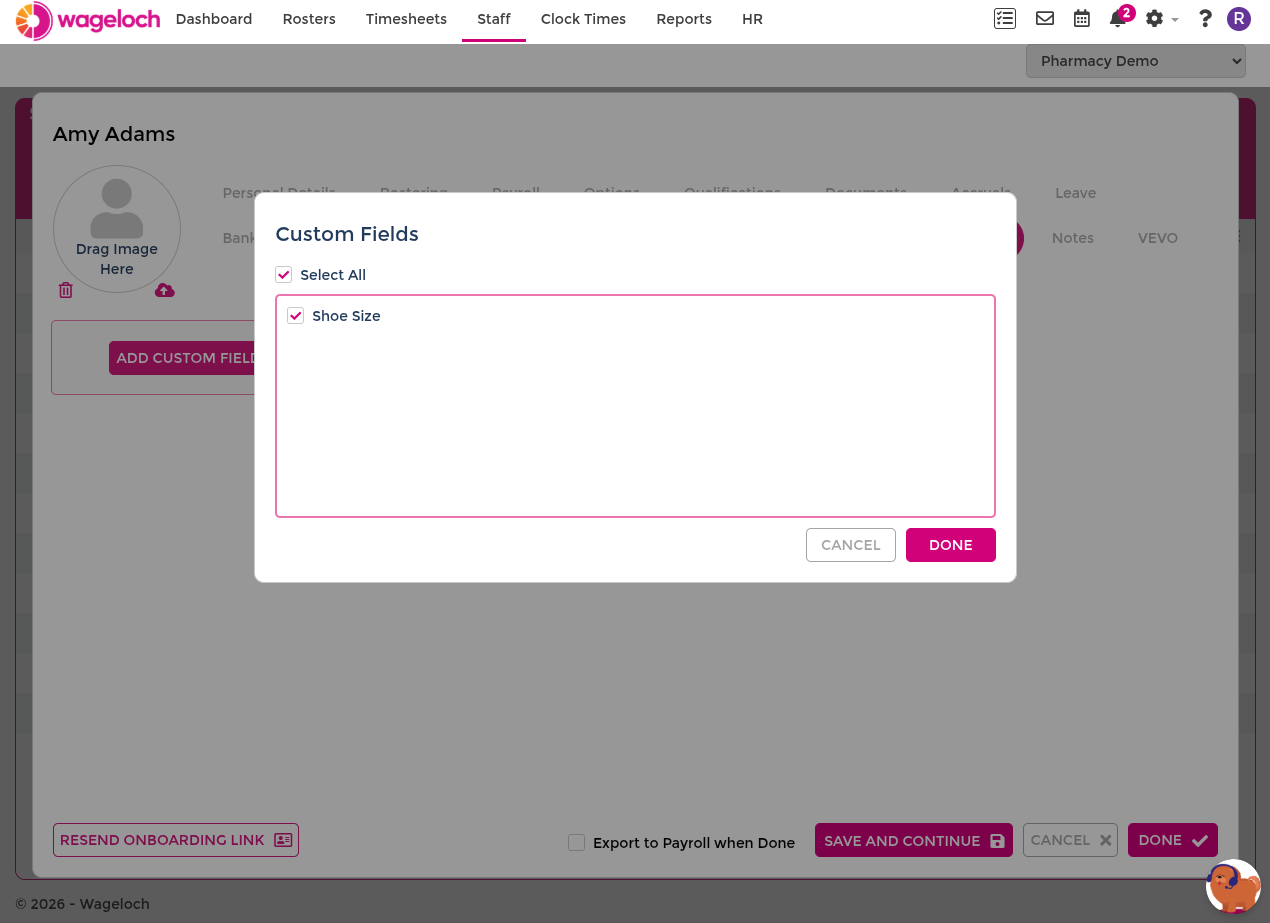
- Choose the fields to add.
- Enter or update values.
- Select Done to save.
Edit existing custom fields
- Go to HR > Custom Fields.
- Select Edit on the field.
- Update name, mandatory setting, or options.
- Select Save.
WARNING
Changing option values can affect how existing records appear. Review current usage before making large option changes.