
Advanced rostering
4 min read
Advanced rostering
Wageloch advanced rostering features support stronger roster control and clearer staff communication, with better pre-publish checks.
Three core features support advanced rostering workflows:
- Grid View: Review staffing across days and employees in one matrix to quickly identify coverage gaps, overstaffing, and unassigned shifts.
- Roster Shift Confirmation: Require selected staff or pay groups to accept or decline shifts after publishing.
- Shift Notes: Attach shift-level instructions that staff can view in roster emails, Staff Portal, and the mobile app.
If you are creating a roster from scratch, start with Creating Rosters first.
Grid view
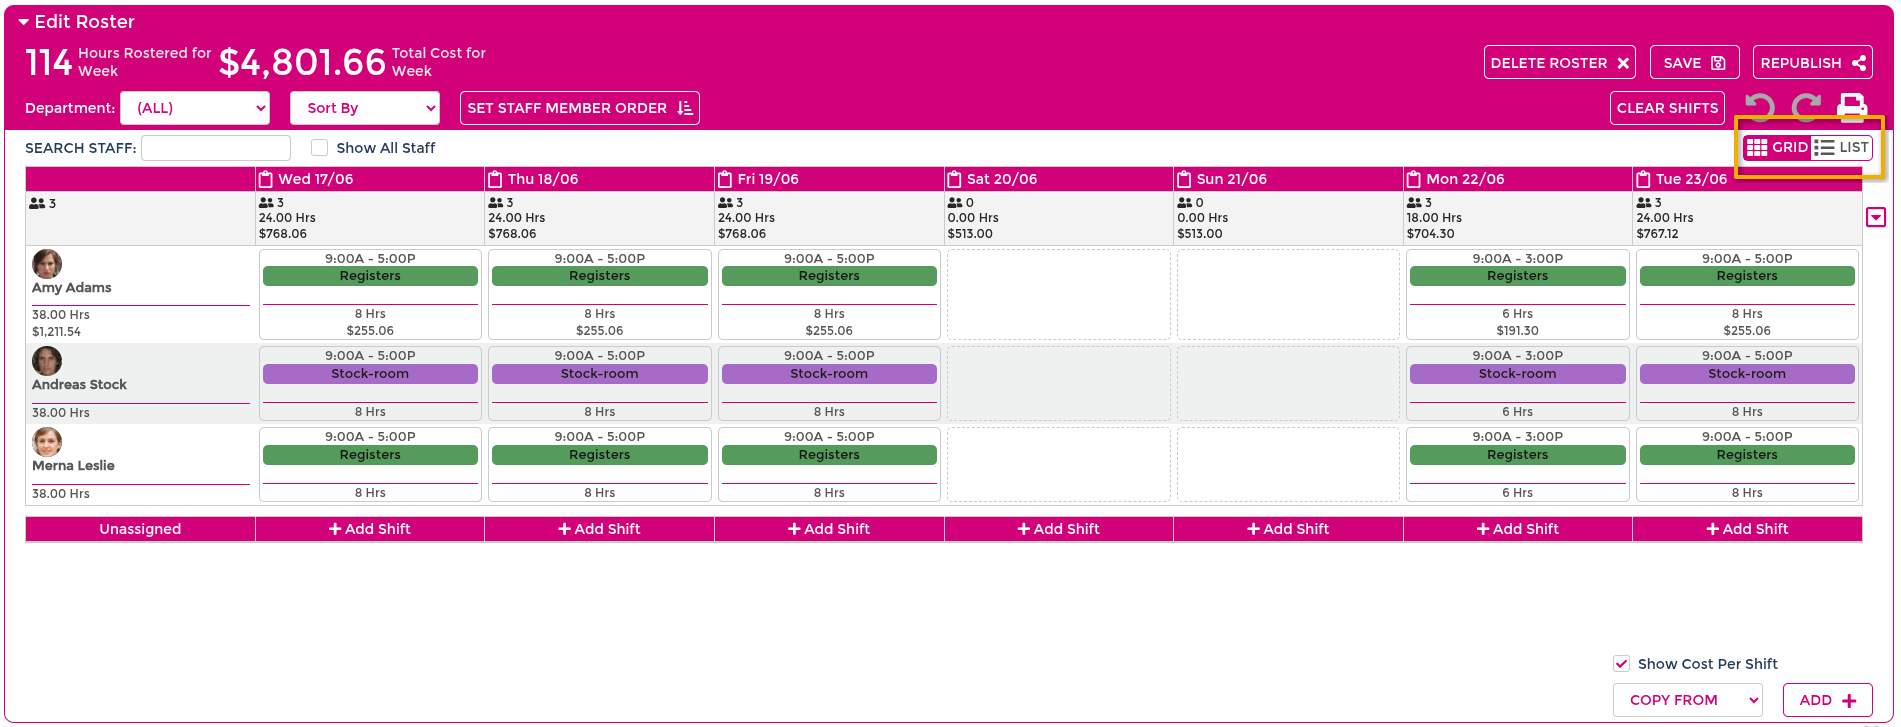
Grid view is designed for fast roster checks across the full period. It is useful for spotting gaps, overstaffing, and unassigned shifts before publishing.
Recommended usage
Many teams build in Daily or Staff view first, then use Grid view to verify.
Open grid view
- Open your roster.
- Select GRID below the Save area.
- Select Show All Staff if the grid appears sparse.
Add shifts in grid view
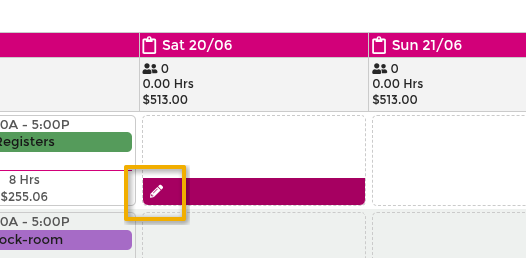
- Find the intersection of the employee row and date column.
- Select the Pencil icon in the cell.
- Drag from start to finish time.
- Adjust edges if needed.
- Select Done.
Assign unassigned shifts
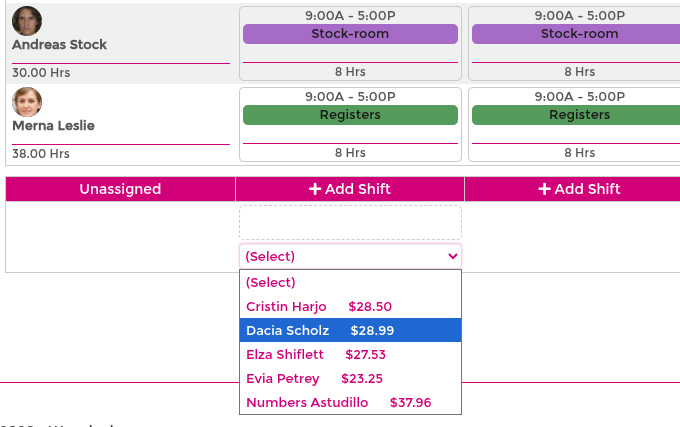
If unassigned shifts exist, they appear in the Unassigned section.
- Select the employee from the shift dropdown.
- Confirm the shift moves into the main roster.
Alternatively, if you want employees to accept or express interest instead of assigning directly, see Send open shifts.
Move shifts
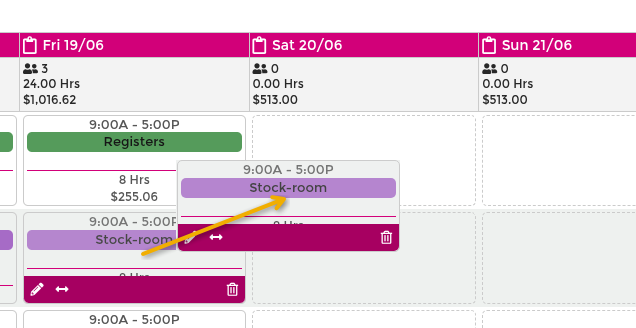
- Left-click and hold the shift block.
- Drag to a different day, employee, or both.
- Release to place the shift.
If the roster has already been published, republish after making changes so affected staff receive updates.
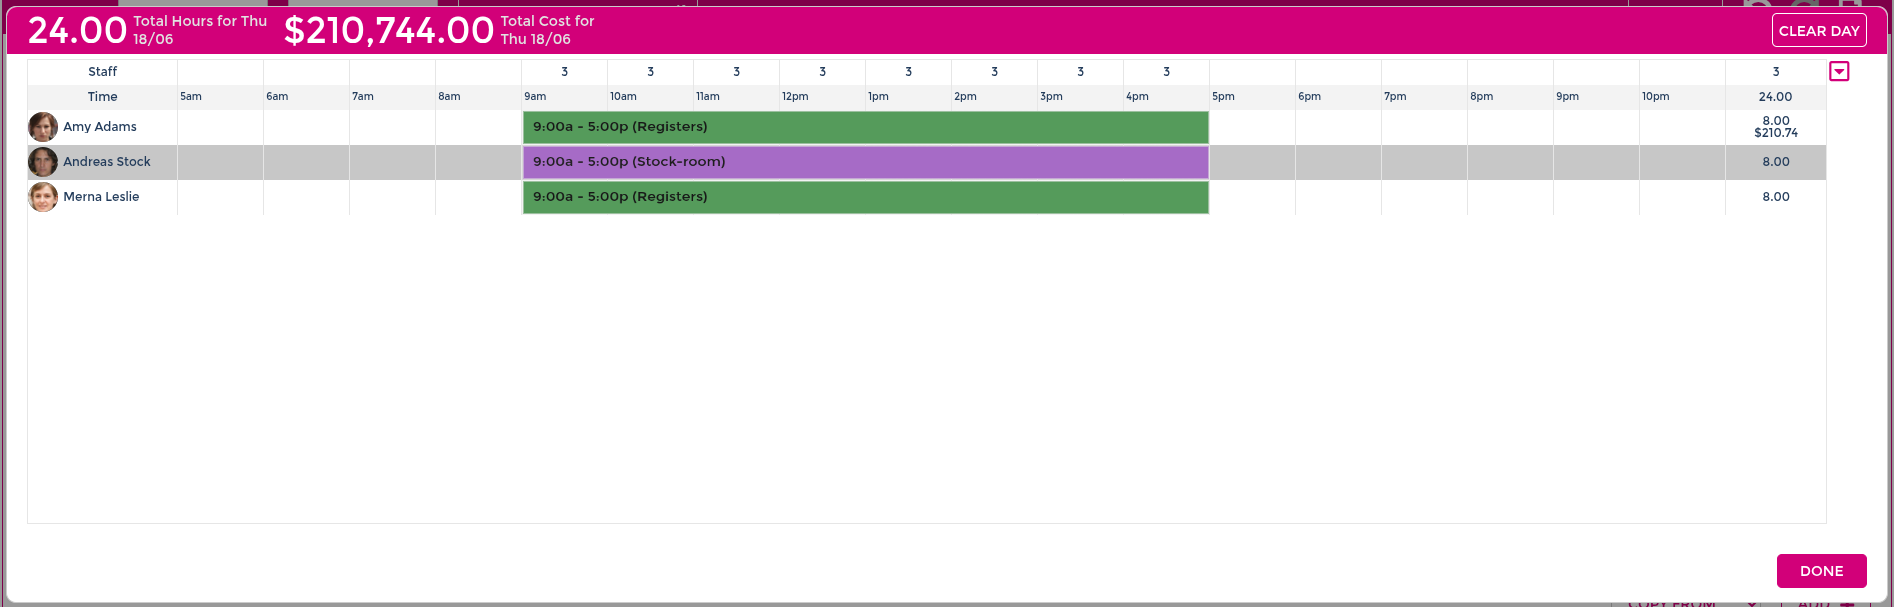
Check by day
- Select a date header at the top of the column.
- Review all staff and shifts for that day.
- Edit if required.
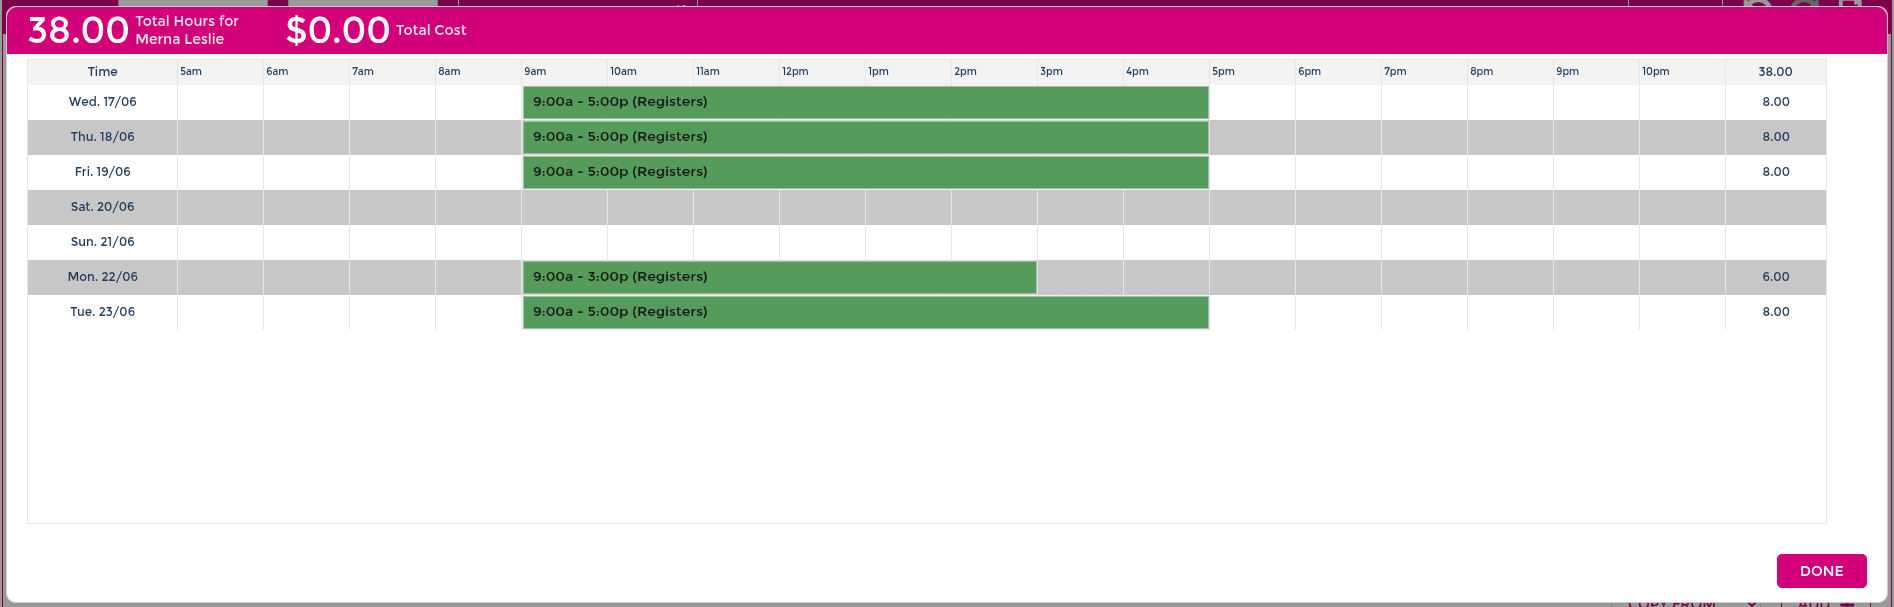
Check by staff
- Hover over the employee name on the left.
- Select the Pencil icon.
- Review the employee schedule across the period.
- Add or edit shifts if required.
Roster shift confirmation
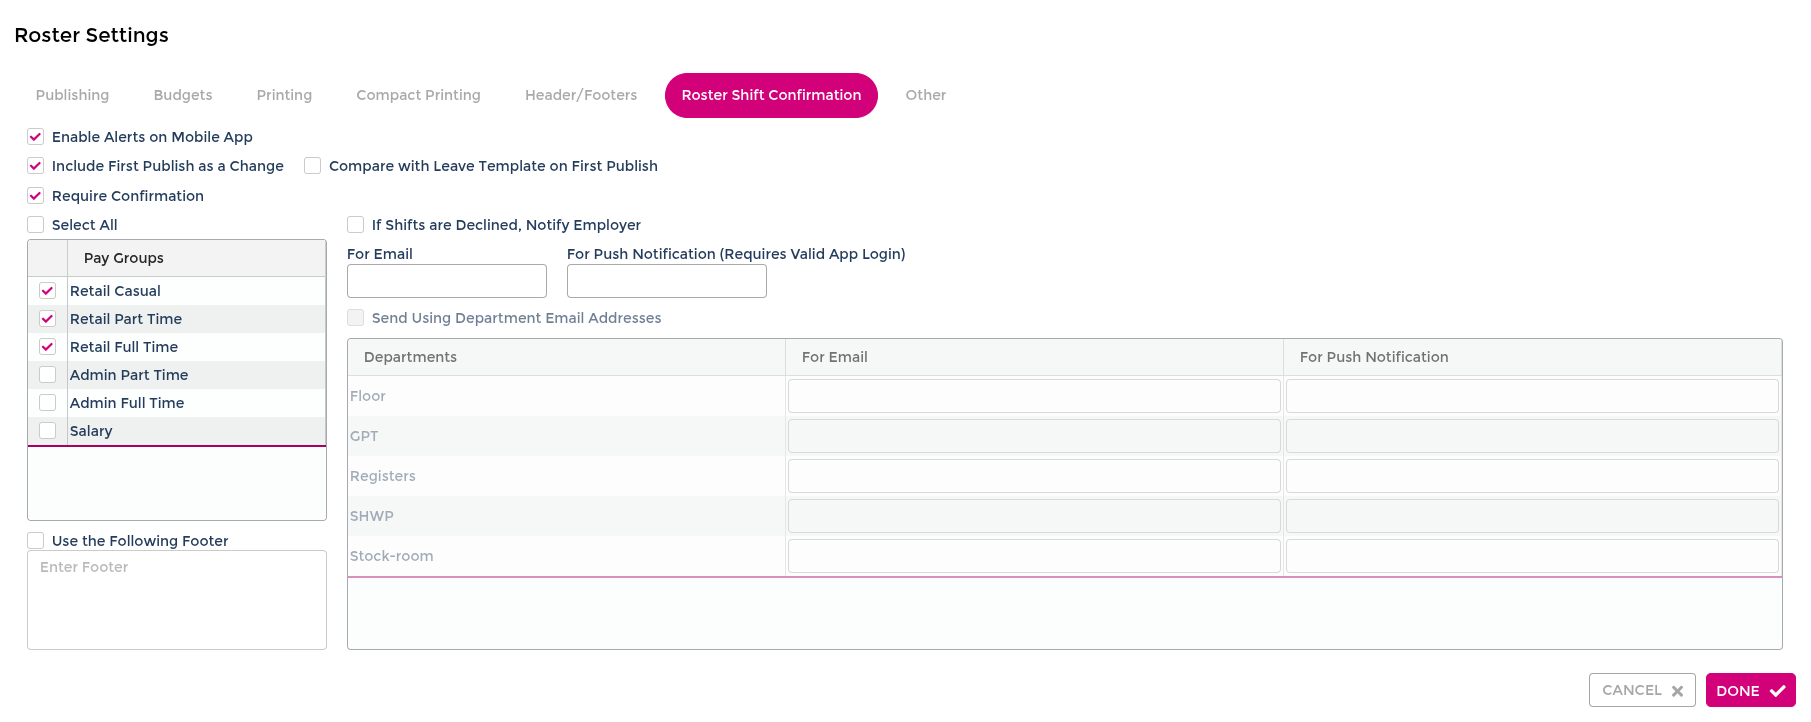
Roster Shift Confirmation allows selected staff or pay groups to accept or decline shifts when a roster is published.
Use shift confirmation when the team needs explicit acknowledgment of new or updated shifts.
Configure shift confirmation
- Go to Settings > Rosters.
- Open Roster Shift Confirmation.
- Choose the staff or pay groups to include.
- Save your settings.
- Publish or re-publish the roster to send confirmation prompts.
Confirm shift responses
After publishing, shift responses can be confirmed by running a Shift Accept and Decline Report (R016).
Shift notes
Shift Notes let managers attach instructions to individual shifts.
Use notes for handover details, key tasks, location updates, or customer-specific reminders.
Add a shift note
- Open the roster.
- Find the shift.
- Right-click the shift and select Add Note.
- Enter the note text.
- Select Add.
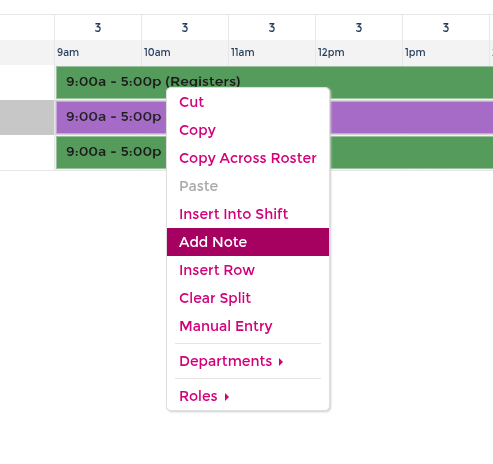
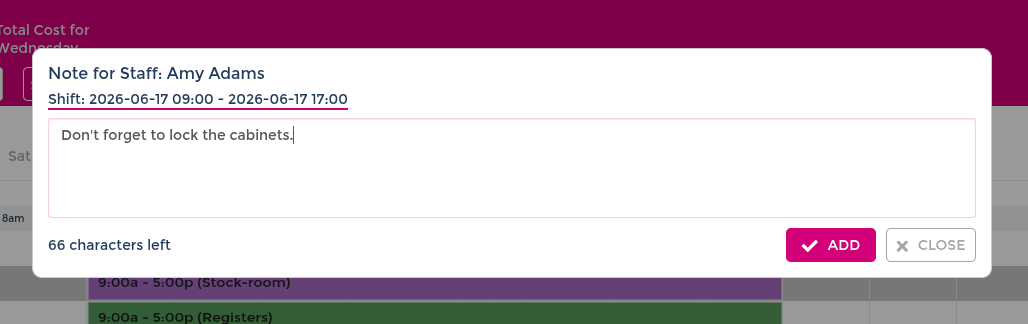
When a note is saved, a note icon appears on the shift.

Where staff can view shift notes
Shift notes are visible in:
- Roster emails.
- Staff Portal.
- Wageloch Mobile App.
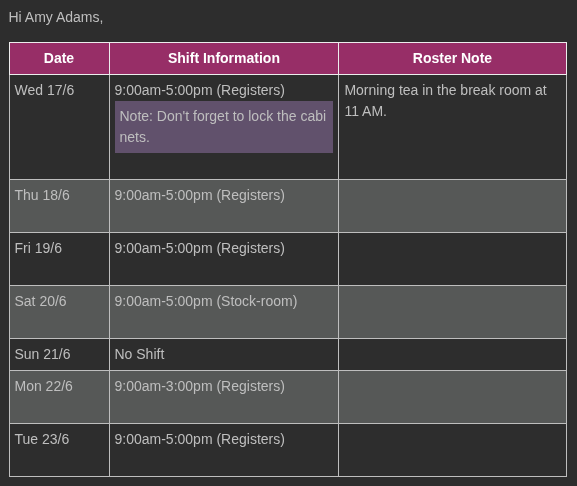
Notes in roster emails
In roster emails, shift notes are shown as note callouts for the employee. Daily notes are displayed separately as roster-wide notes.
Notes in staff portal
Staff can see shift notes from the main portal roster view and from My Roster.